

If you are a Elementor user, it is obvious that the WordPress page builder is very powerful and has a lot of possibilities .
However, there are some plugin that perform some functions . And if you want to modify the header and footer, you will need to look for an plugin capable of this .
Editing the header and footer can be a difficult process in the Elementor , so we will look for a suitable plugin that works on it and we will learn how to deal with it .
Header, footer and block in the Elementor

This plugin allows us to create headers and footers to the sites using Elementor and a custom block can also be used with this plugin. Basically, the tool is easy to install, activate and set up. It is relatively small in size and provides more flexibility and building options in Elementor.
As we know, this builder is already full of functions and capabilities. So, we will learn how to install, activate and set up this plugin Elementor – Header, and Blocks.
Note :
Therefore, you must already have this plugin running in WordPress on your site.
Install and activate this plugin
You can search for this plugin in the plugins page in the WordPress admin control panel on your site.

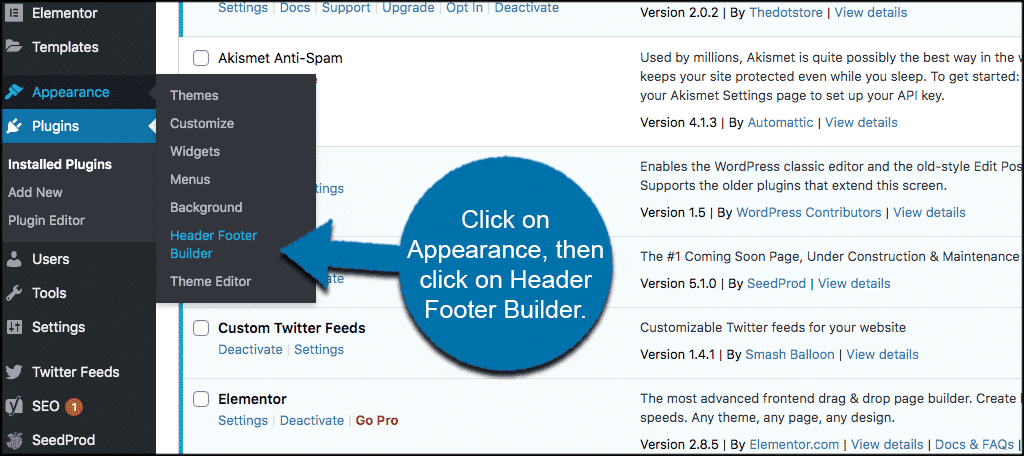
Once this plugin is installed and activated by clicking on Appearance > Header Footer Builder.
You will see this plugin in the left menu of the WordPress Manager Control Panel .
At the moment there are two issues we need to talk about and there are two ways to overcome these issues:
Install a theme compatible with Almentor (list below)
Click on the “Support” tab in the settings section of Almentor and follow the instructions.
Themes compatible with this plugin are as follows:
These are the best themes that can be used with Almentor builder and are compatible with it.
Note :
Some of these themes offer a variety of sub-themes for each of them so your first choice is to use one of the themes from the list above .
Use the Theme Support Tab
Once you are in the settings section of this plugin, you will see two tabs.
All Themes
Theme Support
Click on the “Theme Support” tab.
You will see two different solutions here to add theme support to the plugin. Go ahead and choose the one you prefer.
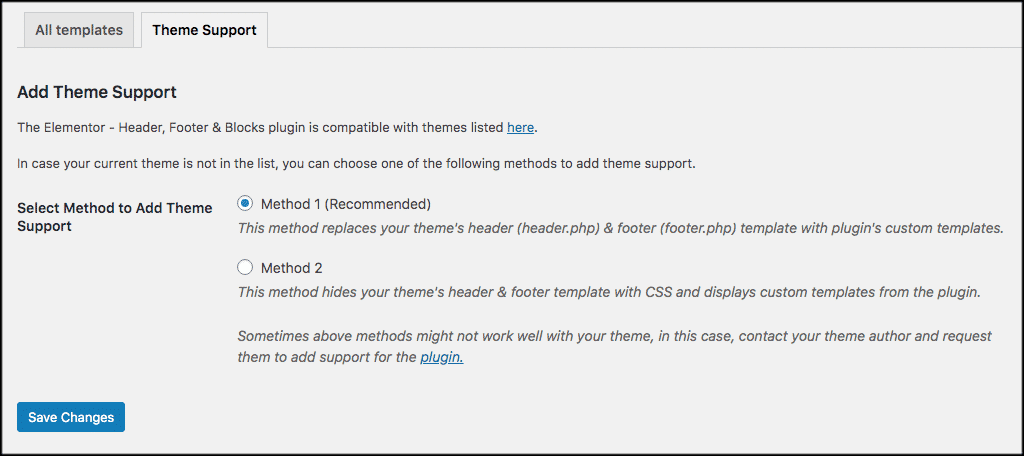
The recommended method should work for most themes. If it doesn’t, try the second method. Now, if neither of these methods work for you, you have two options. You can contact your theme developer and ask them to add support for this plugin, or you can install a compatible theme from above.
Now that that’s done, let’s go ahead and look at how to use this plugin to modify headers and footers.
Note :
You’ll know you’ve used the plugin correctly because the “Theme Support” tab will disappear and you can now add a new theme.
Add a Header or Footer to the Element
Now that you are in the template section, go ahead and click on the “Add New” button to add and edit Elementor headers or footers.
You will be taken to the plugin’s edit page. Here, you will need to complete a two-step process. You need to select all the options you want for your Elementor header or footer and save them. Once saved, you will also be presented with a shortcode that you can use to place the block where you want it. Once you have made these selections, you can now actually create a custom header, footer, or block using Elementor. Let’s take a look at what to do with both steps.
Elementor Header and Footer Options
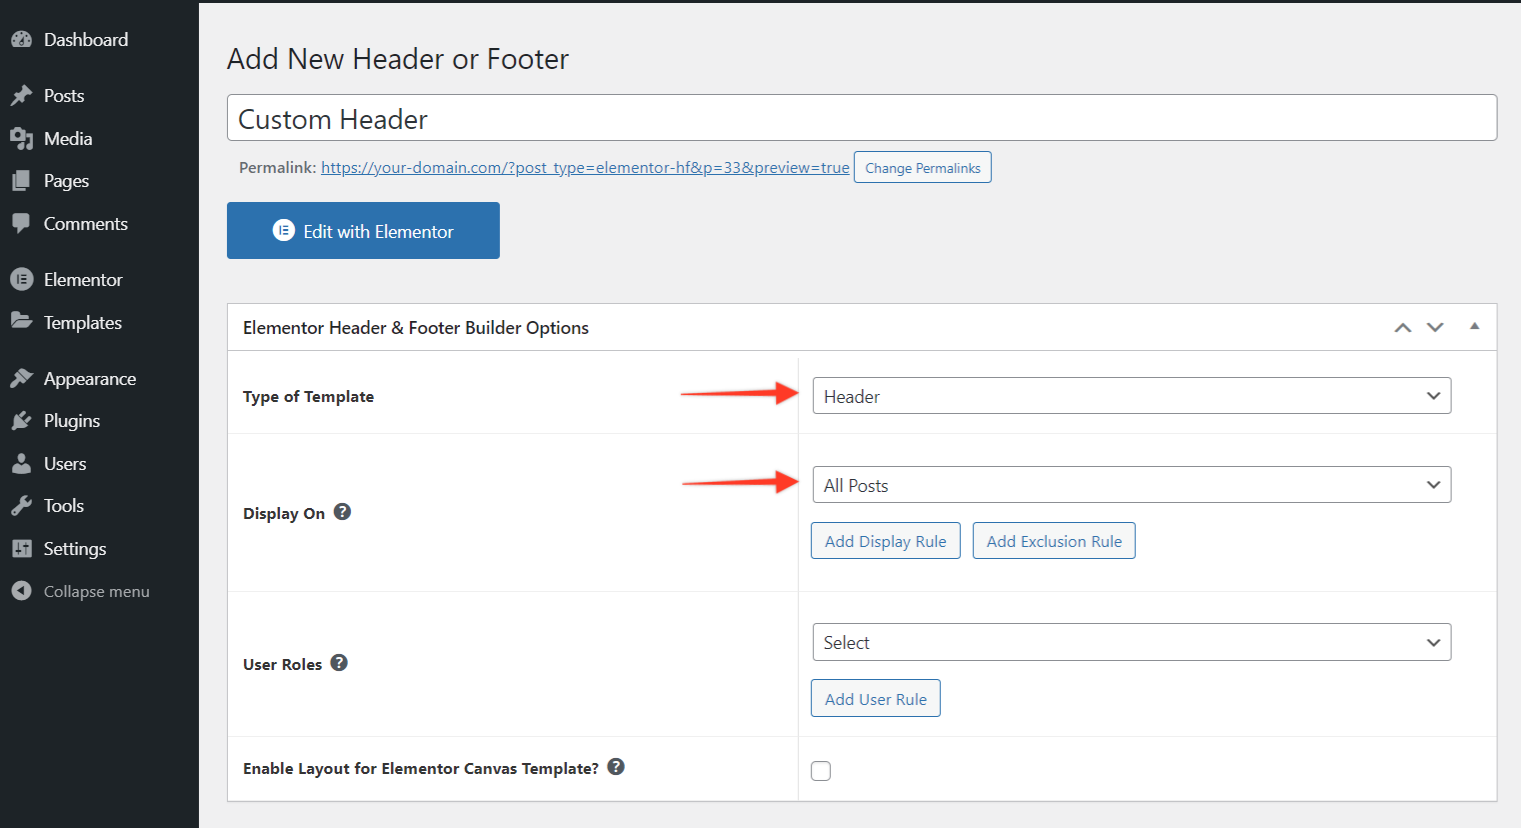
The first thing you need to do is set the header and footer options for the new template you’re about to create. You’re going to name the template. From there, you have several options. They include:
Template Type :
Header, Before Footer, Footer, or Custom Block.
Running Display :
Here you’ll specify where the header footer will be displayed on your site. You’ll also be able to add display rules and exclusion rules.
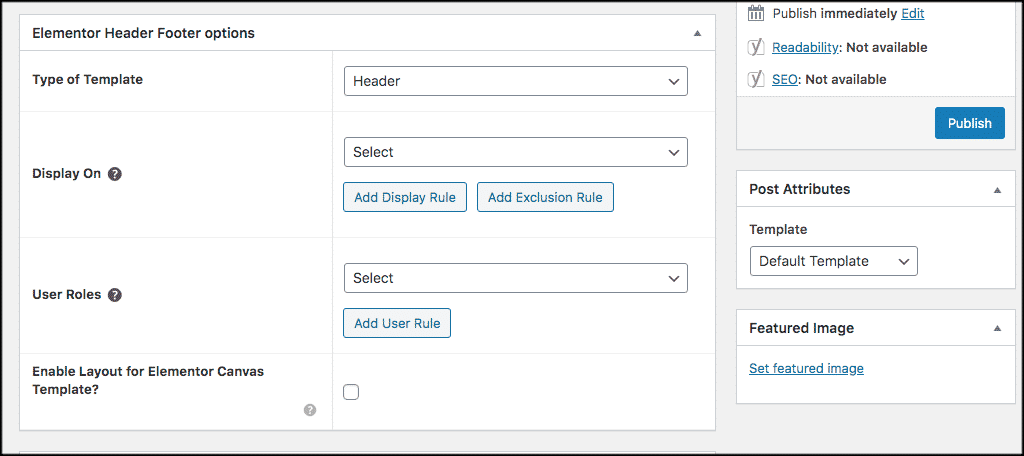
User Roles :
Define your user roles for who can make edits.
Enable Layout for Elementor Canvas :
This will allow you to edit using the “canvas” layout that Elementor offers.
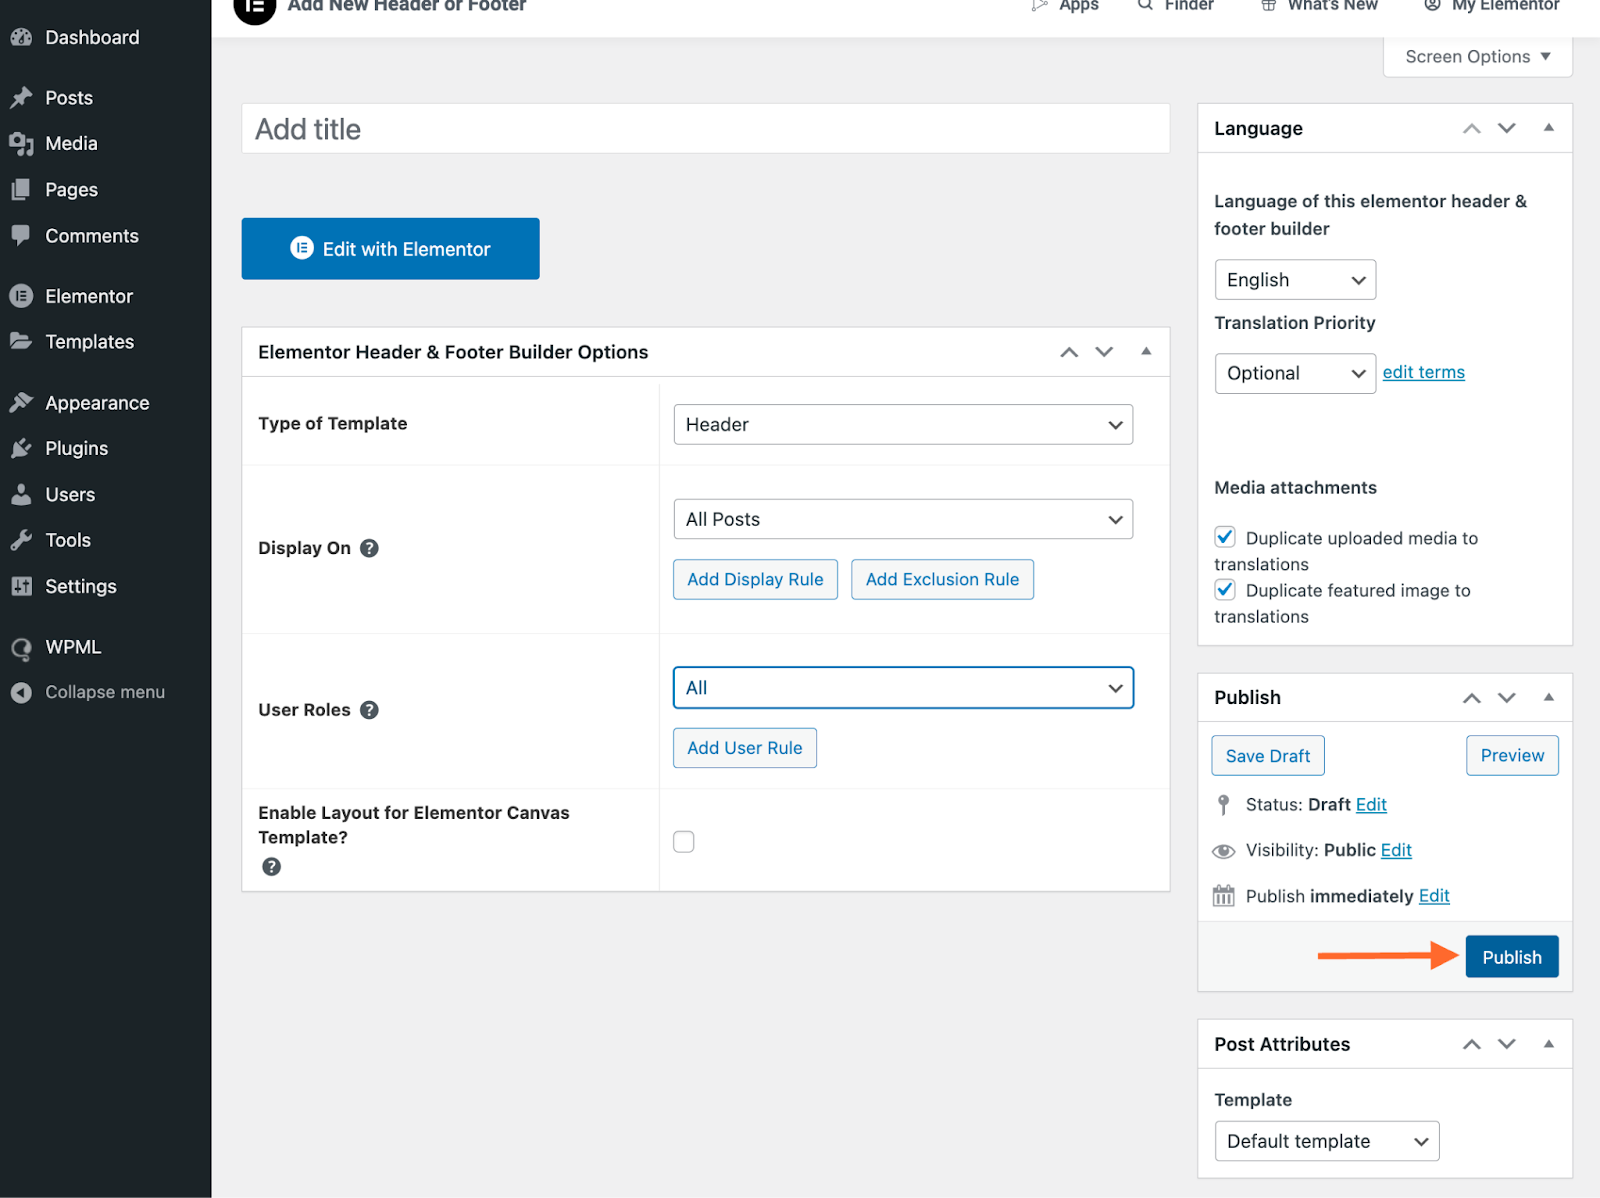
Once you have these configurations the way you want them, click the “Publish” button and your template styles will be published.
Edit Headers and Footers with Elementor
You can now go ahead and actually create and edit your header footer layout using Elementor .
To do this, click the “Edit with Elementor” button .
This will open the Elementor editor where you can then create, design and edit headers and footers using the Elementor page builder.
When you’re done, click the green “Publish” button at the bottom of the editor and you’re all set. That’s it! You can now display this header or footer in the places you chose while configuring the template. The header footer will be displayed based on the rules you have. You can also use the shortcode to display it in other blocks or parts of your website.
Final Thoughts
- When you combine a page builder like Elementor with a platform like WordPress, the possibilities are endless when it comes to concept and design. This plugin just gives you more options.
- I hope this tutorial has shown you how to effectively create headers and footers to display using Elementor. Keep in mind that this particular plugin may take a little extra work to get started. You may have to contact a theme author or use a compatible theme to get the plugin to work. However, the process is totally worth it as your site will be customized the way you want it to be.
What other plugins do you use to create custom headers and footers in WordPress?
Have you found any that are compatible with Elementor and as easy to create and display as this one?