
Google Search Console offers specific webmaster tools to help website owners monitor and maintain their presence and ranking in search.
One of the most important steps in optimizing your WordPress site for SEO is to add it to the Google Search Console .
In this article , we will show you how to easily add and check your WordPress site in Google Search Console also known as Webmaster Tools.
What is Webmaster Tools?
Google Search Console is a free tool offered by Google to help website owners monitor the presence of their websites in Google search results.
It helps you keep track of search rankings along with keeping you up to date with site errors, security issues, and indexing issues that may affect your website’s search performance.
If you are serious about WordPress SEO, you need to add it to Google’s webmaster tools from day one.
So, let’s take a look at how to easily add your site to Google Search Console.
Adding your WordPress site to Google Search Console
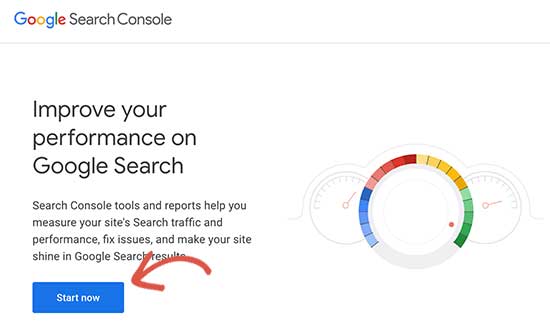
First, you need to visit the Google Search Console website and click the “Start Now“button.
After that, you will need to log in using your Google / G mail account.
Once logged in, you will be asked to enter a address for your website.
There are two ways to check the site: domain name or address prefix URL. We recommend using the prefix method URL because it is more flexible.
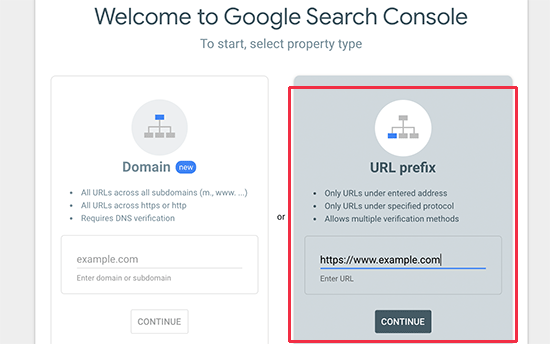
Keep in mind that Google considers HTTP and HTTPS to be two different protocols. They are also considered
https://www.example.com and https://example.com as two different locations.
You need to enter the correct URL address for the website that WordPress is using.
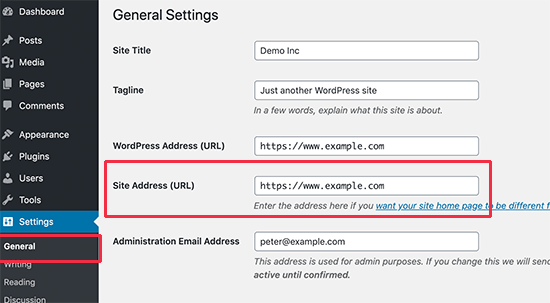
If you’re not sure, there’s an easy way to find out the exact URL address you want to enter. Just log in to your WordPress Management Area and go to the Settings ” public page.
There you will see The address of your website in the site address field.
After entering the correct website address in the Google Webmaster Tools Setup Wizard, click the “Continue” button to proceed to the next step.
Now, you will be asked to prove the ownership of your website. There are several ways to do this, but we will show the HTML tagging method because it is the easiest way.
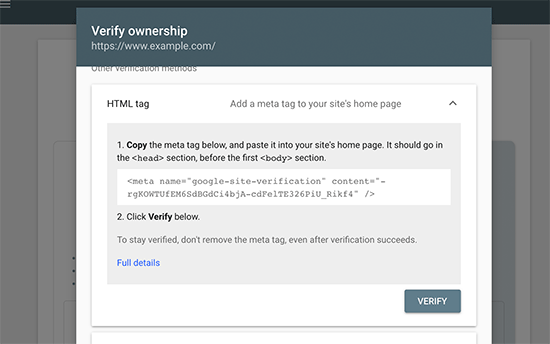
Click on the HTML tag to expand it and then copy the code inside it.
Now, you need to add the meta tag to verify the Google site in WordPress, so Google can verify that you are the owner of the website.
Most WordPress tutorials will guide you to modify the header file.put php in your WordPress template and add the code directly above the
tag.However, we do not recommend this method because if you update or change your theme, the HTML tag will disappear.
Google periodically checks the HTML tag and will disable your access to the location data in the Search Console if you cannot find the verification tag.
Here’s how to make sure that Google can always verify your ownership of the site.
First, you need to install and activate the all in one SEO plugin .
For more details, see our step-by-step guide on how to install plugins in WordPress.
When activated, go to the all in one SEO “general settings” Webmaster Tools page and click on “Google Search Console“.
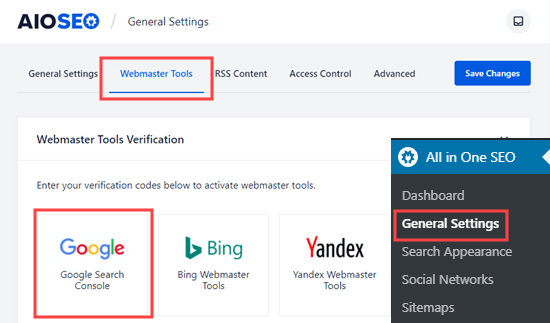
Then paste the code that you copied into the “Google verification code”box . Don’t forget to click the “Save Changes” button to store your changes.
Now you can return to the Settings and click the “check”button.
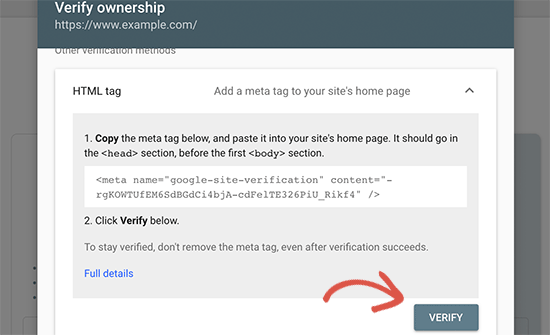
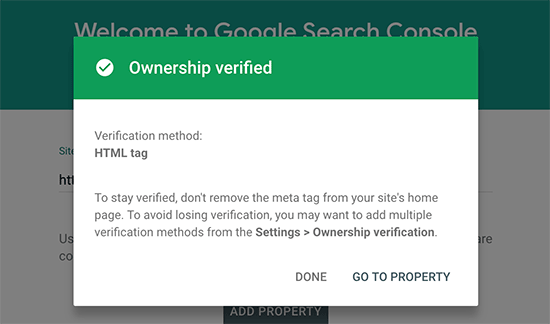
Google Search Console will now look for the HTML tag in the code of your website and will show you a success message.
Note:
If you don’t get a success message, you need to clear the WordPress cache . This will ensure that Google can fetch the latest version of your website.
That’s all. You have successfully added your site to Console (Webmaster Tools). Now you can click on the “go to site” link to visit the Google Search Console control panel

From here you can see your website’s performance reports and Index Coverage.
Before doing this, let’s tell Google more about your website. This will help Google crawl your website more efficiently.
Add an XML sitemap to the Google Search Console
An XML Sitemap file is a file that lists all the contents of your website in XML format, so that search engines like Google can easily detect and index your content.
The good news is that if you installed the all in SE SEO extension in the steps above, you have already added an XML sitemap to your site automatically.
To see your sitemap, go to All in SE SEO “sitemaps . From here, you can see that the sitemap is automatically enabled for you.
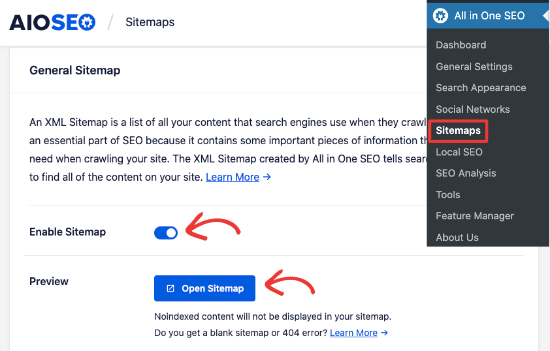
Next, you need to get the XML Sitemap link. Just click the “open Sitemap file” button, and you will see a link to your XML sitemap file.
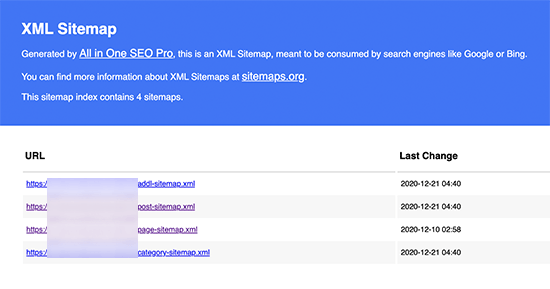
From here, you can just copy The عنوان address from the browser address bar.
Alternatively, you can directly access your XML sitemap by adding sitemap.xml is at the end of your website address. For example:
https://www.example.com/sitemap.xml
Now that you have an XML sitemap ready, let’s help Google find it quickly.
Just switch to the Google Search Console control panel and click on the Sitemaps menu from the left column.

Next, you need to add the last part of The الموقع address of the sitemap under the “add a new sitemap” section and click the Submit button.
Google will now add The الموقع address of the sitemap to the Google Search Console.
AIOSEO also comes with many other sitemaps like video sitemap, news sitemap and RSS sitemap which all help you to get competitive advantage and higher ranking in SEO.
The process of sending these sitemaps is the same as above.
That’s all, you have successfully added your website to the Google Search Console.
The next step is to learn how to use the treasure trove of information in the Google Search Console to grow your business.
Google Search Console and WordPress FAQs
Having helped thousands of readers add and check their website in the Google Search Console, we have seen almost every question you can think of. Below are answers to some of the most common questions.
1. How can I upload a Google HTML verification file to my WordPress blog?
Google Search Console allows several different ways to verify the ownership of a website. In this article, we have covered the easiest way, which is to use the meta tag to check the Google site.
However, some website owners prefer to upload an HTML file to verify the ownership of the site.
To upload the HTML verification file of the Google Search Console to WordPress, you will need to log in to the WordPress hosting control panel or connect to your hosting account using FTP .
After that, you need to upload the HTML verification file inside the / public_html / folder of your website. This is the root directory where you will see other WordPress folders like / wp-admin /, / wp-content/, etc.
2. Should I use an extension to check the Google site in WordPress?
There are many WordPress plugins specifically designed to help you check Google’s website.
However, you do not need to use them because you will most likely need to verify ownership on other webmaster tools and systems such as Bing, Yandex, Pinterest, etc.
It is better to use the all in one SEO plugin because it allows you to add Site Verification for all platforms. Not to mention that it also has a lot of other WordPress SEO features to help you rank better and get more traffic.
3. I’m having problems, is there a phone number for Console that I can call?
No, there is no phone number for the Google Search Console that you can call. If you are having problems with the Google Search Console, you can use the online support center .
For specific questions about WordPress, you can always join the Free WordPress help group to ask your questions.
We hope this article helped you learn how to easily add your WordPress site to Google Search Console.