
There comes a time in the lives of many WordPress sites when you want to start selling something. Maybe you wrote an e-book, or are looking to offer users a way to support your work ?
Whatever the reason for looking to sell something if you’re using WordPress, the easiest way to do this is to install WooCommerce. You can easily add WooCommerce to WordPress. WooCommerce is a standalone plug-in located on top of WordPress, which is very easy to use, has a lot of support, and is very popular (for good reason!).
Today I’ll show you how to add WooCommerce to my WordPress site. I’ll explain what it takes to set up WooCommerce on your WordPress blog. I’m also going to talk about some additional ingredients that you might want to use to increase the size of your store.
But first, let’s start with how you add WooCommerce to your WordPress site.
Install WooCommerce
To start with WooCommerce, go to the Plug-ins menu and click Add New at the top left of the screen. Click Install in WooCommerce and then, when it changes to Activate, click Do New to turn on WooCommerce for your site.
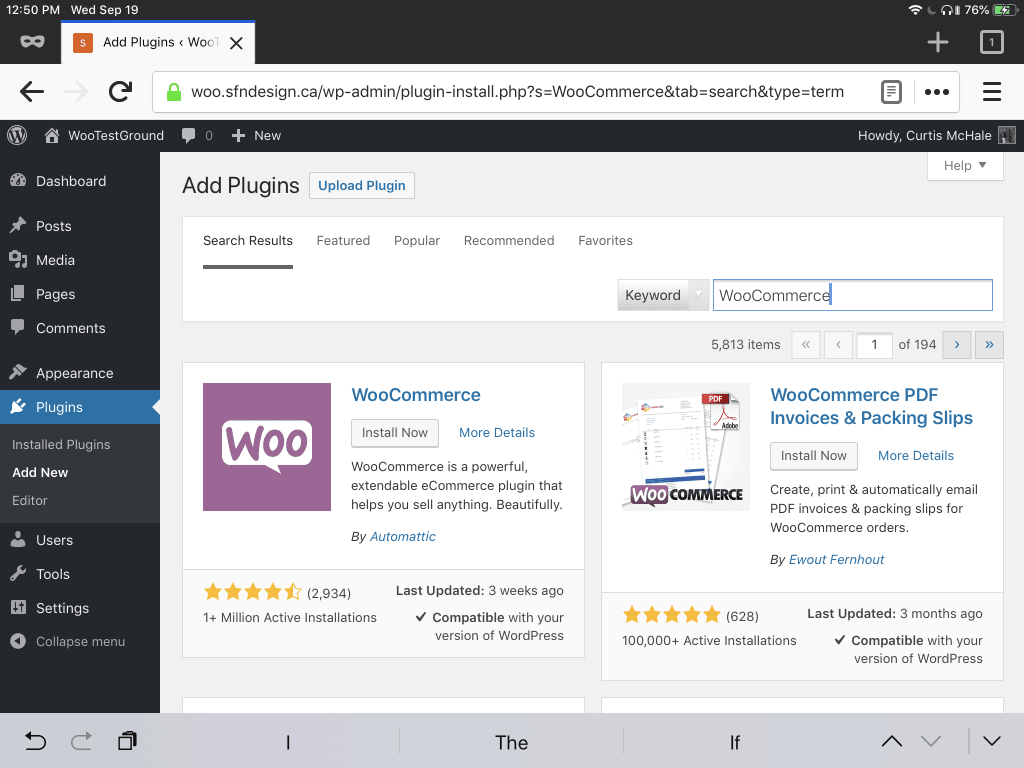
Once you activate WooCommerce, you will be moved to the Setup Wizard.
This search will provide you with all the pages of different settings in WooCommerce and help ensure that your store is set up correctly.
The wizard starts by asking you to specify your location, currency, or whether you want to sell digital, physical, or both products. The last option is where you can choose what to share with WooCommerce about how your store works.
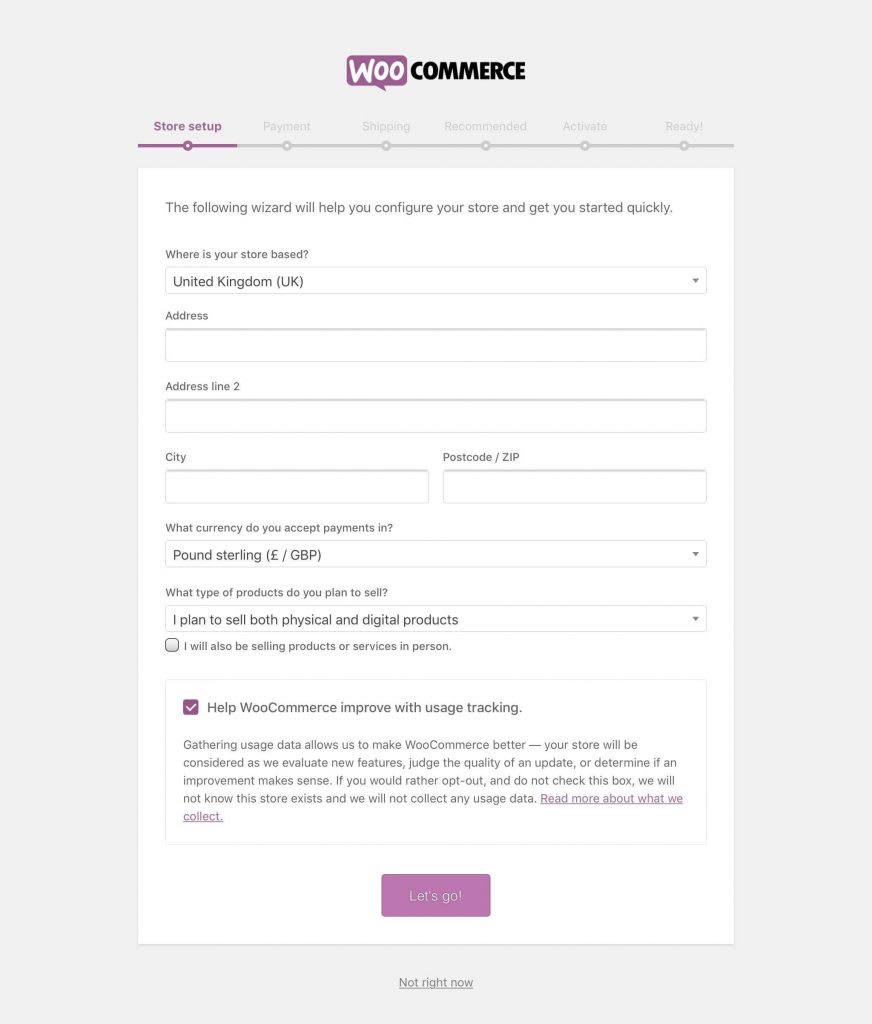
For my stores, I leave this specific because I want to help develop WooCommerce. If you’re not sure, you can click on the link at the bottom to see what they’re collecting and how they’re collecting information.
They don’t collect any private data about your users.
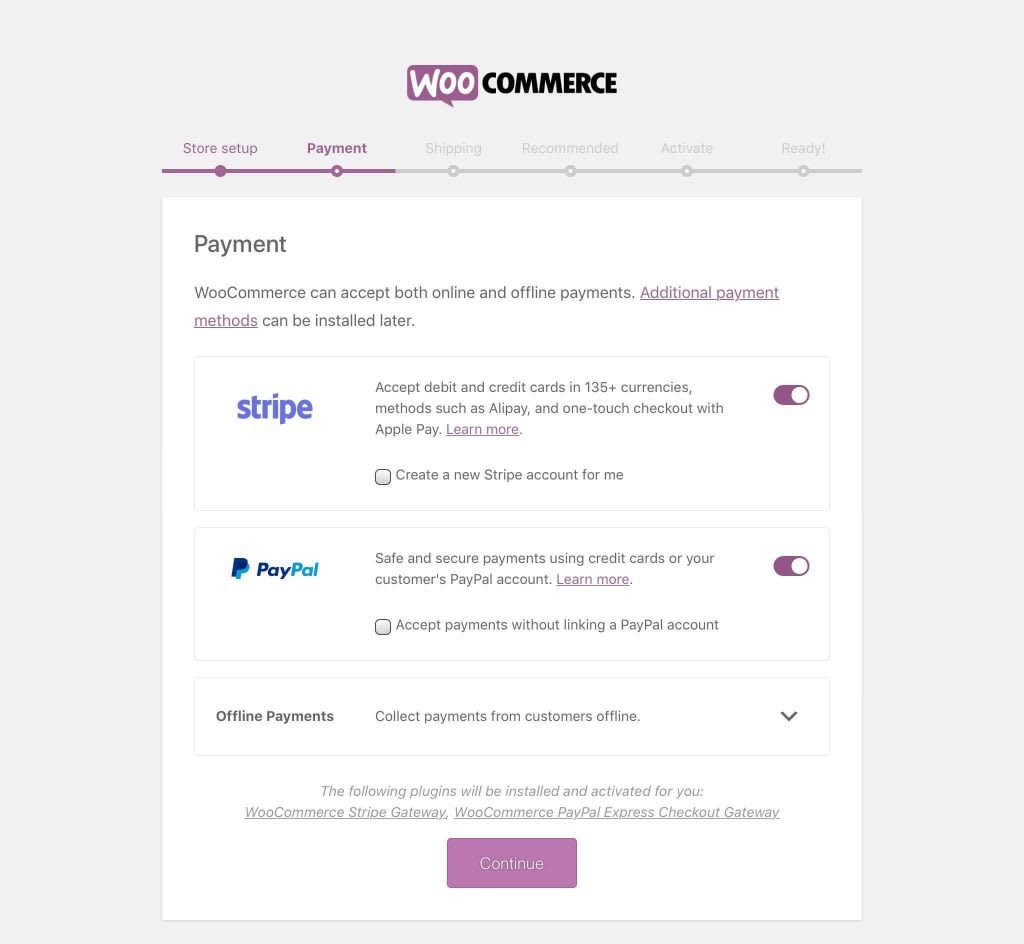
Next, you can choose the payment gateway you want to use with your site. Stripe and Paypal are offered by default because they are the most popular payment gateways. There are other options, and depending on where you live, one alternative might be the best option for you.
WooCommerce store options
We’re now moving to some things you may or may not need on the WooCommerce site if you’re already using it as a blog.
The WooCommerce wizard will display installation and activation of the store interface theme .
Storefront is the default attribute provided by WooCommerce to make sure you have something that looks great with WooCommerce.
If you already have an attribute, you probably don’t need it. Most attributes look good with WooCommerce outside the box, so if you’re not sure, I won’t worry about them.
Eventually, you’ll need to make sure your appearance is a lightweight theme because a light weight will mean faster location and the ability to shift more potential customers.
It includes the WooCommerce Managed Hosting of Nexcess Astra Pro, the fastest topic designed for e-commerce.
The wizard will also ask you to install MailChimp so that you have an email marketing plug-in for your store. Many bloggers already have an email marketing solution, and if MailChimp, which is the default option displayed, you can uncheck the box and not install MailChimp.
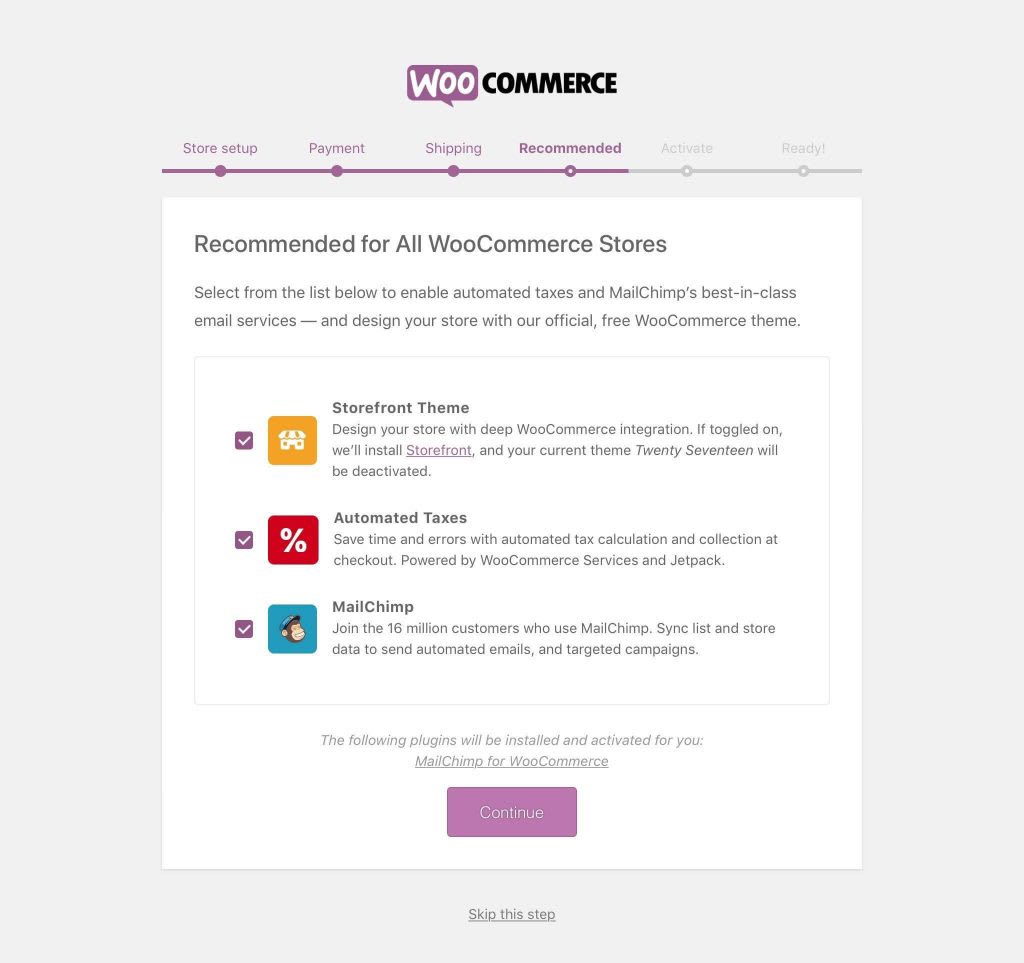
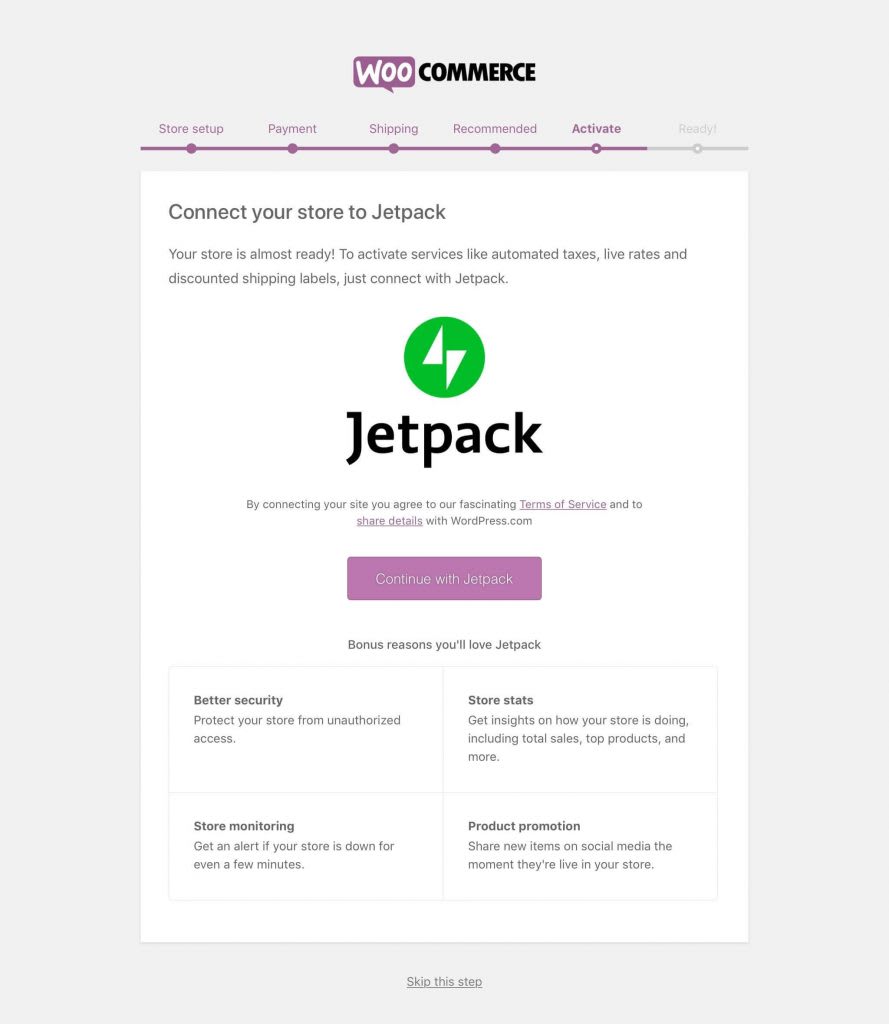
The only thing WooCommerce offers here that you want is to automate your taxes. Taxes can be very complicated. Some countries have hundreds of tax areas and sorting them all is a full-time job. Just let WooCommerce JetPack take care of it for you.
The WooCommerce Setup Wizard will now ask you to install JetPack. Click Continue with Jetpack if you plan to use WooCommerce for taxes.
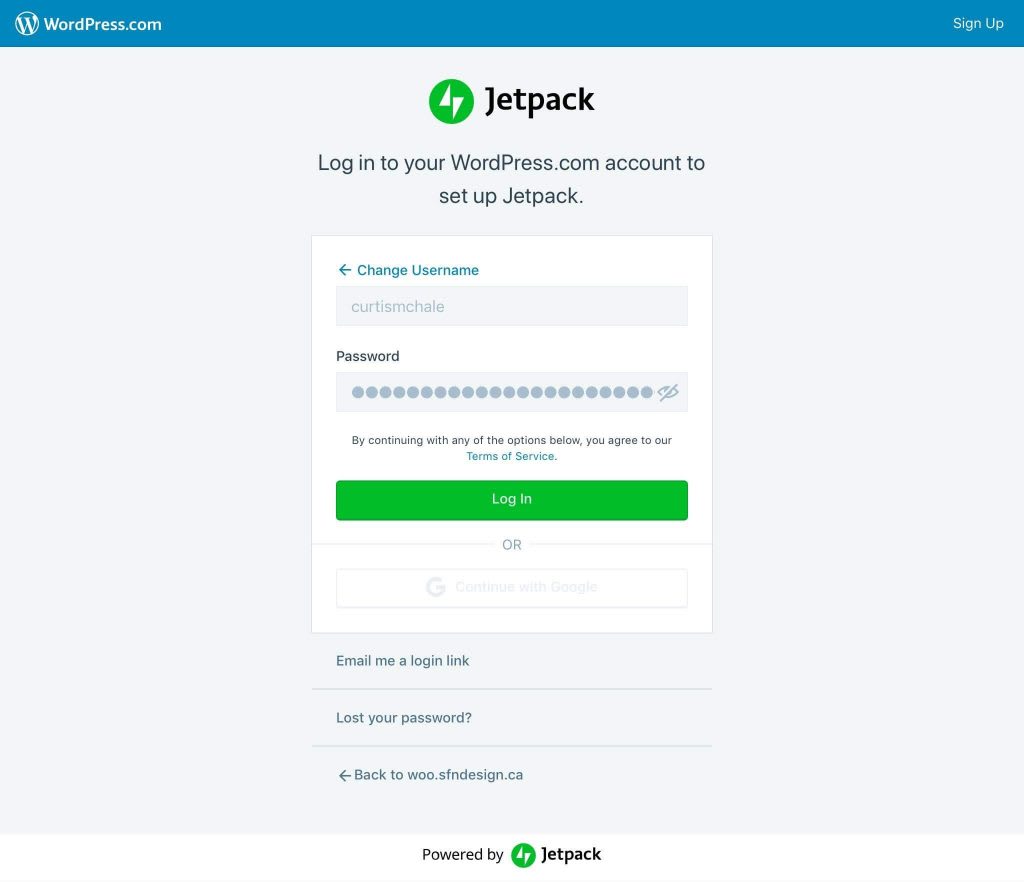
Upon proceeding with JetPack, you will be prompted to create an account on WordPress.com.
WordPress is what enables JetPack on your site to create your account.
If you already have a WordPress.com account, sign in to your existing account.
So you’re almost ready to go. You still need to set up the Stripe and PayPal payment gateways.
- For Stripe, you will need to add Stripe account keys to the WooCommerce Stripe page. This process is a reasonably straightforward copy and paste operation.
- To set up Paypal, there is a built-in button in the WooCommerce settings page to click on and it will get your API keys from your PayPal account. All you have to do is click the button and then sign in to PayPal.
The WooCommerce site is now ready to enter products. Let’s start this process by adding a basic e-book to our WooCommerce site.
Add an eBook to WooCommerce
To get started, go to the product list, and then click Add New. Clicking will take you to the place to add products. It should look very familiar if you are blogging with WordPress for a period of time.
Start by adding your book title at the top of the page. Among them, where you’re putting the content of your blog, set it in the long description. In the default WooCommerce attribute, this appears just below the product on its page.
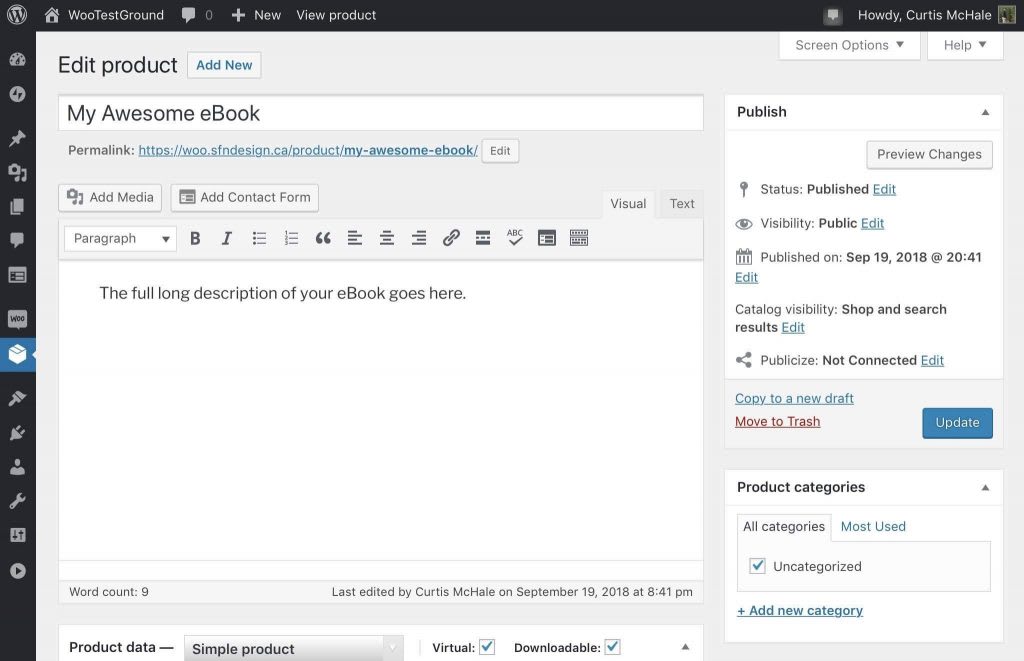
Next, choose the type of product. For a downloadable book, we can leave it as a simple product.
We need to remember to check the “virtual” and “downloadable” boxes or else WooCommerce will expect us to ship
something and hold the order as processing instead of completing it and delivering it to our customers.
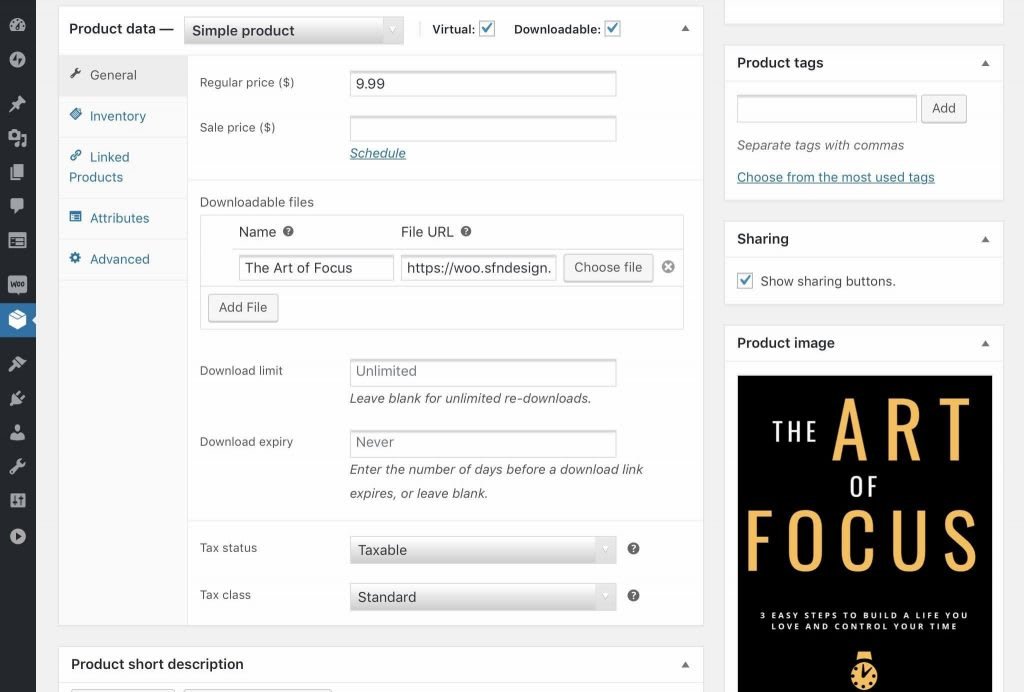
Next, specify the price of your book. You can even schedule the sale price here so you can set it, and then forget about it without the book ever being on sale.
We now need to select the file that we will deliver to customers when we purchase our book.
Click Add File, and then click Choose File. The WordPress media download program will open here. You can choose an existing file, or you can upload the file you want to use.

You can now set the number of times a user can download your book and the number of days until the download link expires.
I usually set the download link for a few days. Setting the link to expire helps prevent people from sharing the link (and your book) with others.
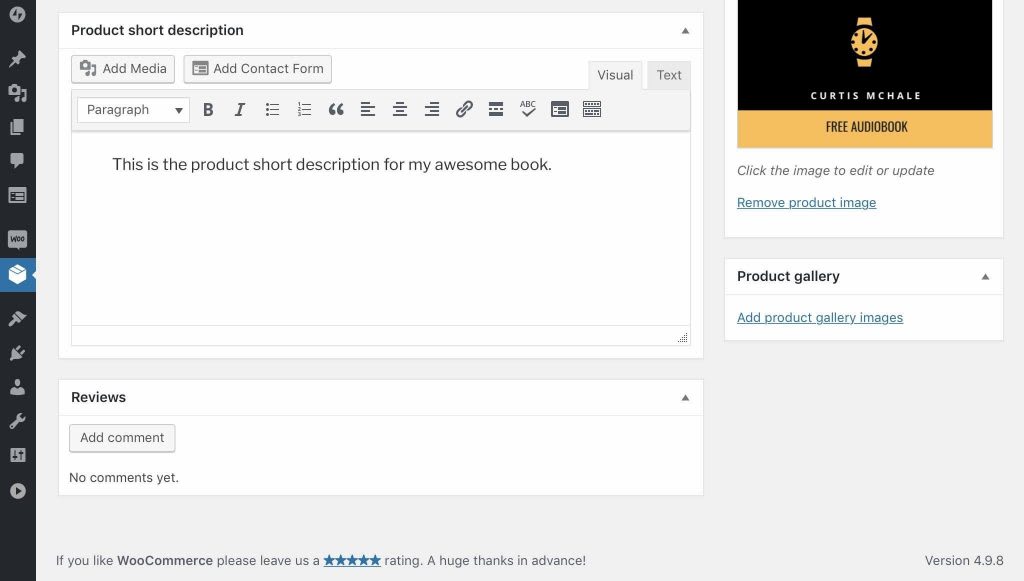
By scrolling down, you can set a brief description of the product. The brief description is placed next to the product by default, so it’s the first thing your customers can read outside of your product image.
Finally :
don’t forget to set the product image. For a book, the cover might be enough. On the right side of your screen in Product Image, click Select Product Image. Here you will see the familiar WordPress media gallery open again. Choose an existing image or upload a new one.
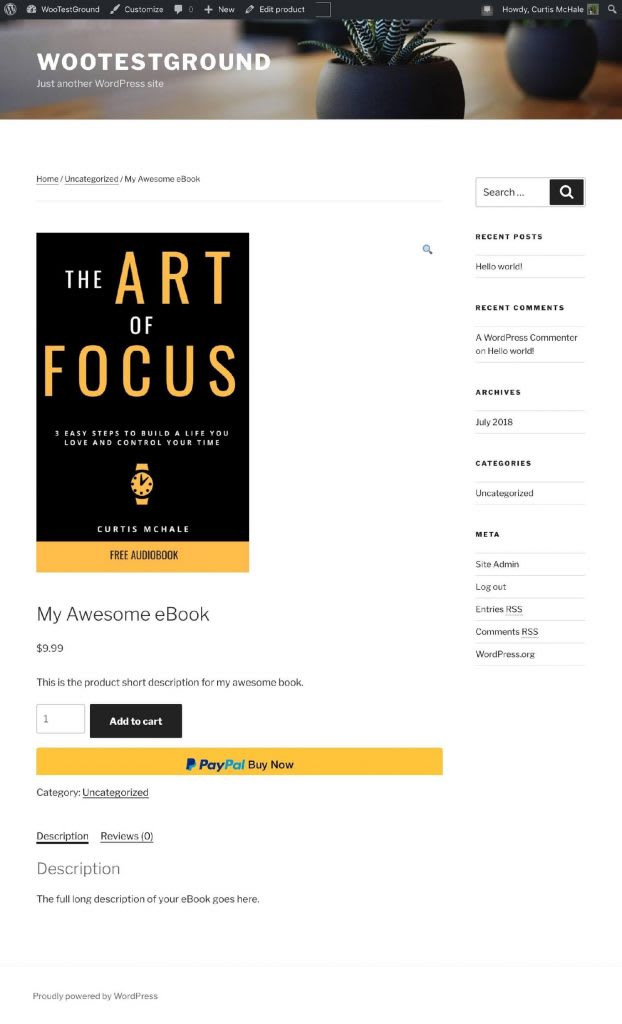
You’re now ready to publish your product. You can see what my trial product looks like with the default TwentySeventeen topic below.
Other plug-ins you need to have
While we have all the basics of WooCommerce setup from our WordPress site, there are still some things you might want to add. You don’t need these plug-ins, but they’ll help you increase the size of your store.
The first is Google Analytics for WooCommerce. You must already run Google Analytics on your site so you can see how your content is resonating with your customers. This plug-in helps connect Google Analytics to your WooCommerce store so you get e-commerce metrics in Google Analytics. Although you may not do much to get started, this long-term data can help you understand where problems are in your store.
It’s important to communicate with your customers, but it can be difficult. By installing the continue, you can automate this operation. For the e-book above, you can email buyers 15 days after they buy the book to ask if they enjoyed reading it. You can continue again within 20 days and ask them to leave a comment on your product.
If you end up with more than one product, smart offerings are a necessary plug-in. What we do in smart offers is introduce other products to your customers. Let’s say they bought your second e-book ; You can offer them first at a reduced price if they buy both at the same time.
Minimum
Although there are a number of steps to create the WooCommerce store, it does not take long. Using the WooCommerce wizard, it took less than 30 minutes to set up the WooCommerce store above.
You know how to add WooCommerce to your WordPress site.
With a little bit of effort, you can have the relationship between you and your customers. You can keep maximum returns from your products, and you can have another asset for your site. WooCommerce makes all of this easy.
Power WooCommerce store with fully managed hosting
With Custom Solution To host WooCommerce, you get:
- Auto-sizing to maintain your position faster while increasing traffic.
- Automatically enhanced images for quick upload times.
- Fast loading times with integrated CDN.
- And more !