
If you want to translate your WordPress website or store into another language and are looking for an easy-to-use plugin, Loco Translate can help you translate all the texts and phrases on your website using a simple and user-friendly interface.
In this article, we will provide a complete guide on how to translate your website using the Loco Translate plugin and how to localize all the themes and plugins, whether they are visible to the user or the site administrator, and save those settings to make your website ready for any desired language.
Using Loco Translate to translate your website
Let us now explain the steps required to use the Loco Translate plugin to translate all the elements of your website, including themes and plugins, into any other language using the built-in editor within the WordPress dashboard. This editor allows you to identify the strings that need translation and translate them into the target language, then save the changes.
We will complete this guide step by step as follows:
1.Install and activate the Loco Translate plugin.
2.Translating WordPress themes.
- Choosing the language.
- Selecting the location to save translation files.
- Starting the translation process.
- Saving the translation.
3.Translating WordPress plugins.
4.Activating and using the new language files.
Installing and activating the Loco Translate plugin
You can install the plugin by going to your WordPress dashboard, then navigate to “Plugins” > “Add New.” In the search box, type “Loco Translate” and click “Install Now.” After installation, click “Activate” to activate the plugin, as shown in the following screenshot. (Alternatively, you can read how to correctly install a WordPress plugin.)
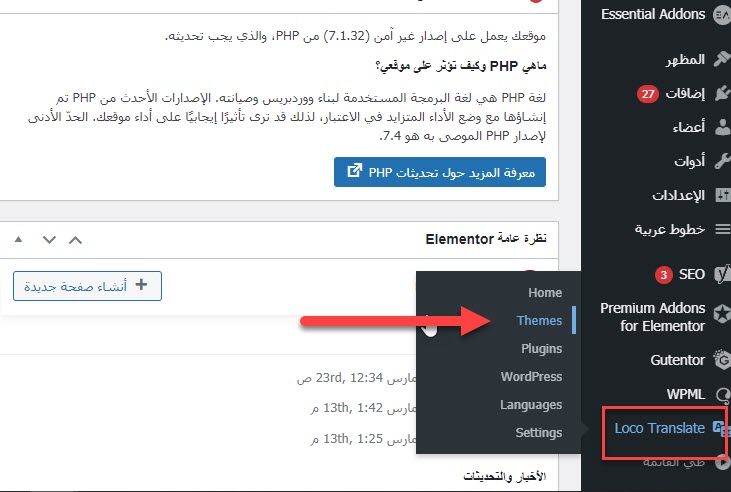
After activating the plugin, Loco Translate options will appear in your WordPress dashboard, as follows.
![]()
And we start successfully translating WordPress templates.
Translating WordPress templates
You can start translating your templates through the plugin control panel by going to: Loco Translate >> Themes.
Once there, you will see a page containing all the templates on your site. You can choose the template you want to translate by yourself. It is not necessary to translate all the templates. For example, let’s assume you choose one of the installed templates as follows:

The next step is to select the desired language by clicking on “New language”.

In the following window, you can choose the language by clicking on the “Choose Language” tab, and also select the location to save the new language files.

Options to save the location of subtitle files
There are three options for saving the translation files:
- Custom : This option saves the translation files for the new language in the following path: (languages/loco/themes/infinite-photography-ar.po). This means that a folder specific to the plugin will be created within the WordPress languages folder, and the new language file will be stored in a subfolder within it.
- System : This option saves the translation files for the new language in the following path: (languages/themes/infinite-photography-ar.po). This means that the files will be saved within the “themes” folder, which is located within the WordPress languages folder.
- Author : This option saves the new language files in the following path: (themes/infinite-photography/languages/ar.po). This means that the files will be saved within the language folder of the plugin itself, not in the main WordPress languages folder.
In general, it is recommended to save the files using the “Custom” option to ensure that the files are not lost when updating plugins or WordPress. After updating the language and selecting the file location, click on “Start Translating” to begin the translation process.
A new page will open, where you can translate the words and texts on your website into the language you previously selected. You will find that the translation editor provides you with three important parts for translation, as follows:
![]()
- From here we choose the text we want to translate
- The text written in your source or site
- We write the translation of the text into the desired language.
For example :
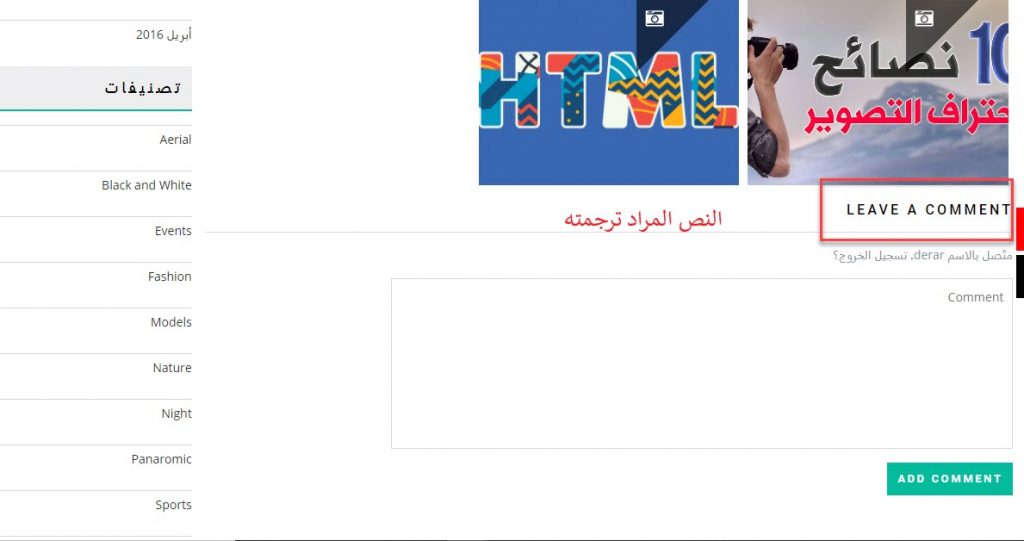
If you have a site in Arabic and use a template designed in English, then after translating the template, you find that the texts in the template that I use are not all translated into Arabic, and you need to translate some of them yourself.
As in the following image, you will find the word (LEAVE A COMMENT), which you need to translate to (leave a comment).
We will go back to the previous page, search for this required word (Leave a Comment) and translate it as follows:

- We write the text to be translated in the search field
- We write the translation in the space provided for it
- Click on Save to save the translation
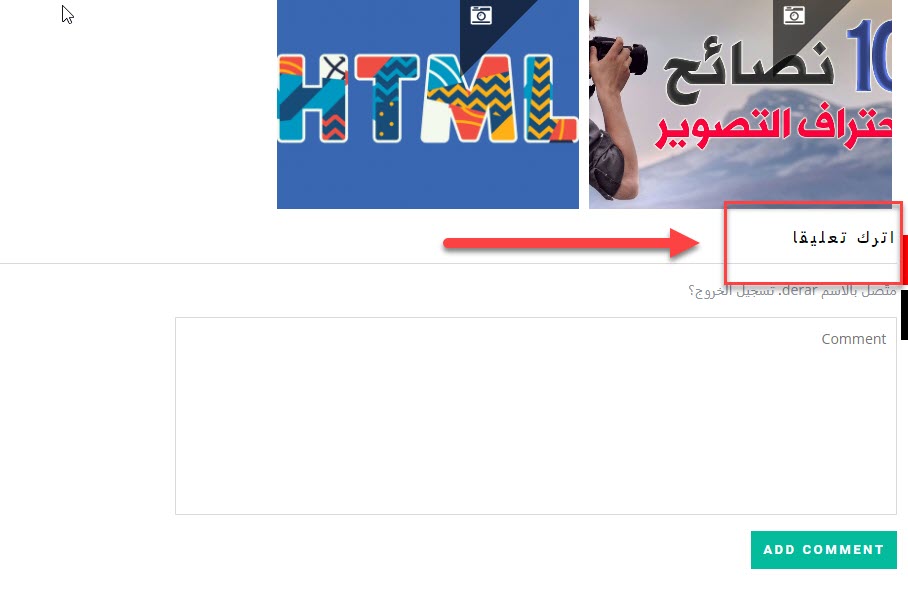
The result will be:
Another example, translating another text, with the same previous steps

In this way, you can translate all templates and all the texts in which they appear in different states, and let’s move on to the next step in translating your site additions.
Translate WordPress plugins
WordPress plugins can be translated, in the same way used in translating WordPress templates, where you will go through your site control panel to: Loco Translate >>Plugins, and then choose the plugin that you want to translate into Arabic or any other language.
For example, we will translate the Portfolio add-on.

After that, you can add a new language to work on, a new language, or choose from the existing languages

After selecting the language, you can start translating the texts you want, like the previous method

Note :
When translating texts, you may come across numbers or special characters. When translating such words, you should keep those symbols as they are. For example, when translating the word ( % Comments ) you should keep the “%” symbol and only translate the text that follows it, resulting in ( % Comments ) These symbols or numbers may indicate specific variables.
Activating and Using the New Language Files:
To activate and use the newly translated language files, you need to change the language of your WordPress site according to your desired language. Here’s how:
To activate and use the new language files that you translated, you need to change the WordPress language for your site according to the language you want through the WordPress control panel, by going to :
Settings << General and then switching to the desired language.
WordPress automatically uses the newly created language files to display the translated texts according to the template you worked on .

Additional features in Loco
Translate In the previous steps above, it was explained how to translate templates and plugins, but there are some other features that the plugin has, as we can see in the following image

The settings (Setup, Advanced) are suitable for developers and those who have good experience dealing with subtitle files. For example, it allows you to load versions of translations via XML files and then modify them.
There are also some additional advantages when working on translating texts

- Sync: Performs a manual synchronization check with the current version of the translation.
- Revert: This button undoes the changes made in a single step each time it is clicked.
- PO and MO: Through these options, you can upload and download translations to external files for use in other projects.
We would like to emphasize here that there is no language switcher feature in the Loco Translate plugin. The plugin is primarily designed to perform the basic tasks and functions of translating certain phrases and texts that appear on the website.
Automatic Translation using Loco Translate:
If you want to automate the translation process, you can use the “Automatic Translate Addon For Loco Translate” plugin, which
serves as an automatic translator within the Loco Translate plugin. With this addon, you can automatically translate any
plugin or template, with the note that texts containing special characters or HTML will not be translated.
You can install and activate the addon, and then you will find a new option in the Loco Translate settings called “Automatic Translation.”
![]()
Thus, you can do automatic translation by following the same previous steps, to find that a new feature has appeared that
has been added in the add-on options, which is the Auto Translate option.
![]()
By clicking on that button, you will find a new window in which you can specify how to translate the template or plugin
![]()
Then a new page will appear, where you will see all the texts to be translated, then click on Translate to start the automatic translation.
![]()
Certainly, automatic translation will not be as accurate as manual translation, but it can be an effective option when
dealing with large amounts of data.
By now, you have learned how to use the Loco Translate plugin to translate the content of your website using the features
provided by the plugin in its free version. It helps you efficiently complete the translation process through a simple editor that
detects all phrases and words present in the template or plugin for you to translate into another language or multiple
languages, providing multiple available languages for your website.