

If you have an e-commerce store on WooCommerce and you have a wide customer base that extends beyond local and regional boundaries, you will need a suitable strategy to change product price to display different currencies. It would be great if you could enable the automatic currency change feature, where customers can make payments in their local currency based on the country they are visiting your store from.
Therefore, currency conversion is an important aspect that helps provide a good user experience for visitors and makes it easier for them to understand the prices of products or services you offer in their local currency. In this article, we will explain step by step how to change the currency based on the country of the visitor to your store using the useful plugin called “Price Based on Country for WooCommerce.”
Price Based on Country Plugin
You can change the product prices based on the country by using the Price Based on Country plugin. This plugin determines the country from which the visitor is browsing and automatically changes the currency displayed to the customer according to their country. For example, if the customer is located in Egypt, the currency shown when browsing the store’s products will be the Egyptian Pound (EGP), and if they are in Saudi Arabia, the currency will be displayed in Saudi Riyal (SAR), and so on.
The plugin automatically detects the visitor’s location through the geolocation feature, which is available in WooCommerce from version 2.3.0 and onwards. After setting up the plugin for the visitor’s location, it will automatically adjust the price of the product they are browsing to their local currency.
Note : The plugin does not generate prices for products in your store automatically, and it does not display currencies that have not been included in its settings. In other words, you will need to enter the base value of the product with the Egyptian Pound and Saudi Riyal, for example, in the plugin settings if you expect visitors from those countries.
You might wonder how the plugin determines the product price in a specific currency.
Well, there are two ways to set the product price for each country :
- Calculating the price based on the global exchange rate: This method is convenient and quick. You provide the plugin with the base price of the product in USD and add the exchange rate value for each currency. The plugin will then automatically adjust the price of each product according to the visitor’s currency. This method is particularly useful when dealing with fluctuating currency rates in countries where you have a large customer base for your store.
- Manually calculating and setting the price: This method requires additional time and effort. It is useful when the exchange rates for the targeted countries remain stable, as you manually set the price of each product in their respective currencies.
Why do you need to change prices?
If you own WooCommerce stores, there are several reasons to consider using this plugin to adjust product prices according to your customers’ currencies. We can summarize these reasons as follows:
- If you have distribution stations and sales centers in multiple countries, you need multiple currencies to operate in each of your sales centers.
- Having multiple currencies helps customers understand and compare prices in their own currency, facilitating their purchasing decisions.
- Building more customer trust: Displaying prices in different currencies in the pricing section of your products creates an impression that your store is global and caters to customers worldwide. This fosters trust and strengthens the brand identity of your store or company.
Steps to change currency based on country :
Here is a detailed step-by-step guide on how to change the product price or currency based on the customer or user’s country, ensuring that each customer sees the prices of your products in their own currency.
1. Install and activate the plugin :
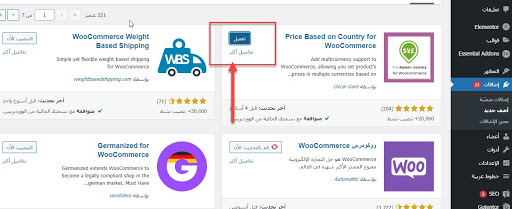
To install the plugin, log in to your WordPress dashboard, go to “Plugins” and click on “Add New.” Then, enter
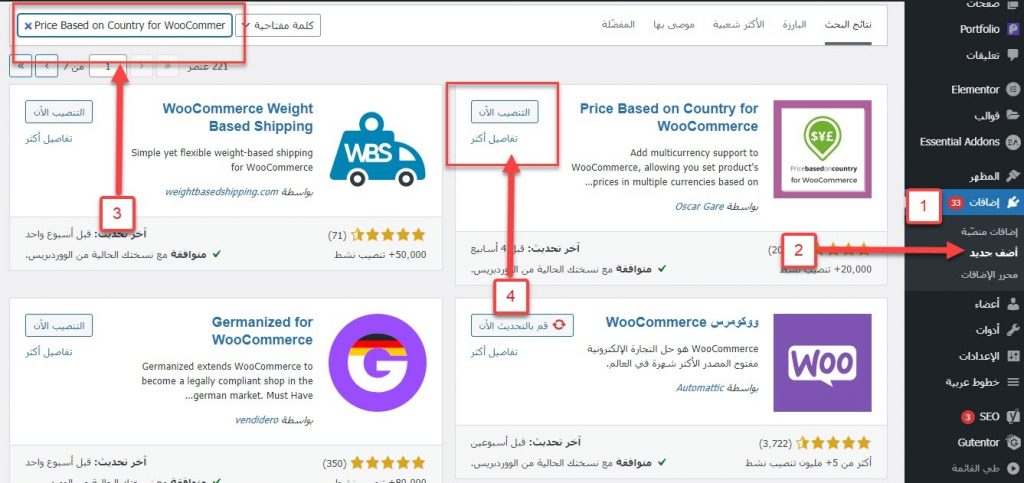
Click the “Activate” button to activate the plugin on your site
We have already talked about how to install the WordPress plugin step by step .
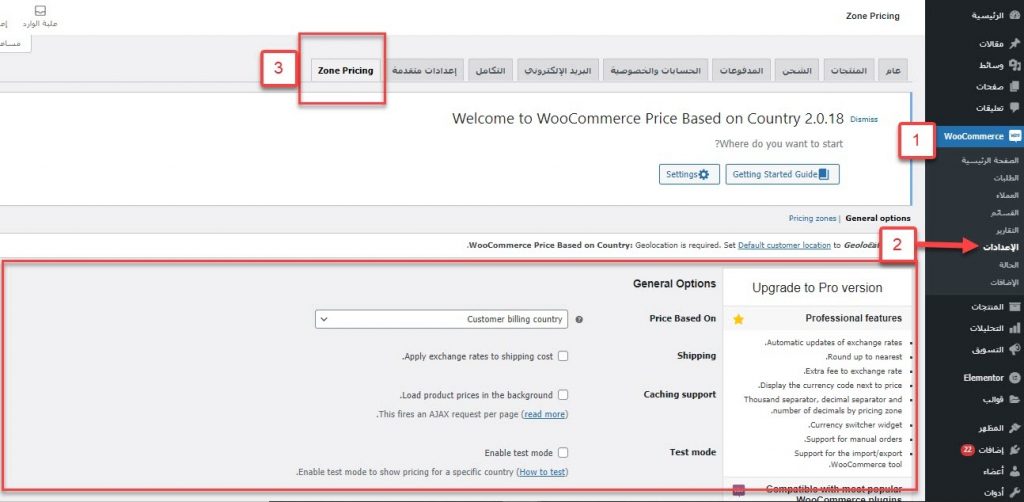
After installing the plugin, you can access the plugin settings by going to WooCommerce << Settings << Zone Pricing
2. Set the price by country
In this step we will change and set the price manually according to the currency of each country. This is by going to the extension settings (Zone Pricing). Where we will have two options :
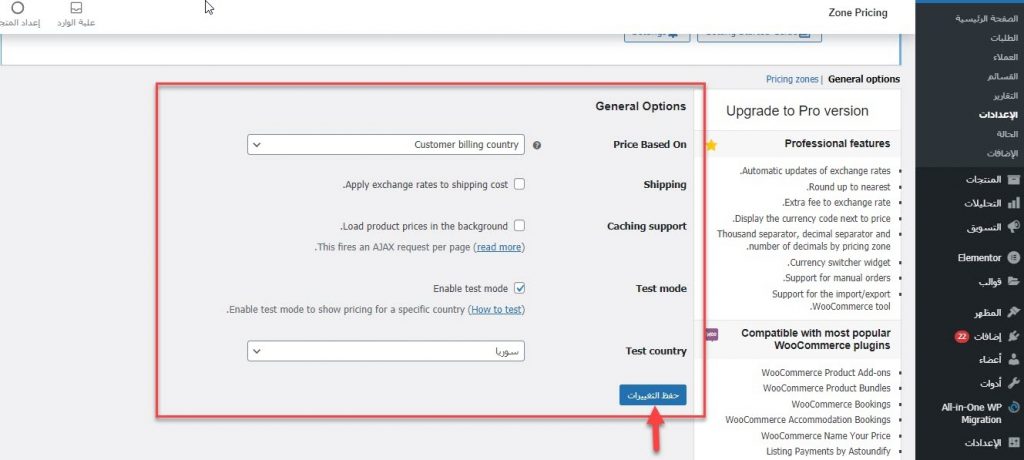
- General options:
-
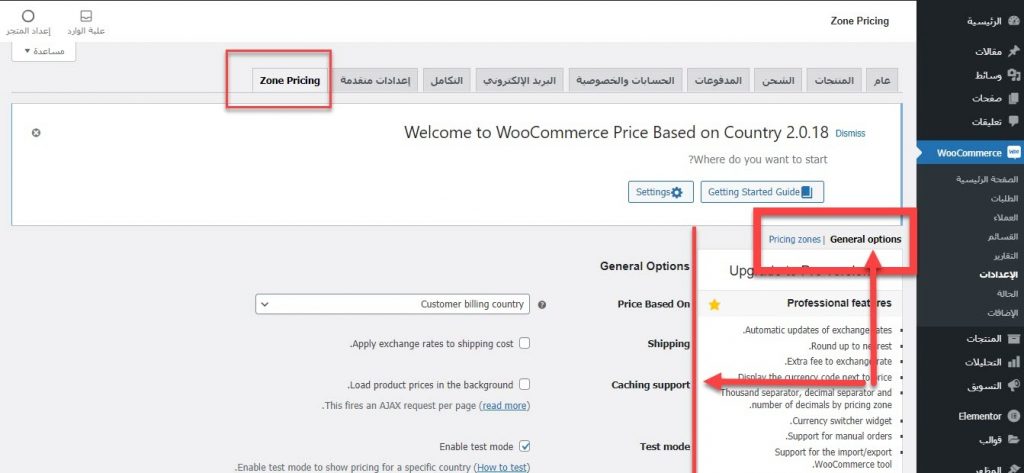
Pricing zones
General options
We have a set of options here:
- Price Based On: We determine whether the price is based on billing or shipping.
- Shipping: You can adjust this option if you want to apply exchange rates to your shipping or not.
- Test mode: We will need to activate it and then choose the country for which we want to change the product price according to the currency used in that country (in our example, we will choose Syria as the country, and thus the currency will be the Syrian Pound).
We will activate the options as shown in the following image :
Note: The translation of the image description or any specific instructions in the image can be provided upon request.
Pricing zones
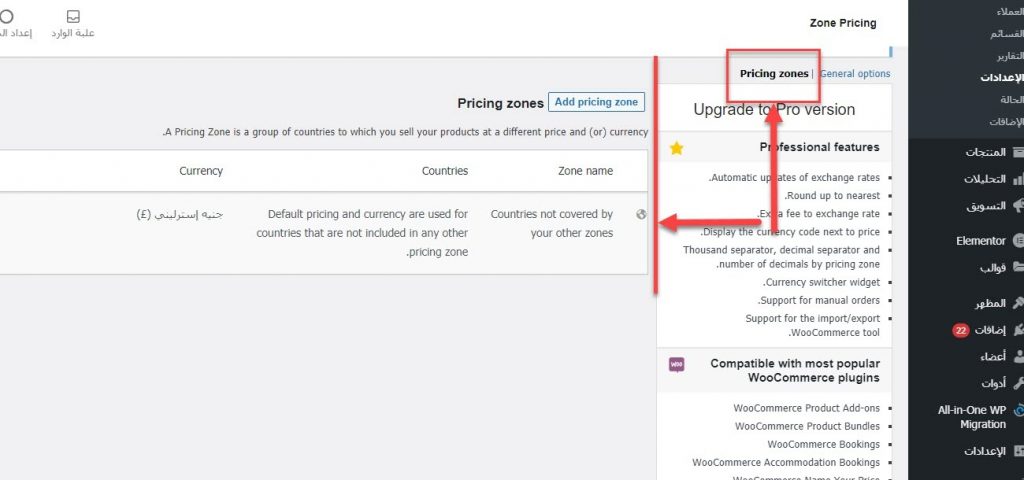
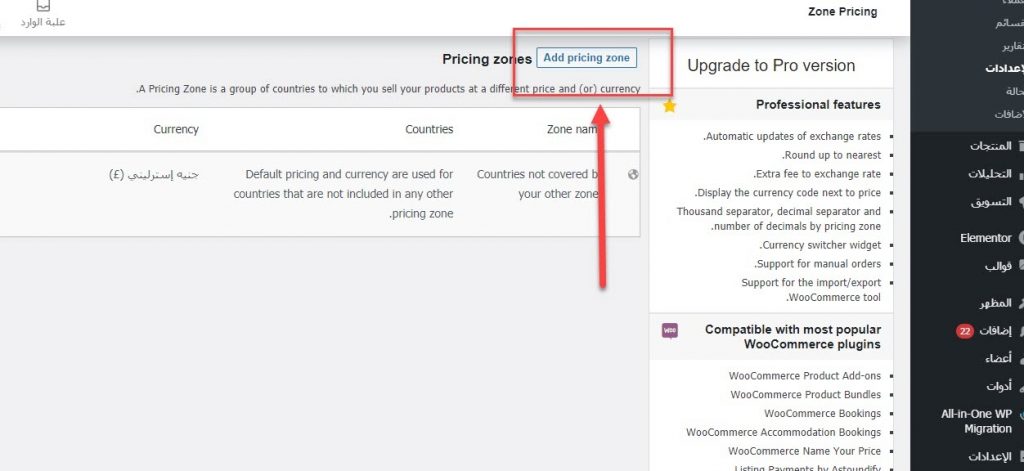
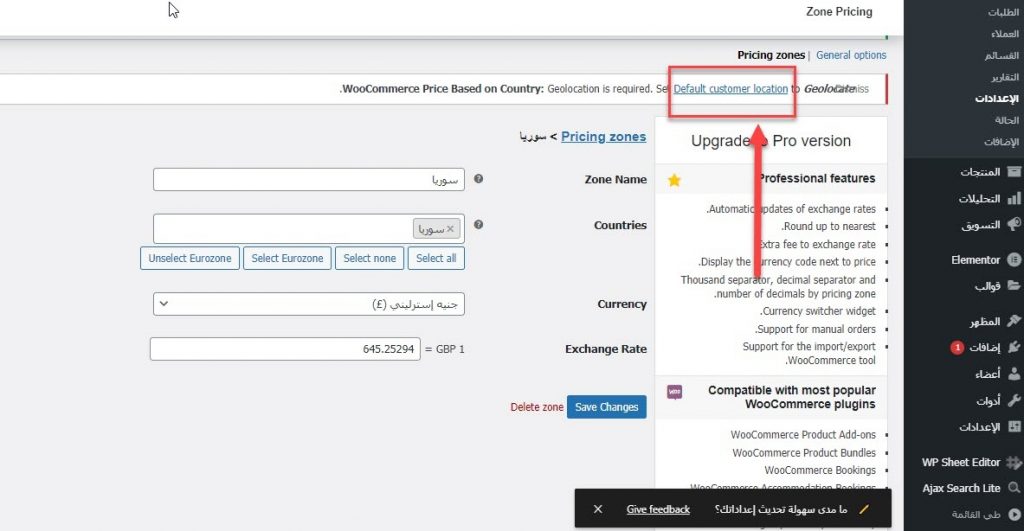
In this option, we will change the price and set it based on the country that we previously selected in the first option, which is Syria. First, we have to click on the “Add pricing zone” option to add a new price zone.
Then a new window will appear for us, in which we have to fill in a set of data related to determining the region and its price, and this data includes all of the following:
- Zone Name, the name of the price zone
- Countries, we specify the country
- Currency
- Exchange Rate
We will write the data as in the following image :
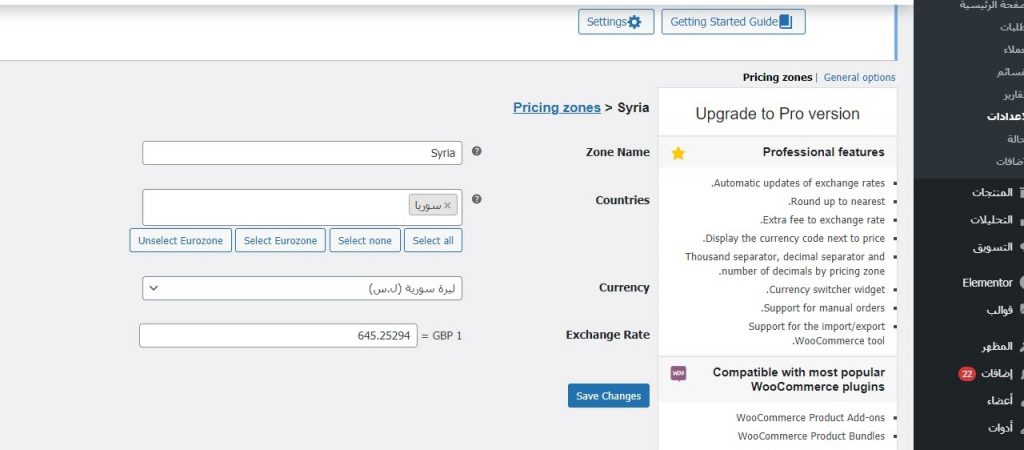
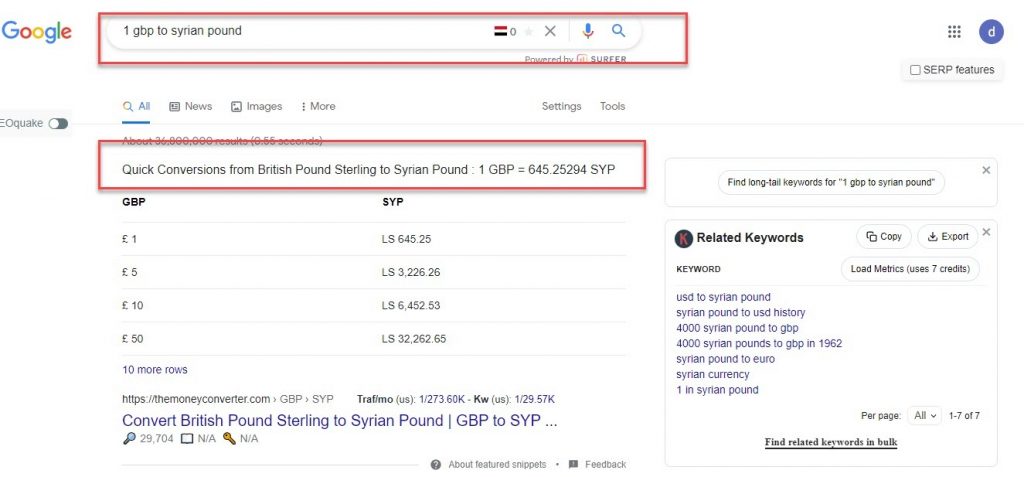
Note : At the “Exchange Rate” option, we note that there is a currency in the abbreviation “GBP”. This currency is the British pound sterling, and it is the one on which the program measures product prices in other currencies.
If you want to know the value of the pound sterling against any currency, all you have to do is go to Google and write 1gbp to syrian pound, or instead of “syrian pound” any other currency you want to know.
It will show us in the Google results how much the Syrian pound is worth against the pound sterling, as in the image below.
After completing the data and the exchange rate, we press the “Save Changes” button to finish setting up the addition.
3. Activate the geographical area selection feature
In the previous steps, we defined a new price region, and also set the exchange rate according to the country that
was chosen, which is Syria in our example. The next and final step before previewing the changes is to
enable the “geographic region” feature so that the extension can track the customer, poll the country they
are browsing from, and automatically adjust the currency in which your products are priced according to that country’s currency.
All you have to do is click on the “set Default customer location” option to do so.
After clicking on the previous option, we will see a message “Zone updated successfully.” Then we will click again on the “Save Changes” option to complete the configuration of the customer’s self-tracking.
4.Previewing the changes on the product (change product price)
So far, we have successfully set up a new pricing zone with the geographic zone feature enabled. We can directly preview the results of these changes by accessing the website and going to the product page. The product price should appear in Syrian Pounds instead of British Pounds, assuming you are browsing the site from Syria.
Below, we have attached an image illustrating how the product price appears before making any changes to the online
store (i.e., before using the addon), and another image of the same product but after using the addon and following the previous steps.
Before making any changes and using the addon, the product will appear as shown in the following image (note how
the product price is displayed by default in British Pounds):

As for the product image after using and activating the add-on settings through the previous stepsAs for the product image after using and activating the add-on settings through the previous stepsAs for the product image after using and activating the add-on settings through the previous steps
As for the product image after using and activating the add-on settings through the previous steps

You can add as many pricing zones as you want to your store based on the countries from which you expect to gain
visitors and customers. This way, each visitor will see their country’s currency when browsing products in your store.
Additionally, if you want to experiment with multiple currencies and different countries, you can use a VPN,
for example, to simulate a specific country such as Canada. Then you can use an incognito browser to preview the changes.
Manually adding currency type and value
If you prefer not to go through the hassle of downloading and activating an external addon and going through addon
setup steps, you can manually modify the currency type and value for each product with a few simple steps.
First, go to the “Products” option and select “Add New Product” from the WooCommerce settings.
You will see the product addition page. At the bottom of this page, you will notice options for manually adding the
price by enabling the “set price manually” option, as shown in the following image:

Currency Switcher Tool
It would be great for your customers or visitors to be able to browse your product prices in different currencies on their own. And Switcher tool enables you to provide this feature to your customers. The Switcher tool will appear as a widget in the frontend interface, allowing customers to select their desired currency. Also The product prices will then be displayed in their chosen currency.
To add the Switcher tool, first, go to “Appearance” and select “Widgets”. Search for the WooCommerce Country Switcher
widget and add it to the desired location on your website, as shown in the image.
Note: This widget is automatically added to the widget section after installing the addon, allowing you to use it and place it in available areas, whether in the sidebar, header, or any other available location. The widget solely switches between currencies based on the pricing zones that have been added as mentioned in the previous steps.

Then users can switch between currencies, and your site will look like the following animation

At the end , in the fiercely competitive e-commerce landscape, you must strive to secure the best user experience for your customers.
One of the key strategies to gain trust and delight customers is by providing the currency switching feature based on their country.
This allows each customer to view your product prices in their familiar currency.
Offering this feature will give customers an additional incentive and motivation to purchase your products.
As we explained in our article, adjusting product prices( change product price) according to the customer’s country currency is not a complicated process at all. You can take advantage of this feature without any significant programming expertise and configure it manually
or automatically, as we have previously explained.