
If you are a WooCommerce store owner and planning to start accepting payments for your products or services online, this guide will help you test WooCommerce Checkout and Payments.
Why test WooCommerce Checkout and Payments?
Customers prefer online stores for the convenience of purchasing products from the comfort of their homes and managing transactions securely online. If your payment process is not working smoothly, you risk losing customers and even facing legal consequences. Due to the immense popularity of WooCommerce and WordPress, there are many ways to test payments. If you have already deployed your website, you can use the following methods to start your own testing process.
A well-organized and trusted online store requires a reliable payment system for smooth online purchase transactions. Slow or malfunctioning payment processes will impact the customer experience and result in decreased sales. You should continue to upgrade your payment system, check for any errors, and maintain security throughout the payment process.
Follow these detailed steps to test WooCommerce Checkout and Payments. We will extensively discuss how to test cash on delivery, check payments, and test with the WooCommerce Payments plugin.
How to test WooCommerce Checkout using the Cash on Delivery option?
Access the WooCommerce option in the left sidebar of your WordPress dashboard. Go to Settings> Payments> Payment upon receipt, and enable them.Access the WooCommerce option in the left sidebar of your WordPress dashboard. Go to Settings> Payments> Payment upon receipt, and enable them.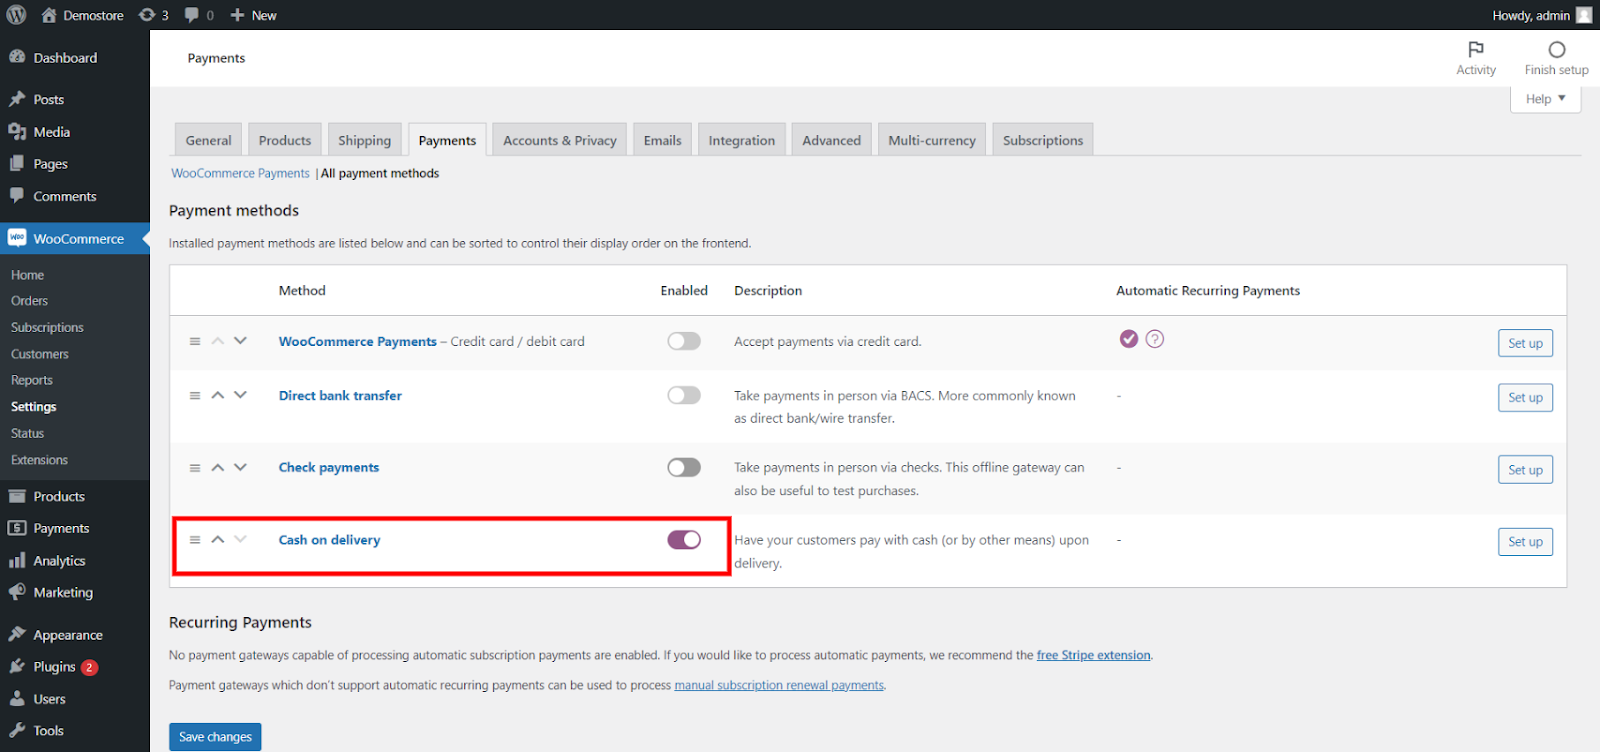
Now, visit your wooCommerce store and try and ask for a product. You can see from the screen shot above that a product has already been added to the shopping basket. Now click the “Control of the purchase” button. This button will redirect you to a new page like below.
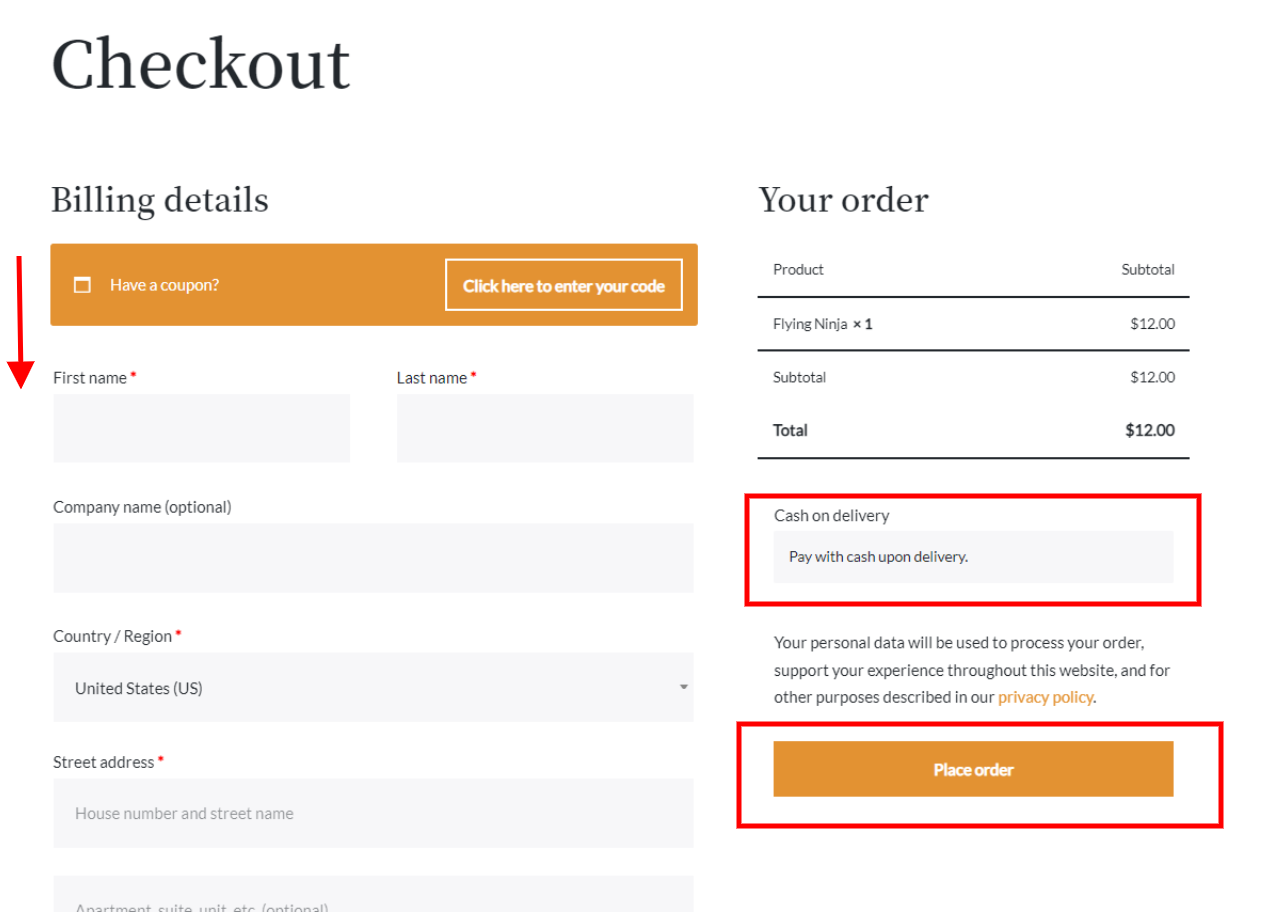
Here, customers can fill in all the necessary details required to get the product they want. For testing purposes, you can fill in any contact and delivery details. In the payment method, the checkout page will only display the Cash on Delivery option because we have enabled it in our WooCommerce payment settings. Once you have filled in these details, you can click the “Place Order” button.
This will redirect you to the order confirmation page as shown below.
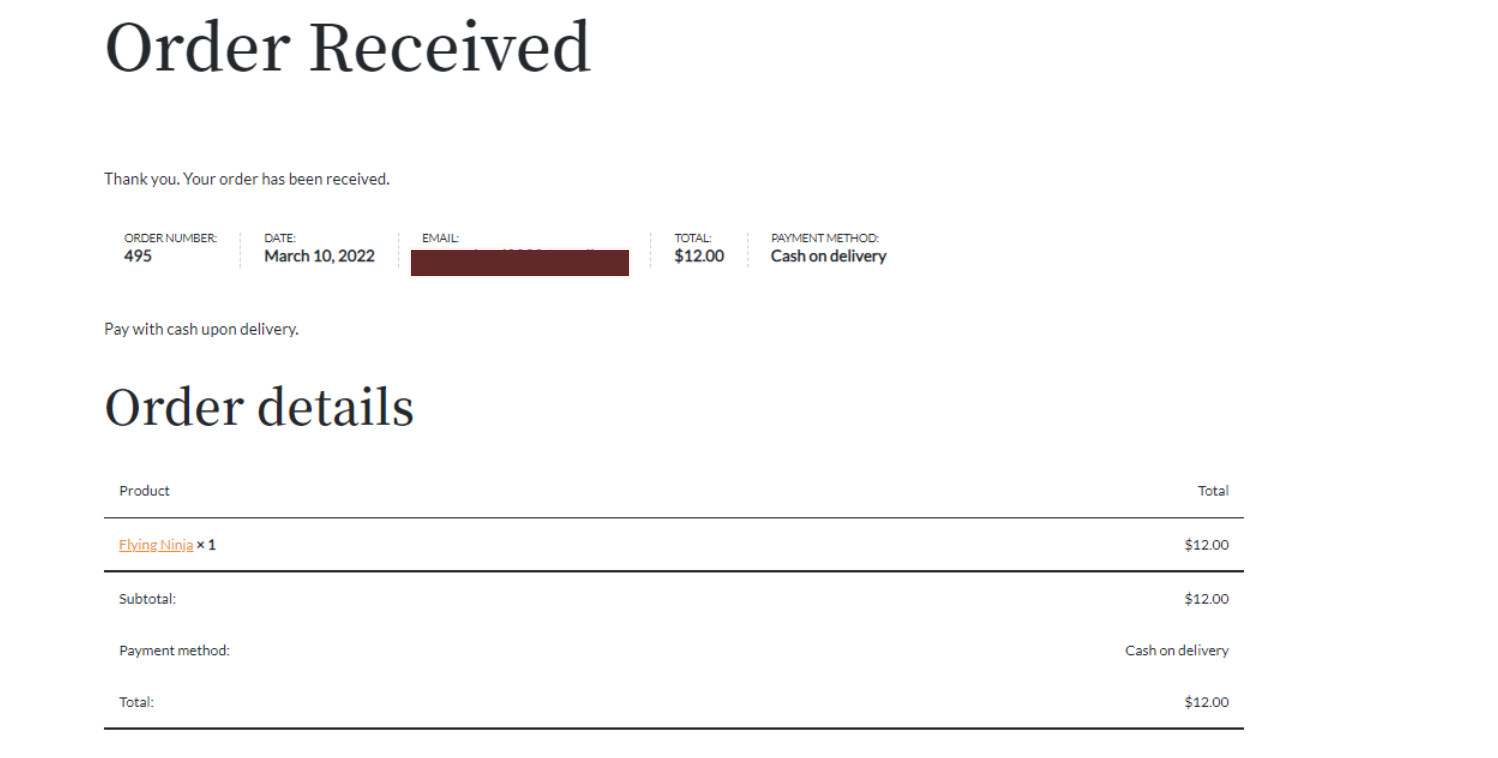
This page will display all order details such as the order number, date, email, total price, and payment method. You can see that the checkout and order pages are functioning smoothly. An automatic email will be sent to your customers with the order details.
You can access the order details through your WordPress dashboard. Go to WooCommerce > Orders. Here, you can view and click on the desired order number. This will display all the detailed information about the submitted order.
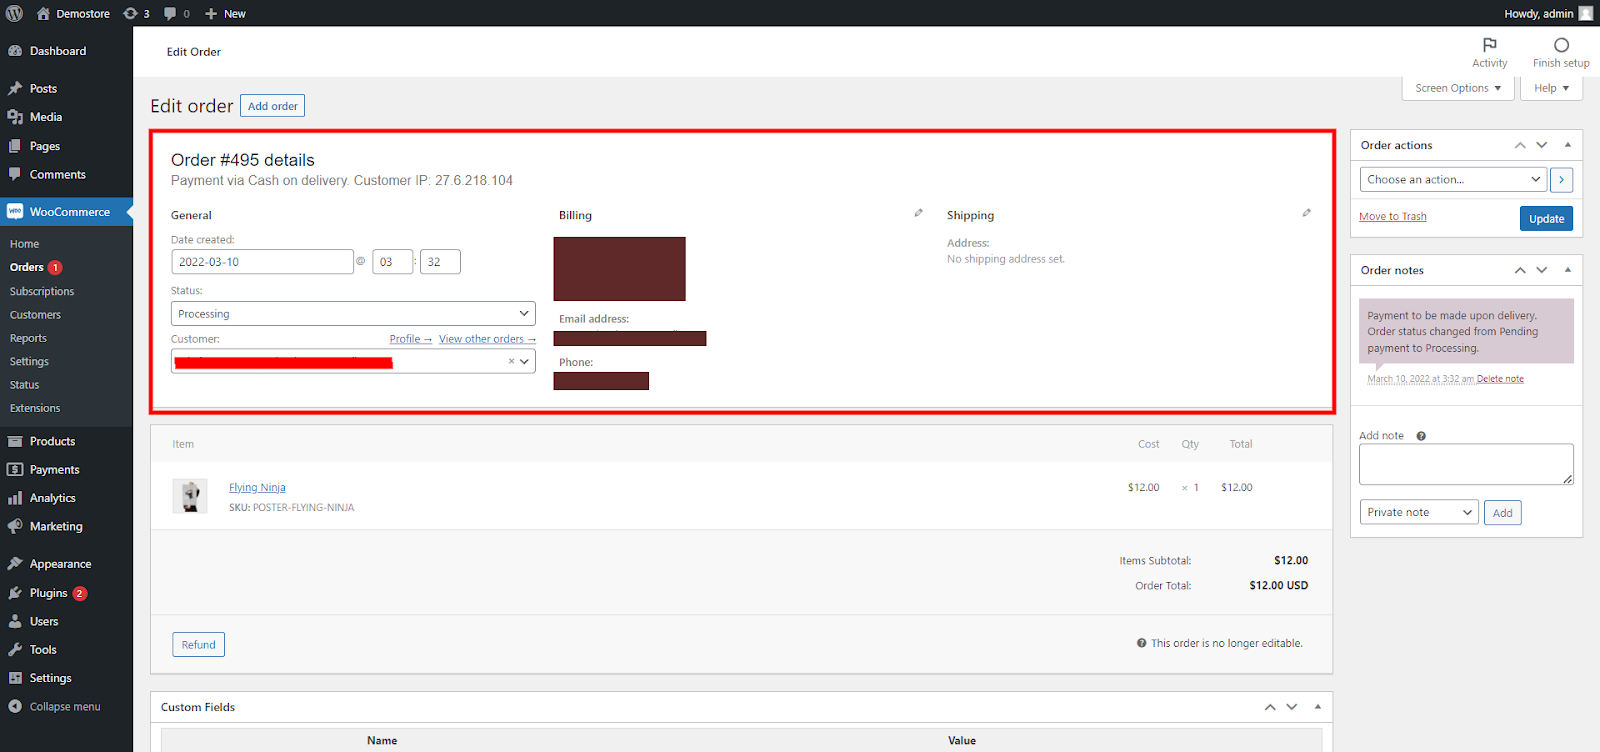
You can access customer contact information, shipping methods, payment methods, and even modify the information if needed.
How do you test WooCommerce Check Payments?
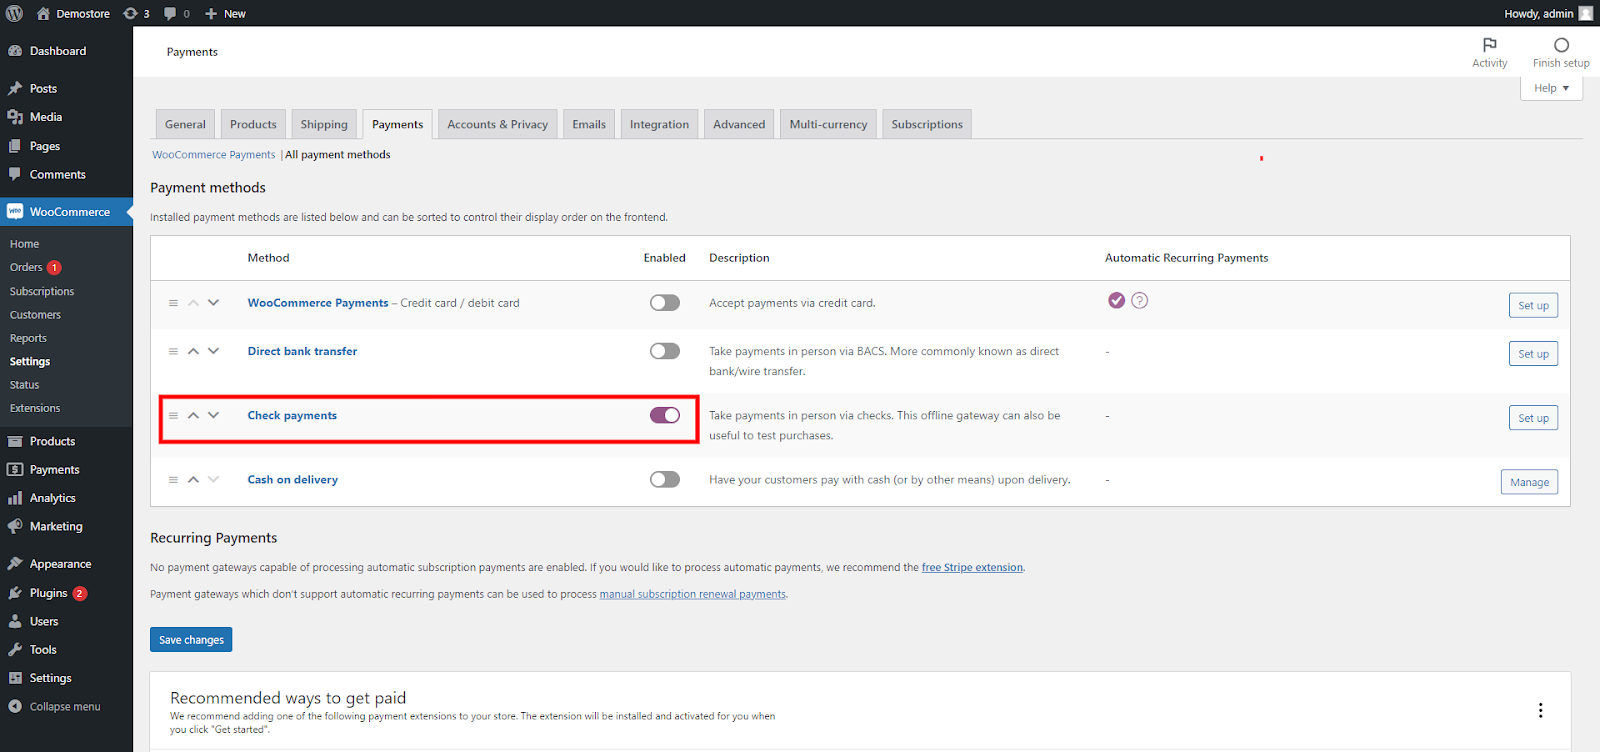
We will use the simplest method to test check payments. Go to the Payment section in WooCommerce > Checkout, and enable it. Now, visit your online store and place an order for a product. You will be redirected to the Checkout page, where you fill in the delivery details and select the payment method as “Check Payment”. Proceed with the order, which will redirect you to the order confirmation page.
You can now navigate to your order page and verify if the order has been successfully submitted. Open the latest order and check the payment details in the admin order dashboard. Here, you can see that the order has been completed using the check payment method. Similarly, you can test this for bank transfers as well.
How do you test WooCommerce Checkout using the free plugin?
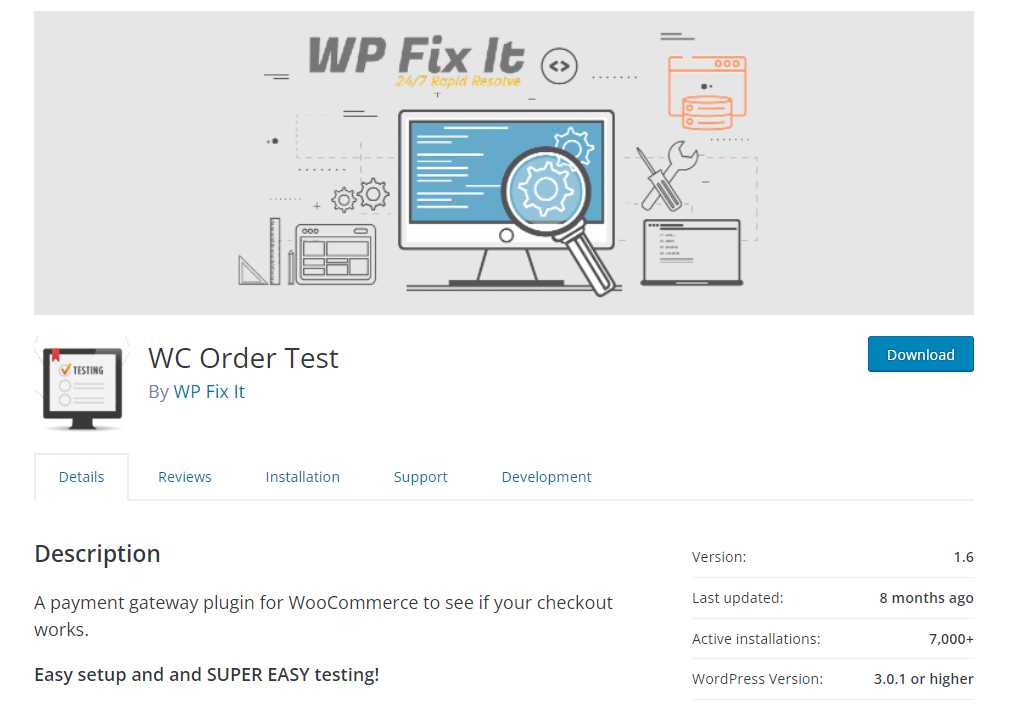
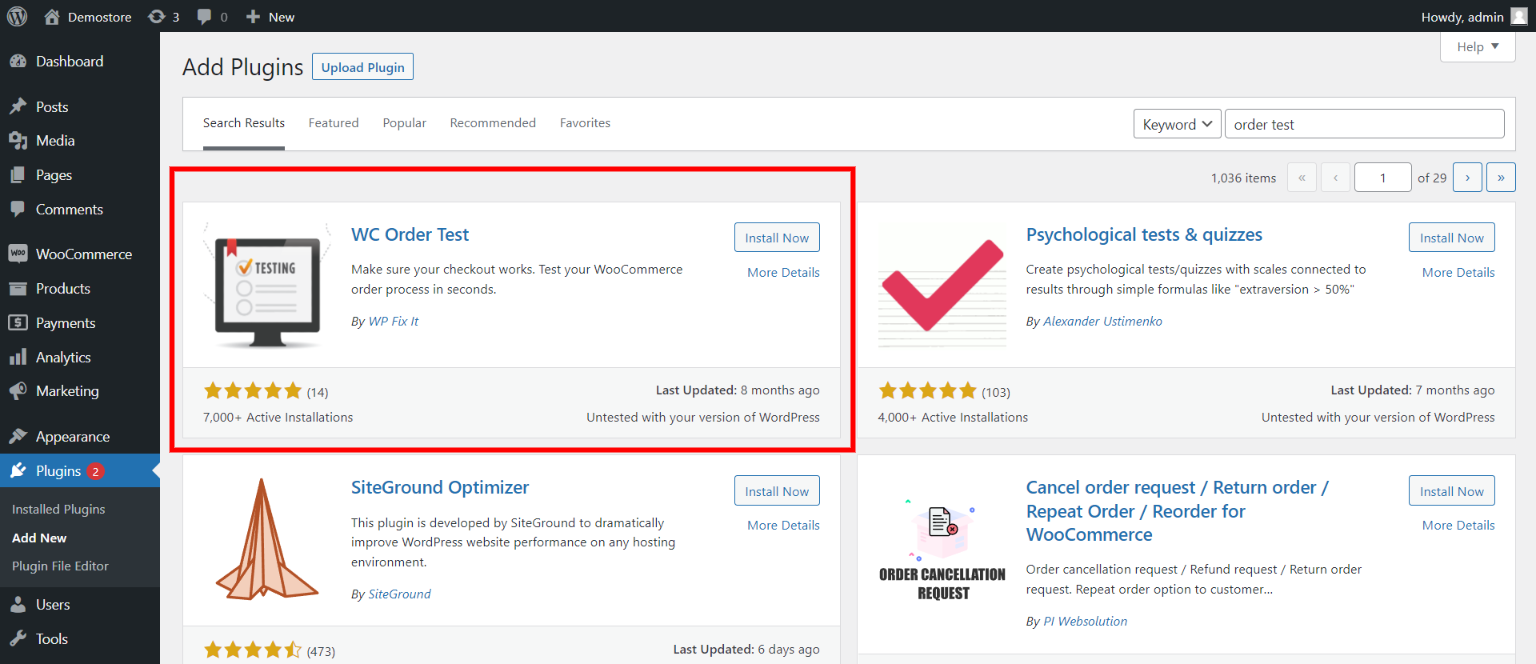
Visit your WordPress dashboard and then go to additional ingredients> New add. In the search bar, type WC Order Test. This auxiliary program allows you to test the exit process in a simple and effective way. Install the additional WC Order Test and then click Activate button.
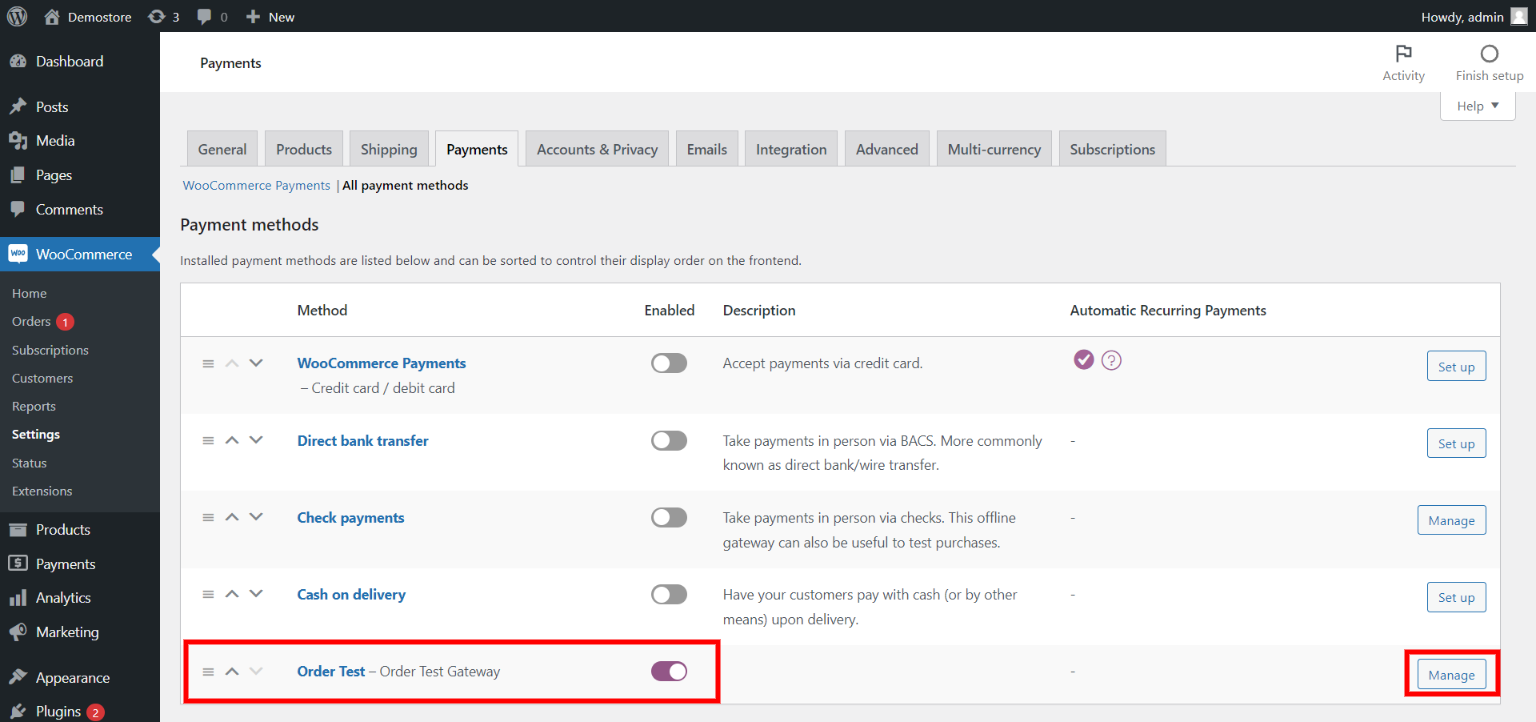
To completely use this additional component for test purposes, go to WooCommerce> Settings> Payments. Here you will see a new option: the order test, enable this option and then click the Management button.
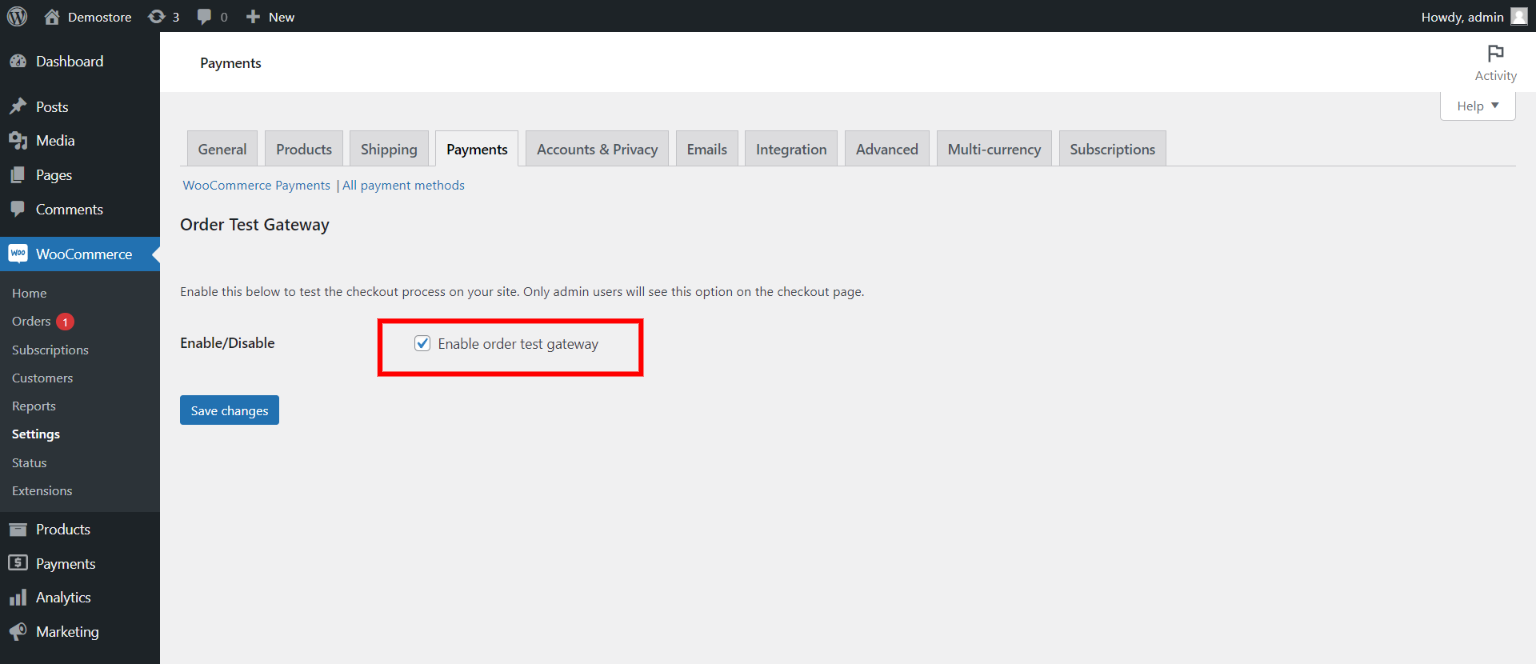
In the settings panel for this assistant program, you have only one option to enable the order test portal. Upon completion, click the Save the Changes button to move forward.
Visit your store and ask for a product. Upon follow -up to the exit page, you will see the application for the order test portal.
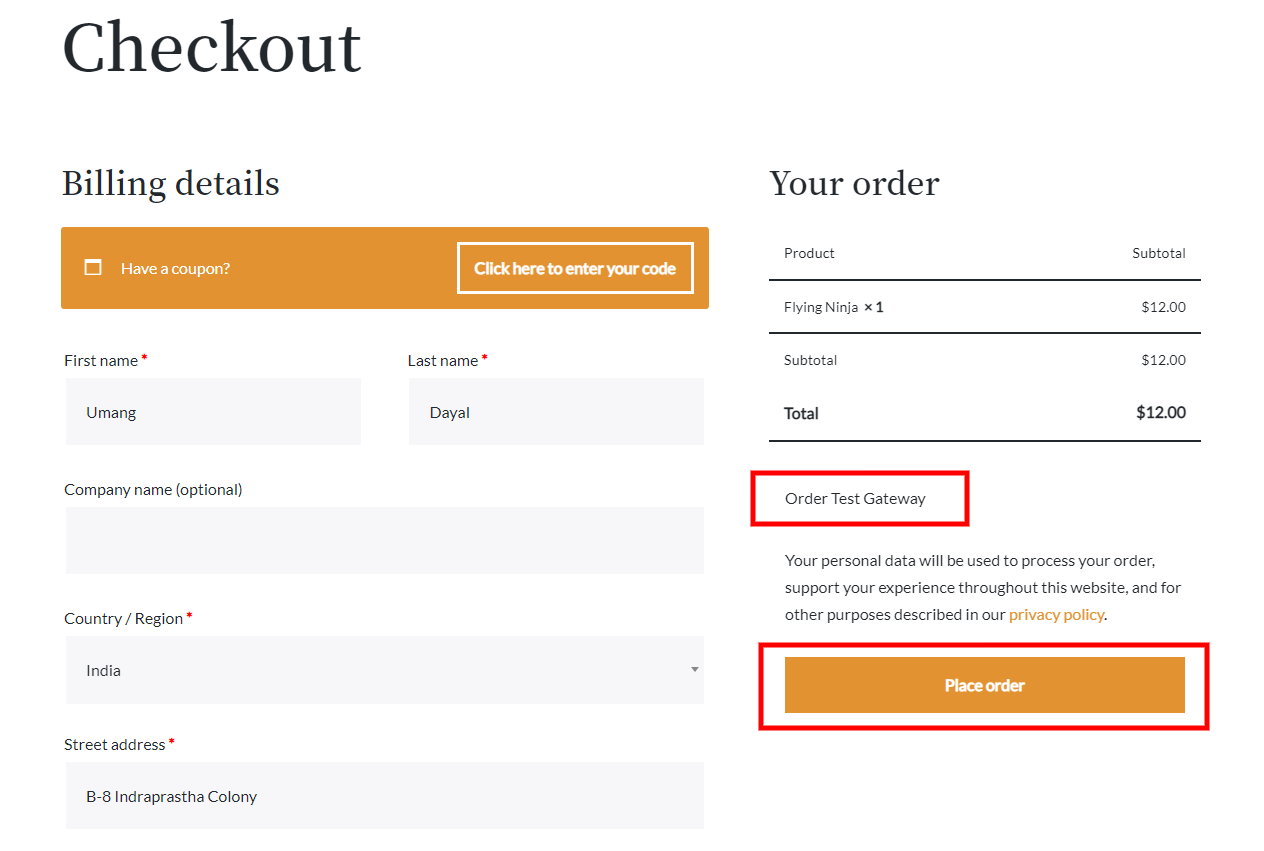
Select this option and after filling in delivery and calling data, you can click the “application” button. This button will be directed to the new request confirmation screen.
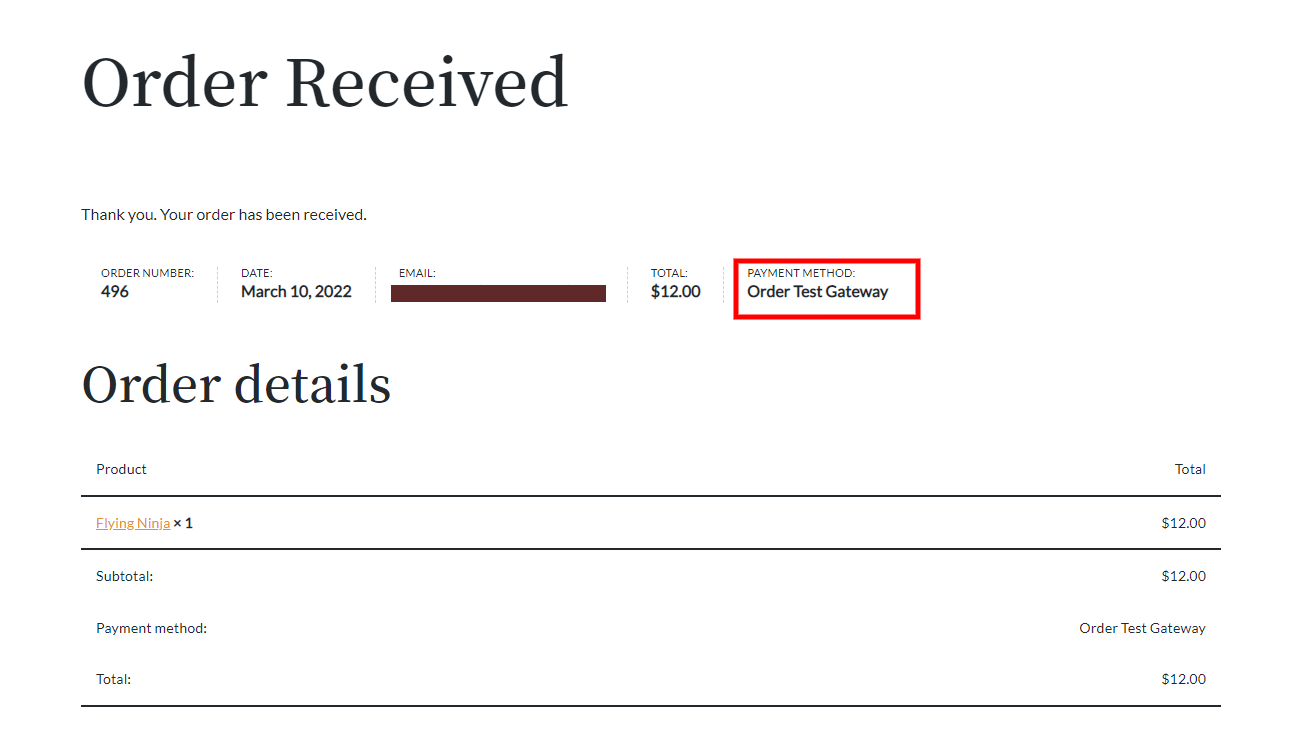
This contains all related information related to your product and delivery. Take the order number and you can access it on the WooCommerce request page.
How to test WooCommerce Checkout and Payments using the WooCommerce payment program?
You can easily set up and use the WooCommerce Payments plugin to integrate credit and debit card payments, as well as support Apple Pay and Google Pay applications. This plugin allows you to manage and view transaction reports using the plugin’s dashboard. Let’s see how you can test payments when using the WooCommerce Payments plugin.
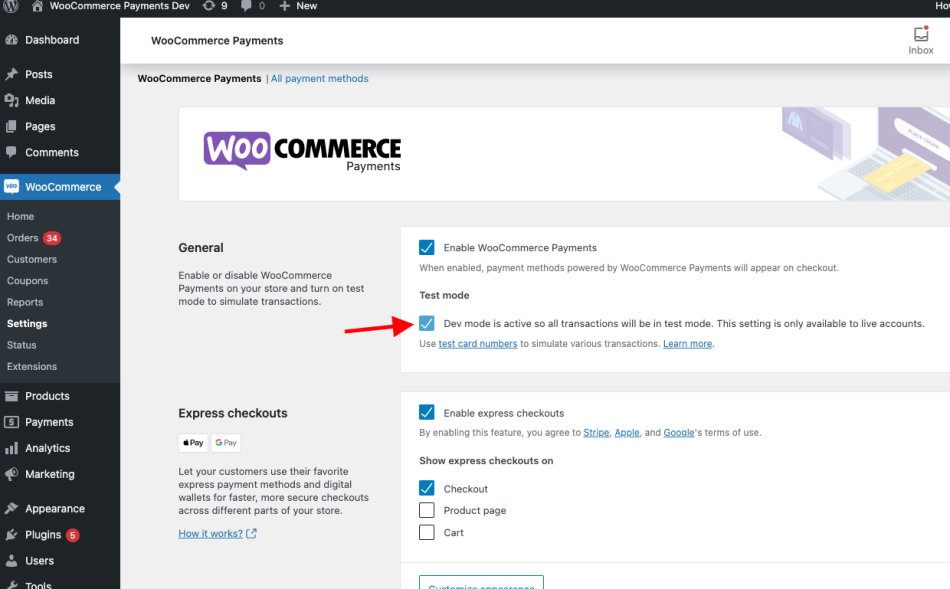
To test on a development site, you can create a test account using the development mode.
Now, install the WooCommerce Payments plugin and configure it by filling in the necessary details.
Once you’re done, switch to the test mode. Go to Payments > Settings > Enable Test Mode. Save these changes to proceed.
To test the card payments using this additional component, go to your shopping page and then add a product to your shopping basket. Now, go to the exit page and fill the delivery details in the required fields. After filling the required data, you will enable you to enter the card details.
Use the following test cards numbers for test purposes.
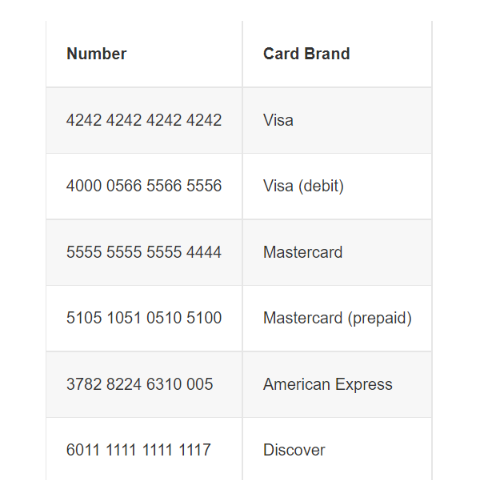
For expiration date, enter any future date and type any CVC code consisting of 3 numbers except 123.
When you end, put the request. You will see the request to confirm the request as shown in the roads above.
From your WordPress dashboard, you can go to payments> Transactions to know the fees. The request will be processed forward as if you were using a real credit card.
How to test the card payments using the tape payment portal ?
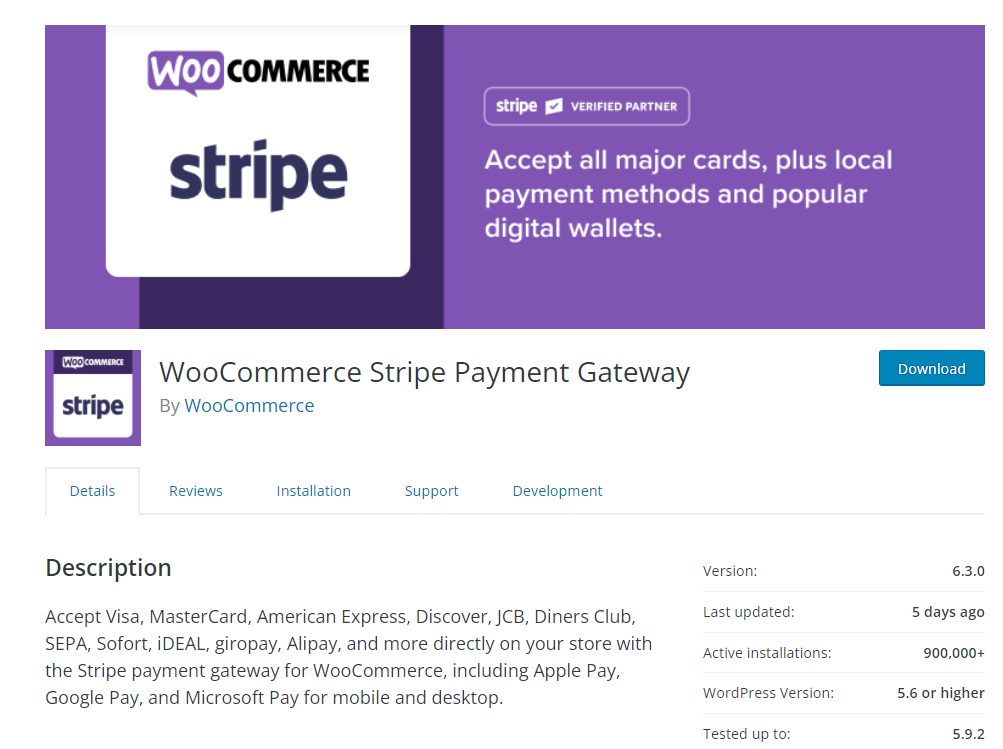
tools that enables card payments, digital wallets, and local payments through the Stripe gateway. Additionally, you can use the Stripe test mode feature for your WooCommerce store.
To get started, go to the WP Dashboard and install the plugin. Once done, click the Activate button. Now, let’s integrate the Stripe plugin in test mode. You will need to set up your own Stripe account for API keys. Create a new account on the Stripe website, then navigate to Developer > API Keys. Here, you can access your Publishable Key and Secret Key.
Next, go to your WooCommerce settings and access the Payments tab. In the payment options, enable the Stripe payment method, then click the Setup button.

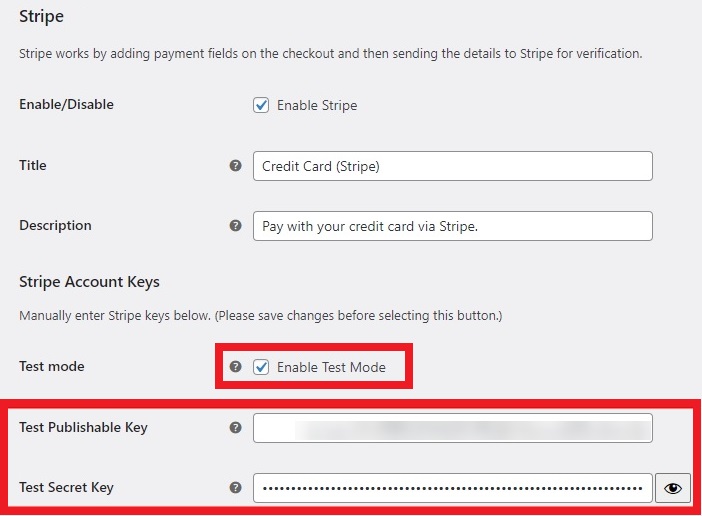
This button will return to a new window where you can enable the test mode and include publishing key and secret keys.
Once pasted both key, you can click the change button.
Now, navigate to the front-end of your e-commerce store and purchase a product. Add the product to your shopping cart and proceed to the checkout page. Add and fill in all the necessary billing and customer details.
To test credit card payment for Stripe, you can use the test numbers mentioned above in the previous section. For the CVC code and valid date, you can enter any valid numeric values. Once done, you can click the “Place Order” button to proceed.
To verify if the payment is working correctly, you can go to your Stripe Dashboard > Payments tab. Here, you can view all the submitted orders. If your order is displayed in the payment dashboard, it means that the payment has been successfully processed using the Stripe gateway.
Now, to make this payment method available to your customers, go to WooCommerce > Settings > Payments. Click on the Manage Stripe Payment button and disable the test mode.
Fill in the necessary fields according to the instructions and click the “Save Changes” button once you’re done.
Use the aforementioned methods on how to test WooCommerce Checkout and Payments on your online store. Additionally, you should regularly update payment-related plugins and install additional security plugins if necessary.
A smooth payment process will enhance the customer experience, build trust among users, and increase your online sales.