

Do you wish you had more control over your website without the need for code Such as creating a custom Hyder
If you are familiar with the famous page builder Elementor, you know that it offers incredible flexibility in building your site – no coding needed!
However, Elementor only takes you so far, because it is your WordPress theme that controls elements such as the Hyder, including the logo and the navigation area.
This is not a problem if you are satisfied with the Hyder options that come with your template, but every WordPress theme is different, so the built-in options may not be exactly what you are looking for. Or maybe you like headers, but wish you could easily apply a unique Hyder to a landing page on your site.
Whatever customization you need in your heads, there are some great ways to use Elementor and enjoy full drag-and-drop control over your website header. Here’s what you need to know to create beautiful custom headers using Elementor!
How to edit Hydra in Elementor ?
Obviously, in terms of aesthetics and functionality, the Hyder of your website is essential for a good user experience. After all, this is where the navigation menu, logo, shopping cart and other important items are located!
To customize the header for Elementor, you will use a cool feature called Theme Builder, which is available only in Elementor Pro.
Note :
this approach requires you to have the paid version of Elementor, but we’ll also discover a free alternative later.
Create an element Heider using the attribute constructor
Here’s how to get started using Theme Builder.
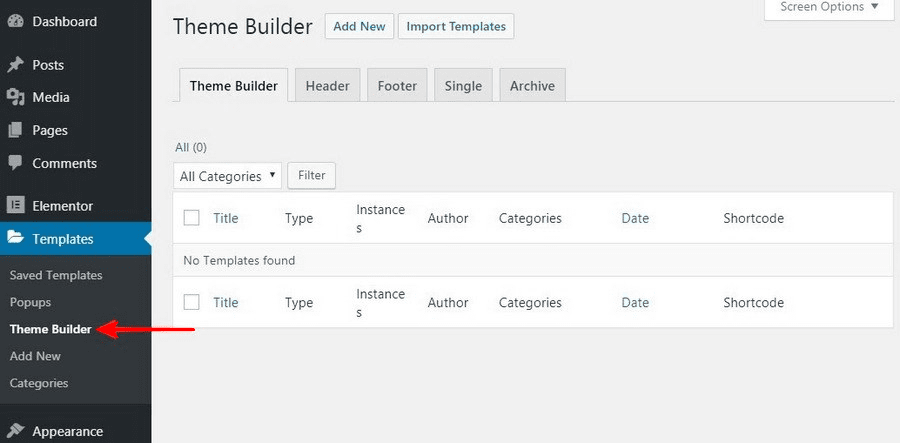
Step 1: Find the item tab in the sidebar
Go to the backend of your WordPress site, install the extension Elementor from plugin> add new .
Be sure to install the Pro version of this page builder. It includes dozens of pre-made Hyder molds, but for full control you have to make your own from scratch!
Go to templates > template builder .
Step 2: Create a new template in Elementor
Click Add new template to create a new template in Elementor.
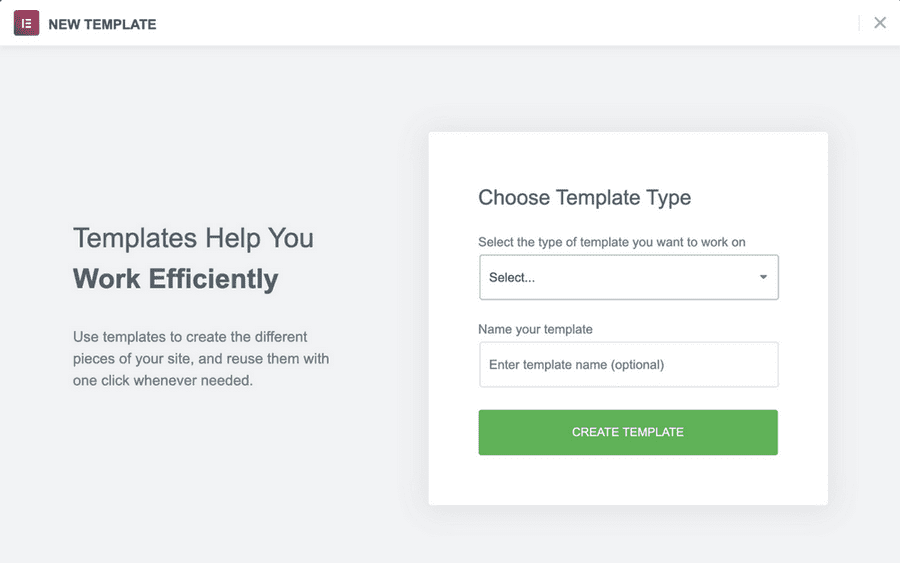
Under this dialog box, you can select the Hyder option and create a name for your template.
Step 3: Click “Create Form” to get started
Once the template is created and published, you can edit the Hyder directly using Elementor!
Elements
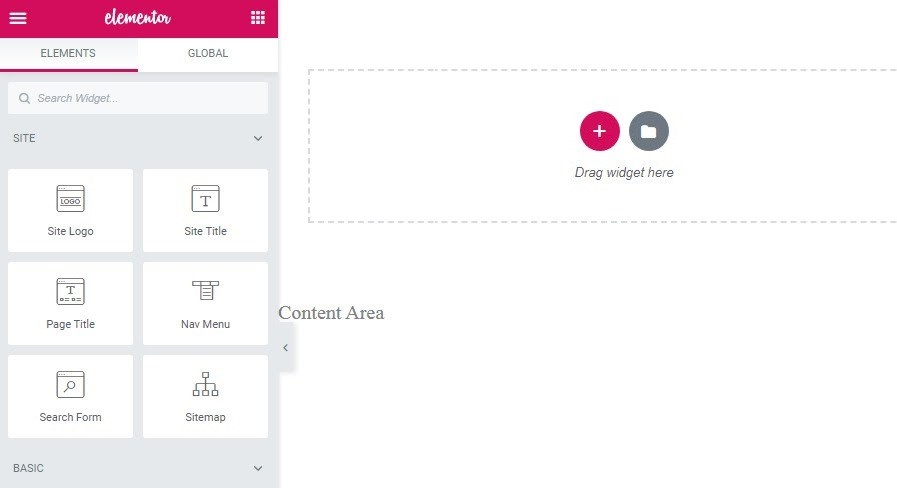
The Hyder design works in the same way as any page or section using Elementor. Just drag various tools to the main page to create something amazing.
Speaking of widgets, you’ll find all kinds of easy-to-use Elementor tools to quickly build a custom Hyder in the Elementor Pro sidebar.
Here are some of the most useful :
- Website logo
- Website address
- Page title
- Navigation menu
- Search form
- Location map
With these widget options in Elementor Pro, you can create a Hyder that has every element you need!
Just remember, if you are designing a custom Hydra , you want to take advantage of dynamic content so that the website pulls the same element from each page.
For example, to get a consistent logo, you can upload a site logo to your customizer using the site logo widget and use it as a dynamic element in the header template, instead of using an image widget for the logo.
This way, it will look the same on any page that uses this header template – and when it’s time to update your logo, just swap the logo in one place!
Step 4: Choose the offer terms
Now you have one more step to complete and you are ready to move the new Hyder.
Once you click on “Publish”, you will be asked to select the display status.
The terms of the offer mean only the place where you want to show the address on your WordPress site.
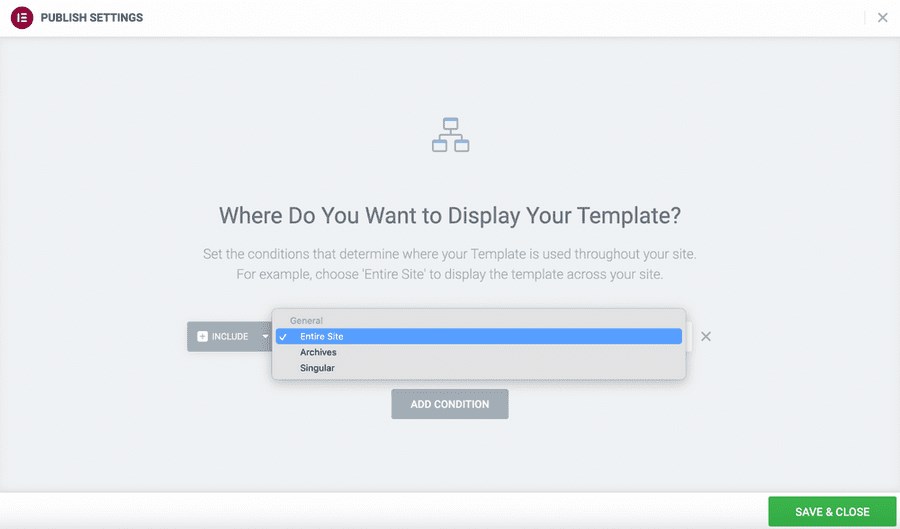
There are three options :
- The entire site : if selected, the address will appear on all pages and all blog posts on your website.
- History: if you select this option, you can show the Hyder on a specific archived page or post.
- Individual: if you select this option, you can show the title on a specific page, category or post.
This targeted offer is one of the most powerful things about Elementor. You can use this to create custom pages, posts, and even landing pages within your WordPress site.
Hydra freezes while scrolling
To create a sticky Hyder for your Hyder template, all you have to do is go to the panel and select Advanced > scroll effect .
Then choose ” up ” or “down” to make the title you created “stick” to the top or bottom of the page as the user scrolls.
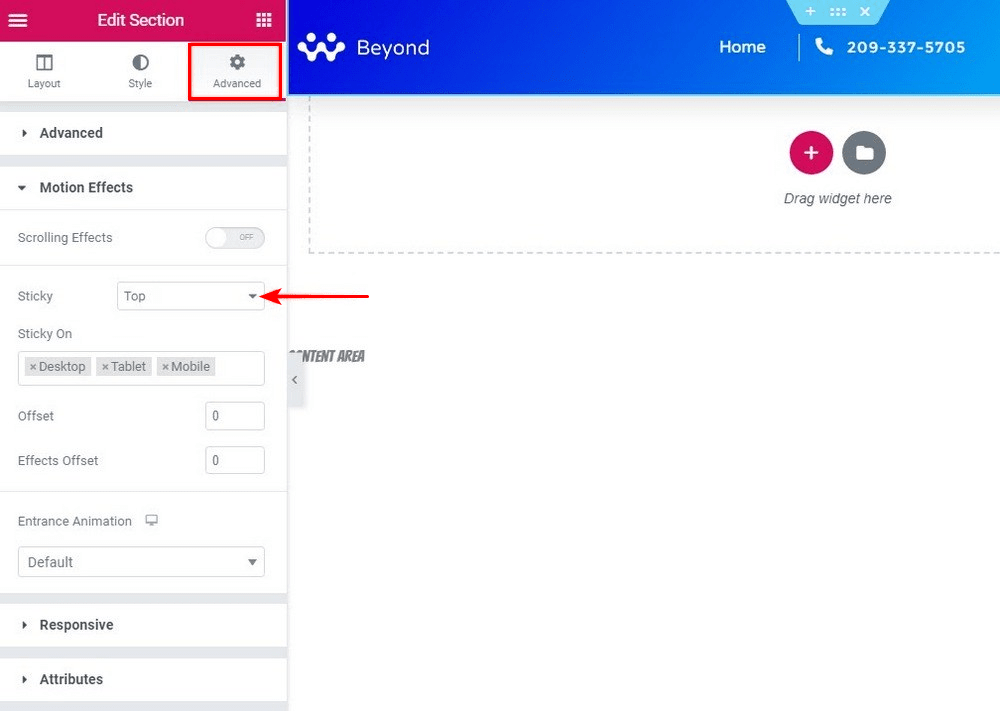
There are additional features to determine how to animate the Hyder, and you can also select which devices you want to be applied to desktop, mobile and tablet.
Hyder transparent element
If you really want the custom Hyder to impress you, you can add transparency to it by changing the Opacity to a number like 0.5 using some custom CSS classes and Elementor’S CSS.
After that, you can combine it with the sticky Hyder feature, so when the user scrolls, the transparent Elementor Hyder will reveal the page behind it.
This feature requires a little code, but fortunately, it’s as simple as copying and pasting.
Here’s an official Elementor video showing how it’s done.
Creating a mobile Hyder
Elementor Pro gives you the freedom to customize your mobile Hyder just like you customize a page.
You can select the view of a mobile phone or tablet by clicking on the response mode button located at the bottom left of the screen, just below the widget panel Elementor.
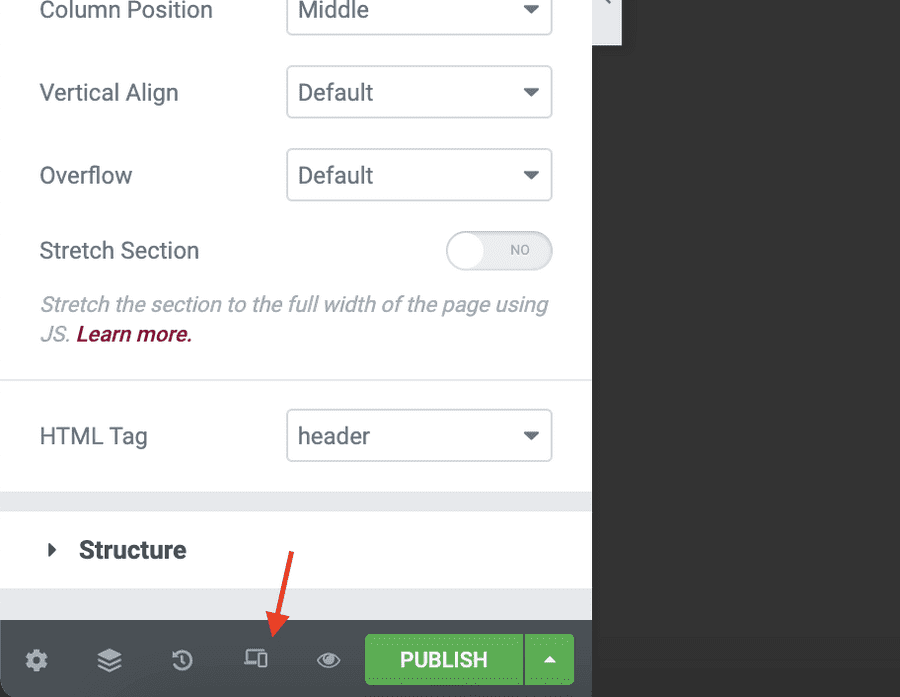
Once selected, you will notice that a bar appears at the top of the editing area. You can select the screen size from here.

This process is very similar to editing pages using the free version of Elementor.
Summary of the element Theme Builder
This is a quick overview of how to create custom headers in Elementor. It’s not a perfect solution, but it gives you a lot of flexibility in creating the custom Hyder you need for your website.
Using conditions, Theme Builder also allows you to create more than one Hyder and customize them for different areas on your site, which is a huge benefit that you may not get with your current template.
Do you want to know more about the Theme Builder method Here’s the official video that guides you through creating your own WordPress header using Elementor’s Theme Builder.
Positives of the attribute Builder :
- Gives you full customization of your Hyder design
- The Elementor page builder uses intuitively
- Includes a large set of useful widgets
Negatives of the attribute Builder :
- The coding scheme does not include
- There is no huge list included
- Requires Elementor Pro (paid version of Elementor)
A free alternative to Elementor Pro to create a custom Hyder
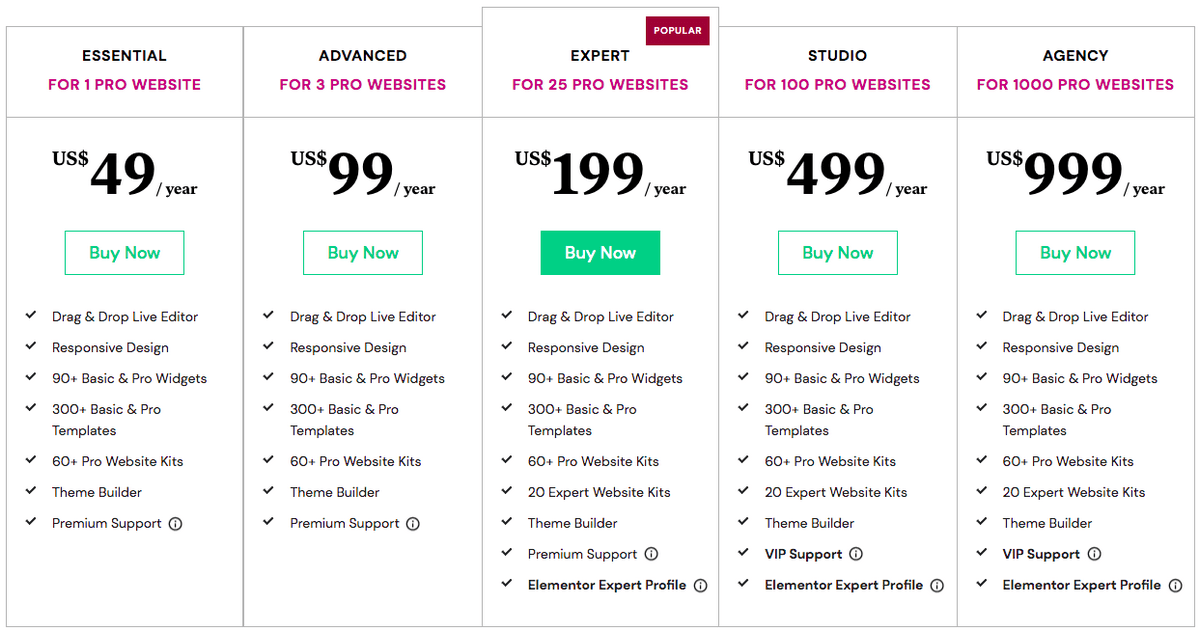
The Theme Builder in Elementor Pro is undoubtedly powerful, but to access it, you have to purchase a Personal Elementor subscription, which costs 49 dollars a year for one website.
The good news is that if you are using the free version of Elementor, you have another option.
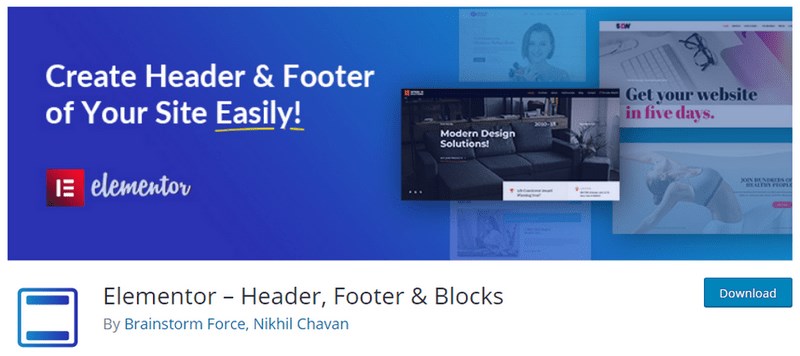
We have created a great free plugin called Elementor – Header, Footer & Blocks plugin. This is an extension for Elementor that allows you to create a layout and set it as a header or footer on your website.
How it works It’s as easy as 1-2-3 :
Design a layout in Elementor as you normally would
Appoint him as a Heider
The template you created will be automatically applied as a Hyder
The Elementor – Header, Footer & Blocks extension gives you a lot of the same functionality as the Theme Builder in Elementor Pro, with the added feature of chart markup .
To learn how to install plugins click here.
Another big benefit of this add – on for building is that you can use it for free indefinitely-you don’t have to worry about losing access if you don’t keep a paid subscription.
The Add-On comes with built-in tools that facilitate the Hyder design process.
These tools provide basic features that are needed so that you don’t have to look for additional components.
- Website logo
- Website address
- Website logo line
- Sailing list
- Page title
- Copyright
This plugin works with all themes. Few themes have built-in compatibility with this extension while for some you will need to choose a compatibility method.
In the event that after activating the plugin, you will see a notification to check the available compatibility methods.
Go to Appearance > Header Footer Builder > Theme Support, and select a suitable method.
Once you’ve added theme support, just design a schema with Elementor, decide whether to apply it as a header or footer, and you’re done!
Start with Elementor-header, footer and blocks
Should you use the element Hyder?
So far in this post, we’ve looked at some ways to create a custom Hyder using Elementor. But with all that said, is it really worth abandoning your theme Hyder options in favor of a custom Elementor Hyder
Not necessarily.
The biggest benefit of sticking Hydra built into your template is that it is already fully supported.
Here are some features that your theme may include:
- Multiple layout variations
- Proven Hyder
- Mobile responsiveness
- Mobile Hyder options
- Custom design options
In other words،
If you can get the Hyder you want without the need for an Elementor, you might be able to finish the job with just a few clicks. With other add-ons you can do that.
Conclusion
Creating great-looking websites has never been easier with the drag-and-drop features of the most popular WordPress page builder. No matter what approach you take, your website is sure to look and work great with Elementor! Not only that, but you can also design your blog using Elementor .