
Would you like to display a Google map on the contact form of your website ?
You can use geolocation to pre-fill in the user’s address and indicate his location by placing a pin on the map. This makes filling out the form easier and faster which leads to a better completion rate.
In this article, we’ll show you how to include a Google map in contact forms using a map pin.
Why include a Google map in your contact form ?
When you created your WordPress site, you probably added a contact form so that visitors can easily communicate with you about your products and services.
And if your business has a physical location, you’ve probably also added a Google map to your location to encourage people to visit your store.
What many business owners don’t know is that you can use geolocation to automatically fill in the address field on your contact form and display the user’s location on a map. This improves the overall user experience and helps reduce form abandonment.
Knowing the locations of your users also allows you to use geolocation targeting to show personalized content and increase conversion rates.
With that being said, Let’s take a look at how to include a Google map in contact forms.
How to include a Google map in the contact form ?
In this tutorial , we will use WPForms, the best contact form plugin for WordPress. It allows you to easily create any type of form with a simple drag-and-drop form builder.
There is a free version of WPForms available with all the features you need to create a basic contact form. However, for this tutorial we will use WPForms Pro since it includes the Google Maps extension.
The first thing you need to do is install and activate the WPForms plugin . For more details, see our step-by-step guide on how to install WordPress plugins .
When activated, you need to visit the WPForms ” settings page to enter your license key. You can find this information in the area of your WPForms account. Be sure to click the “check Key” button to activate your license.

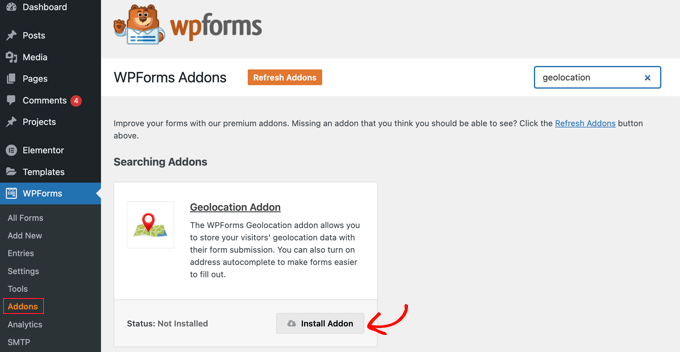
Next, you need to go to WPForms “Addons and find the geolocation extension. You can use the search option at the top of the screen, or simply scroll through the available add-ons.
Once you have found it, you should install the add-on by clicking the “install extension”button.
Now that the geolocation add-on has been activated, you will need to configure its settings. To do this, go to WPForms “settings and click on the geolocation tab.
On this page, you need to specify the geolocation provider. For this article, we will choose the Google Places API.
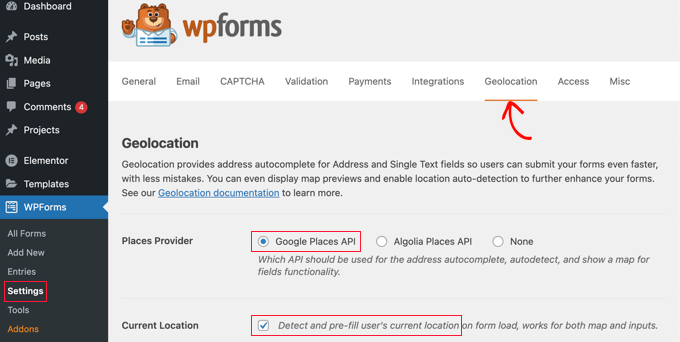
You should also click on the “current location”checkbox. This will automatically detect and complete the address when users fill out the contact form, saving time and improving accuracy.
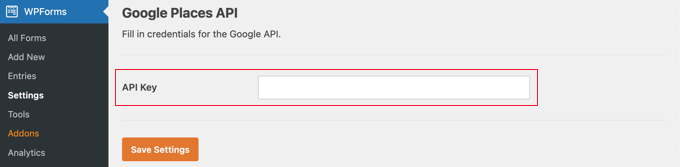
Next, you need to scroll down to the Google Places API settings. You will be asked to fill in your Google API key. You can get your key from Google and then paste it into the field. We’ll show you how to do this in the next section.
Creating an API key for Google Places
You can get the API key for Google Places by going to the Google Cloud Console website .
You will be asked to select your country from the drop-down list and agree to the terms of Service. In some countries, you may also be offered the opportunity to register for a mailing list.
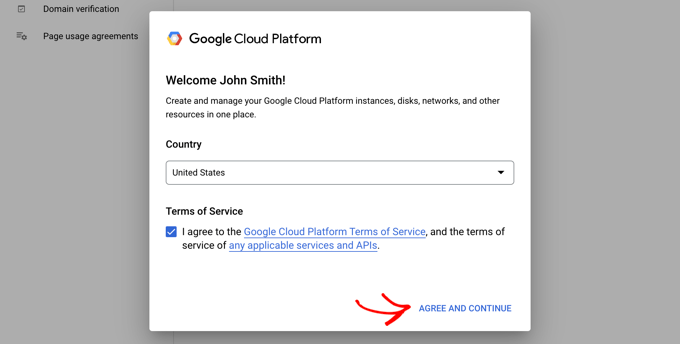
When you are ready to move on to the next step, click “OK and continue”.
Next, you will need to select a project for the API key. Just click on “select a project” and click on the project you want to use from the list.
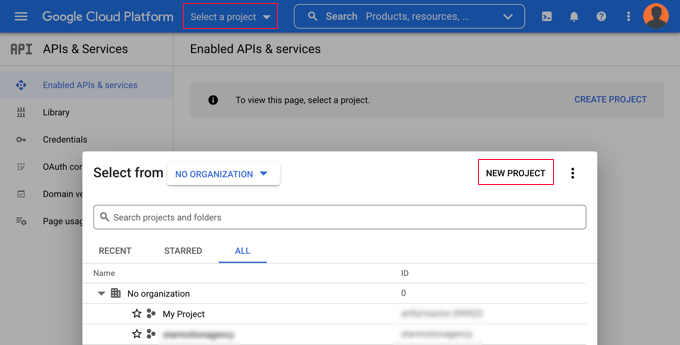
If you have not created a project before, or if this is a new site that you have not added to Google yet, then you should click on “new project” to set one up.
Note :
Google will prompt you to enable billing for this project in order to use the Google Places API. They offer the first 300 dollars for free, which is a lot of money to cover a simple inline map as we design in this tutorial. Small traffic sites will not need to pay anything, and they will ask for your permission to upgrade before charging any fees.
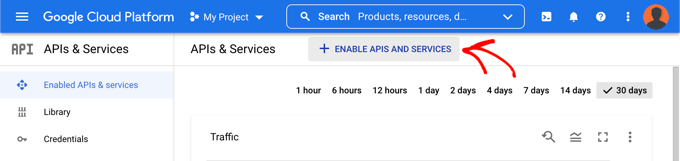
You should now be on the “APIs and services” page where you can enable the necessary APIs to display Google Maps on your site. You will need to click the “+ Enable APIs and services” button at the top of the page.
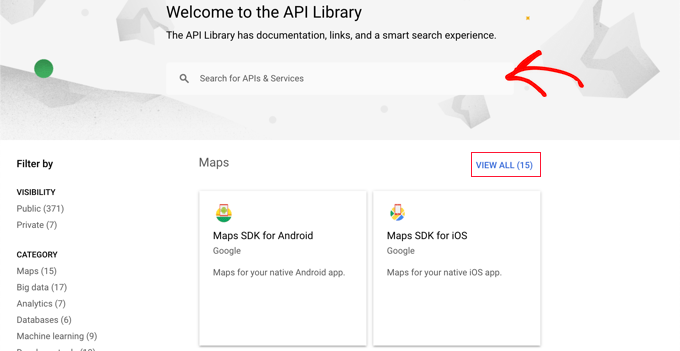
This will take you to the Google API library where you will need to enable three different mapping APIs.
You can find them using the search function located at the top of the page or by clicking on the “view all” link located next to the maps section.
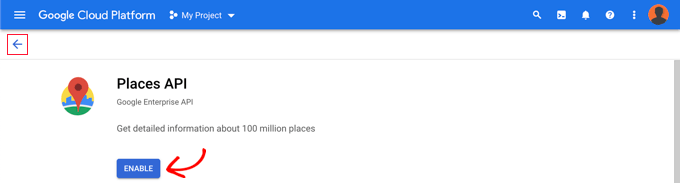
First you need to search for and enable the Places API. Once you have located it, you will need to click on it. On the next page, you should click the “Enable”button.
After that, you should do the same with the Maps JavaScript API and Geocoding API
Now that you have enabled the three APIs, you can create an API key.
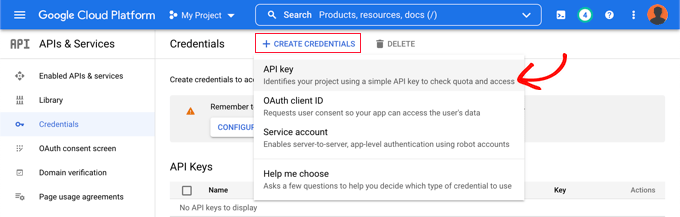
In the menu on the left, you need to go to the APIs and services “credentials .
From here you will be able to click the “+ Create credentials” button at the top of the screen and then select the “API key”option.
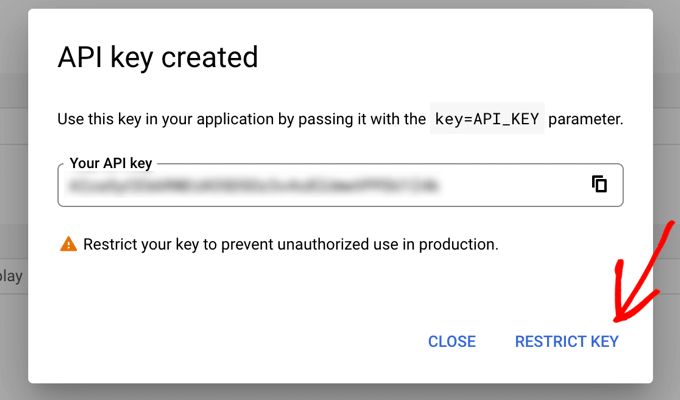
Your API key will be generated and displayed in a pop-up window.
Later in this tutorial, you will need to copy this key to the WPForm settings. For now, let’s take a look at how to put some restrictions on the use of the API key.
Restricting the API key of Google Places
Overuse of the API Key may take you out of the free plan and cost you more than you expect. We recommend restricting the key to prevent unauthorized or unexpected use.
To do this, you need to click on the “restrict key” link at the bottom of the “API key created” pop-up window in the screenshot above.
On the next page, you can set up a number of different restrictions. The first of them is “application restrictions”. In this section, you should click on the option “HTTP referrals (websites)”. Then the key will be used only on websites.
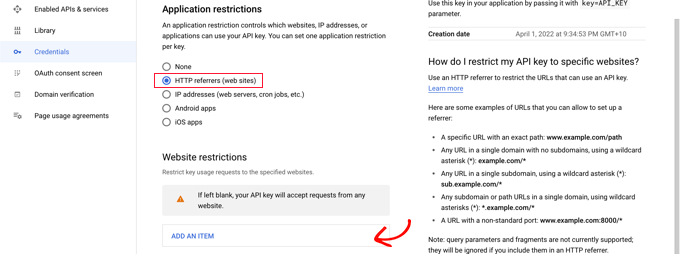
After that, you should make sure that it is used only on your website. To do this, you must scroll down to the “site Restrictions” section and then click on the “add item”button.
Now you should type the domain name of your website in the “new item” field using the style *example.com/*.
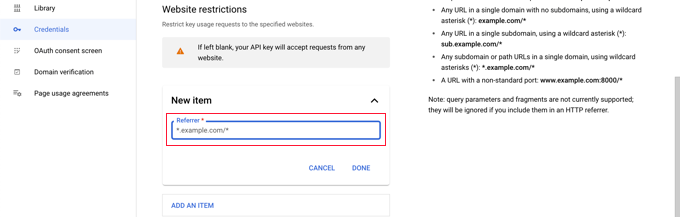
If you are going to use Google Maps on more than one website, you can click the “add item” button and add as many domains as you like.
Now that you have restricted the API key to your websites only, you can also restrict it to work with Google APIs that you have added above only.
You need to scroll down to the “API restrictions” section of the page and select the “restriction key”option. This will reveal a drop-down menu where you should check the boxes “Geocaching API”, “Maps JavaScript API” and “Places API”.
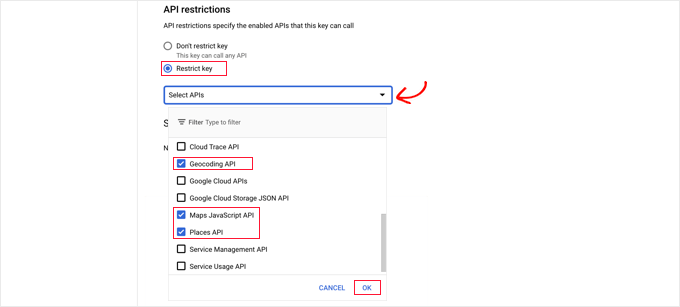
Once this is done, you must click on the “OK” link to store your settings. Finally, be sure to click the “Save” button at the bottom of the page to activate all the restrictions you have chosen.

Note that it may take up to 5 minutes for the settings to take effect.
Adding the Google API key to the WPForms settings
You will now see the API key listed along with any other keys you have available. You must click on the copy icon in order to be able to add the key to the geolocation settings page of WPForms.

Note that if at any time you need to change any of the API settings or restrictions , you can click on the Edit icon on the right
Now you need to return to your website which should still be located in the WPForms “settings” geolocation page.
Once there, paste the key into the Google Places API field in the WPForms settings. Once this is done, be sure to click on the “Save Settings”button.

Note :
Google Places requires that you have an SSL certificate for your site. To find out how to get one, check out our beginner’s guide on how to get a free SSL certificate .
Create a contact form using the Google map included in WordPress
Now that you have configured WPForms and Google places, you are ready to create a contact form in WordPress.
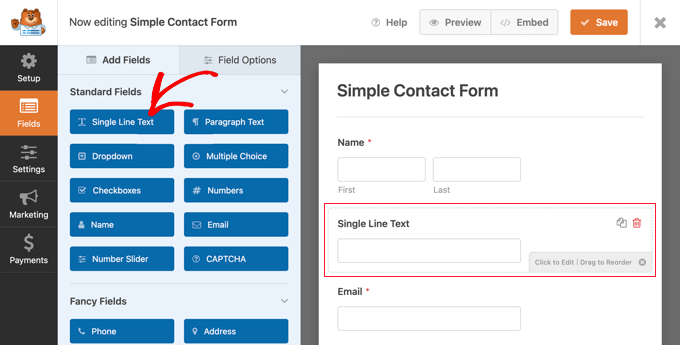
Once you have created a basic form, you will need to add the address field. You can use either the address block or a single line text field. In this tutorial, we will use a single-line text field.
Just drag a one-line text block to the form.
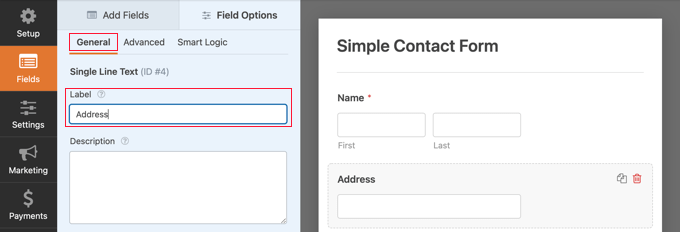
Next, we will customize the field settings.
To do this, you need to click on the field to view the one-line text settings.
First, the field label must be changed to”address”. This will show users what they should write in the field.
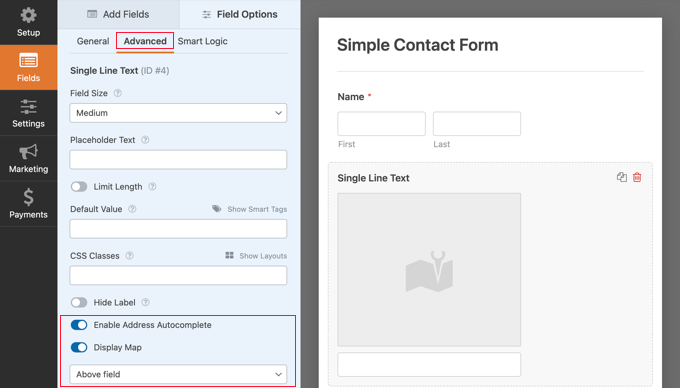
Next, you need to change the field settings so that the map is displayed in the form. To do this, you will need to click on the Advanced tab.
Once there, you should look for the “Enable address autocomplete” option under the settings and switch it to the “On”mode.
You will then see another option,” map view”, which you must also enable. You can choose to display the map above or below the field.
Add the contact form to your website
The simplest way to add the contact form to your website is to click the “embed”button. You will find it next to the “Save” button at the top of the form editor screen.
You will be asked if you want to add the form to an existing one or create a new page.
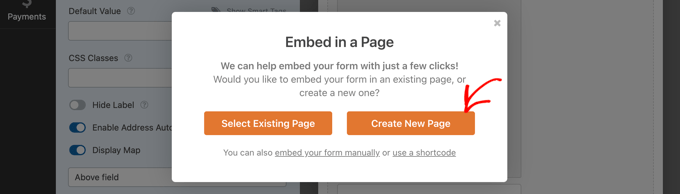
In this tutorial, we will click on the “create a new page”button.
After that, the page should be named and then click on the button “let’s get started!”Button.
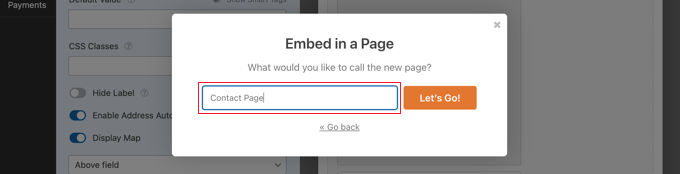
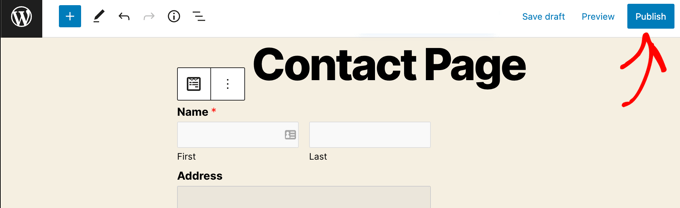
A new page with this name will be created, and your contact form will be added automatically.
All you have to do is click the “Publish” button to push the form to the live stream.
View the Google map in the contact form
When a user visits your contact form, he will be asked if he would like to allow your website to access yours.

If they click on the “Allow” button, their current location will be entered in the address field, and a pin from this location will be added to the map.
This autocomplete feature will save visitors time by making typing their addresses faster and easier.
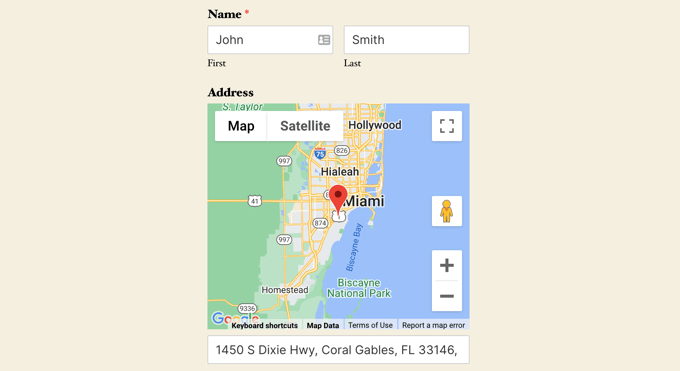
If they need to change the address, they can simply type in a new address or drag the pin to a different location on the map.
How to display user location data in a form
Once geolocation is enabled, WPForms will also record each user’s location when filling out your form.
You will need to go to WPForms “entries and then click on your contact form.
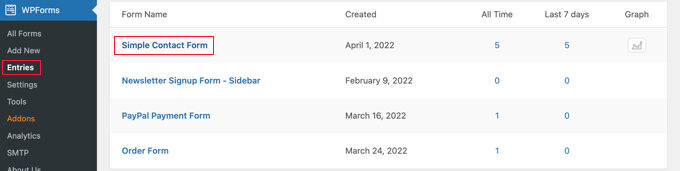
Now you will see a list of entries that have been filled in by users for this form.
To view a specific entry, just click on the “view” link located on the left.
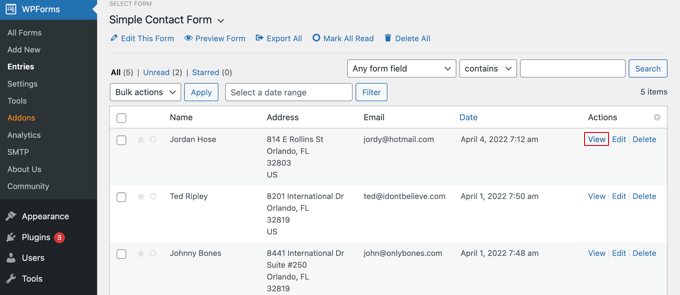
Now you will see the form data filled in by the user such as name, work email, work phone number, along with some location data.
This includes a pin on Google Maps, the user’s location, zip code, country, as well as latitude and approximate longitude.
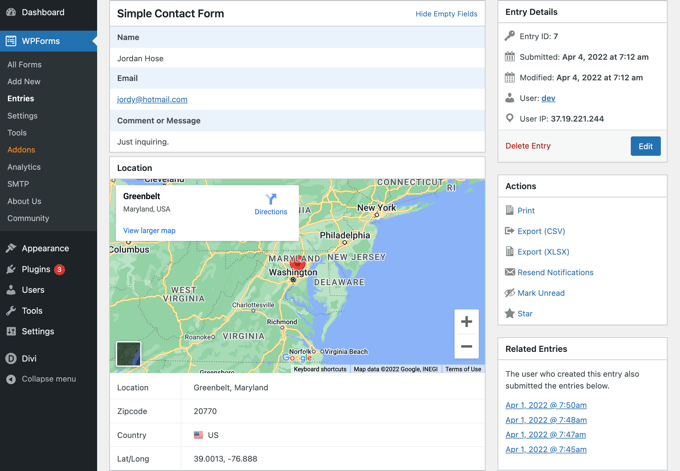
Of course, if the user does not give permission to the form to find out its location, the location data will not be displayed.
That’s all, you have successfully added a Google map in your contact form.
We hope that this tutorial will help you learn how to include a Google map in contact forms.