

Are you interested in building a great website by Elementor In this article we will provide how to use Elementor
In this Elementor tutorial, we will cover what we started earlier on how to use Elementor step by step and learn about some of its best features.
In the end , you should have everything you need to create a WordPress website that impresses, in no time!
5. How to use Elementor Theme Builder
Usually, when something becomes easier to use, it should drop the useful features. Fortunately, Elementor is an incredibly easy-to-use and versatile special case, largely thanks to its theme creation tool.
Available in Elementor’s Pro version, the Theme Builder is a game changer for anyone familiar with page builders, because it allows you to create headers, footers and other dynamic content for your website.
It even allows you to bypass aspects of your WordPress theme, so you can keep working and make the changes you want!
Why do you need dynamic content? Well, sometimes you might want to host a sales page that doesn’t have a traditional header and sidebar or you might want to save a custom blog post layout that you can use every time you add a new post.
The possibilities are endless.
Build a header / footer with Elementor
Are you ready to create a custom header or footer using Elementor using the Theme Builder Here’s how it’s done!
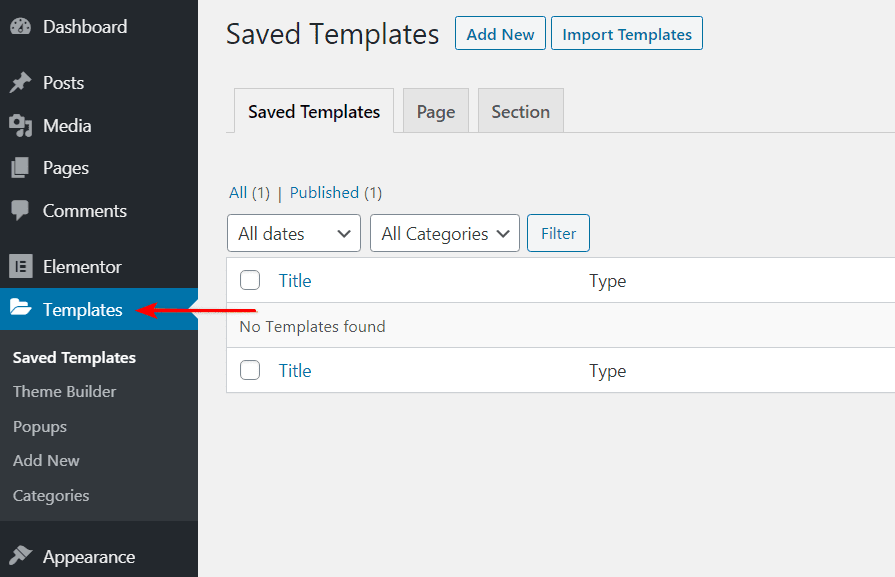
Step 1. Click on “templates” in the WordPress dashboard
After logging into your WordPress dashboard, go to “templates” under Elementor in the side menu.

Step 2. Add a new template or import
This is where you create a new template for your head.
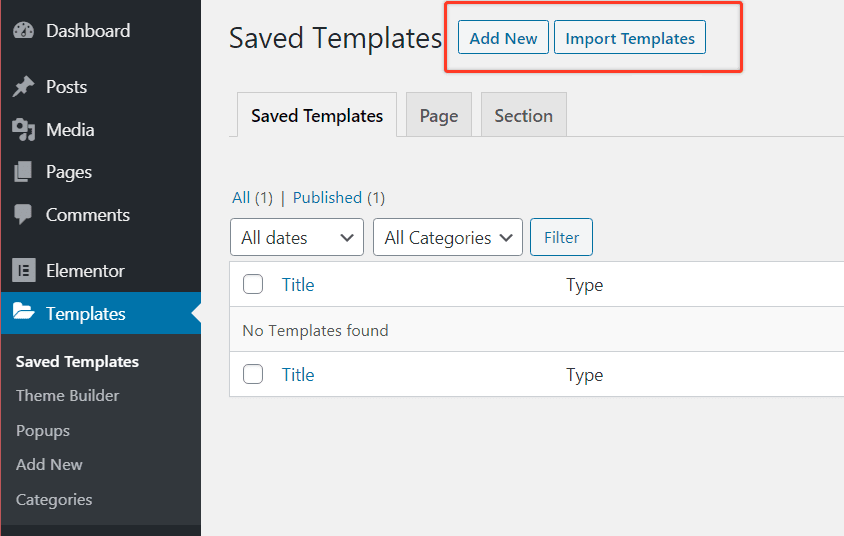
If you see a header that you already liked the look of, you can import it to use as a starting point. Otherwise, click on “Add New”.
This will bring up a dialog box that will allow you to choose the type of template, the title in this case, as well as the name of your template.
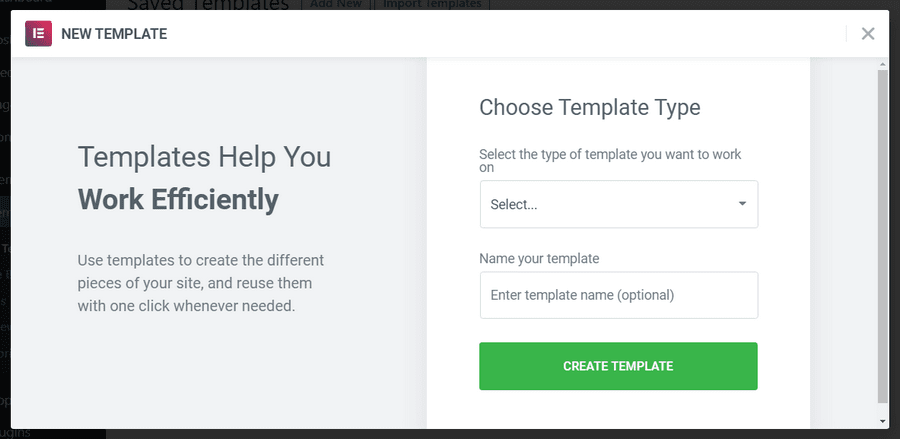
Notable :
Elementor free includes only section and Page Templates. The Pro version includes several additional template categories, including widget, header, footer, individual and archive.
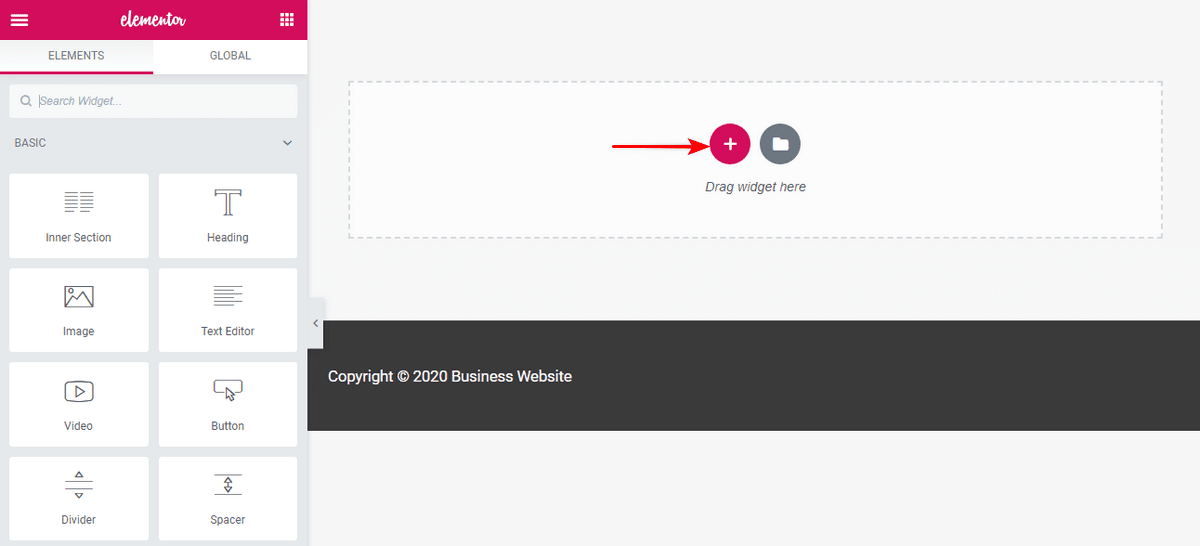
Step 3. Edit your new template
If this step sounds familiar, it’s because it’s the same exact editor that we used to create a full page earlier. Now, it is applied to create a custom header.
You can go through the process of creating your layout using various widgets, and even specific images or other content. Once your new header is saved, it can be easily accessed from a new page.
Building WooCommerce pages using Elementor
The process of creating a custom WooCommerce product page is similar to any other page or section that you can create. Feeling a pattern here
Using WooCommerce Builder, Elementor supports the ability to create a template for one product page. Once you create a new template, you will see a template library full of blocks or full pages that you can use for the WooCommerce product page.
Keep in mind that this WooCommerce template will contain a number of dynamic product widgets, including the product title, product image, and product price.
You can set product details using WooCommerce,and use Elementor to display updated product information on the frontend.
Quite simply!
What item is missing?
Despite all this flexibility, there are still some things that Elementor cannot do. Remember that Elementor is not an attribute-it uses its own attribute constructor to override some attribute features.
To fully control your appearance, we recommend using Astra Pro and Elementor. Astra gives you built-in header and footer options, huge menus and much more!
Beginner templates for the element
Another great benefit of Astra is its collection of ready-to-import Starter templates to Elementor, including free and paid options.
For example, if you are setting up a fitness trainer website, you can use Astra’s fitness Trainer starter website as a solid foundation and customize it from there.

Importing the Astra starter model is easy to do!
You just need to install the free or paid version of Astra Theme, as well as the free Starter Templates plugin .
Once you have both set up, you can log in to your WordPress dashboard, go to Appearance> Starter Templates, and select the website you want to import.
After that, you will be able to make changes to the starting location right in Elementor!
Final additions to the element
In addition to these templates, our Add-On called Ultimate Addons for Elementor provides additional functions that are not present in Elementor.
This goes further than Elementor Pro in offering advanced widgets, such as content toggles, pop-ups, content timeline, and table of contents.
For maximum control and flexibility, it’s definitely worth checking out Ultimate Addons for Elementor !
6. How to build templates using Elementor
You can create templates for all types of sections and pages , including:
- Page
- Head
- Appendix
- Single function
- Blog archive
- Product pages
In this example, let’s work with the post / Page template.
Create a page template using Elementor
In Elementor, both the page and the post are covered by the “page form”. This is a saved template that you can use for any new page or blog post, allowing you to maintain consistency, even with several team members posting.
Even better, this is available to all Elementor users, including with Elementor Free.
Step 1. Click on “templates” in the WordPress dashboard
After logging into your WordPress dashboard, go to “templates” under Elementor in the side menu.
Step 2. Add a new template or import
This is where you create a new template for the page header.
In the dialog box, choose the type of Page template and name your new template.
Then, click “Create Form” to get started!
Step 3. Edit the page template
Just like earlier when we created our own page, you will use the same editor here. It’s as simple as creating new sections, changing columns, dragging different widgets to the page.
Once you have designed the page you want, you can save it as a template so that it can be accessed for any of your other pages from now on.
7. How to create a pop-up in Elementor
Do you want to create a pop-up window in Elementor Maybe you make an ad, pick up leads or something else
Creating a pop-up window in Elementor is fairly simple. You will need to upgrade to the Pro version to create pop-ups though.
You have some really cool features with the Pro version, like the welcome pop-up, product sales, exit pop-ups, and more.
Just follow these steps to create a pop-up window that will launch when you click on the button.
1. Head to control panel> templates> pop-ups> add new .
2. Name your template, then click “ Create template “.
3. You can choose to create your own template or choose one from the template library.
4. Click “publish” once you’re done. Then save and close.
5. Now, create a new page in Elementor. And drag the button tool.
6. Under layout, select Link> dynamic> actions> popup .
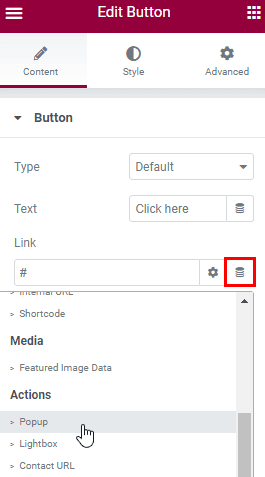
7. Browse to Popup> Open Popup> and select the popup you just created.
8. Click “Publish” when you’re done and check out the live page. Click the button to display your pop-up window.
And that’s how easy it is to create a pop-up window using Elementor!
8. Create a mobile responsive website using Elementor
With the increasing number of users visiting websites from their mobile devices, it is necessary to get where to view your website on a mobile phone. As noted earlier, more than 50% of your website traffic comes from mobile devices.
We have listed some steps with which you can make sure that your website is compatible with mobile devices if you use the Elementor page builder.
If you prefer to see how to do this, check out this video tutorial on Elementor response.
Elementor makes it very easy when it comes to customizing your website for different devices.
The general rule is that all editable features have a specific setting for desktop, mobile and tablet. The most common settings include text size, margin and padding.
For example, as shown in the image below, find the device icon next to “display”. This is the case with any item that you would like to customize.
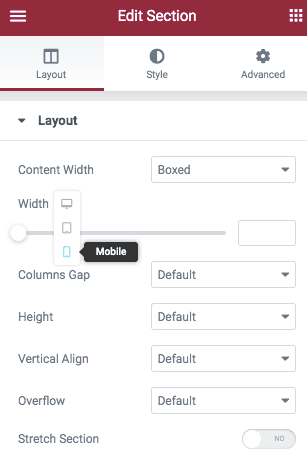
Click on the device for which you want to make customization. Once selected, manipulate the settings based on your preferences.
By default, background images respond automatically. You have complete control over more customization of images to suit your device, even to the point of having different images for different screen sizes.
Did you know that you can choose to show or hide a section based on the device?
For example, if there is a row of images or text that you would like to hide in mobile devices, you can easily do this.
Just head to the editing section> advanced options> responsive tab.
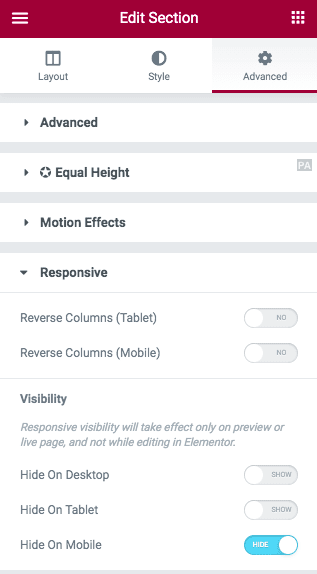
Have you noticed a set of options under the “visibility” By default, the partition is set to be displayed across all devices. If you want to hide it, well, just toggle the button depending on your device.
While you can still see the section while editing the page, it won’t be visible in the frontend, once the page is published.
To switch the display of the entire web page, all you have to do is click on the response mode icon at the bottom of the Elementor dashboard.
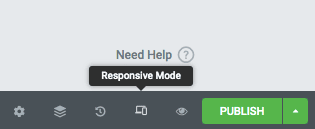
By default, you will notice the mobile display.
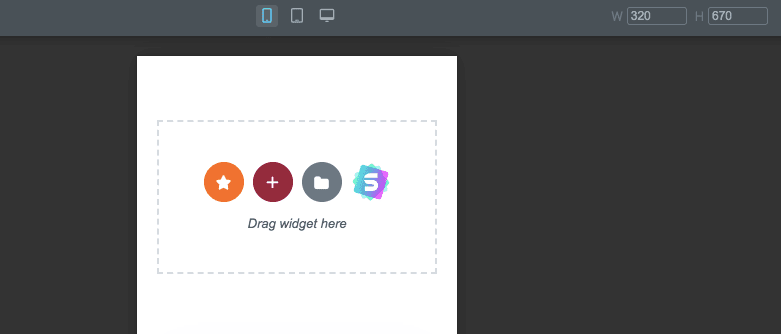
To switch between devices, just click on the respective device icon at the top. And to exit the responsive view, just click on the “X” in the upper right corner.
How easy is it to create a responsive mobile display Easy reading
9. Why you should use Elementor?
Now that we know how to use Elementor, let’s cover an out-of-context, but often asked question. Why should we use Elementor in the first place
Whatever your experience, creating a website can be difficult. From getting where to navigate to maintaining the aesthetics of the site in general, it takes time and effort.
If you are a freelancer or a website designer, you will be well aware that with each new client comes new challenges and specific requirements.
In fact, platforms like WordPress make the entire website development process a lot easier. However, you always want more.
Fortunately, you have drag-and-drop page builders like Elementor that take the entire web development process to a whole new level.
From using a bunch of tools and elements to build your own web page to cool blocks and templates, there’s a lot you can do with Elementor.
Let’s delve a little deeper into why the Elementor page builder plugin is used .
1. User-friendly
Creating a website with Elementor is as easy as 1-2-3. With the drag and drop feature, just add a widget or element of your choice, customize it the way you want, and publish the page. It’s that simple. You don’t need to know how to program or have any programming knowledge.
2. Direct editing
Elementor is a WYSIWYG editor (what you see is what you get). With the real-time preview, you can see exactly how your page looks after the update, instead of posting it and then having to redo if it didn’t go the way you wanted.
3. Powerful and impressive assets

With over 90 incredible tools (also referred to as blocks) and over 300 designer templates, you can adjust your imagination while creating web pages, landing pages, pop-ups and more. From headlines to buttons, social media icons to galleries and carousels, there’s a widget for any feature you’d like to add to your website.
4. Responsive design
Since more than 50% of website traffic comes from mobile devices, it is essential that you get the mobile view of your website immediately.
With Elementor, you can easily preview and customize your pages for desktop, mobile and tablet devices. Just switch the display and adjust each item to look perfect on any device.
5. Universal fonts and colors
Set your choices of fonts and colors across your site with one click. From headings, paragraphs, and even button text, select your brand at once and apply it to every element on your site.
6. Ready-made templates
With Astra Starter templates, you won’t really need an alternative. There is a ready-made form no matter what niche you are in.
If you are looking for more options, you can consider an impressive selection of templates that Elementor is proud of. So, even if you are a beginner starting with website design, Astra and Elementor have got you covered.
7. Create advanced motion effects
Do you like to integrate animation into your website Do you know, these parallax effects, do you make texts stand out by creating a three-dimensional effect,or even a Lotte effect Elementor allows you to do this fairly easily.
8. Very safe
With regular updates, Elementor ensures that your website is in good hands. It is fully compliant with WordPress security standards and removes any malicious content when needed.
9. 50 + languages
With RTL integration and multilingual support, Elementor is available in multiple languages. Use the platform in your preferred language.
10. Seamless integration with WordPress plugins
Whether it’s WooCommerce, LearnDash, Yoast SEO, MemberPress and much more, Elementor is compatible with popular WordPress plugins.
11. Open source
Although this will require some coding from your end, you have full access to the Elementor source code. You can improve the capabilities of Elementor by adding your own custom functions and custom CSS.
12. Revision history
If you’ve been coding for a while now or for that matter, even using Google Docs, you agree that the Undo and redo feature is a big boon. Whether you delete a single line of code or an entire block of code, a simple undo can return to where you started.
Using the Elementor review history, the entire page creation process can be easily tracked.
13. There are no abbreviated codes
Although we don’t see a reason why you should give up Elementor, just in case you want to switch to an alternative, Your Website will still be up and running. As with some page builders, you are not secured by shortcodes when using Elementor.
14. Active community

With Elementor, you are not alone. Due to the popularity of the Elementor plugin, there is a growing community that you can contact.
You can constantly learn, get acquainted with new tools, design ideas and much more. Not to mention that the community is there to support you if you need any help, suggestions and ideas to create a great website.
15. Free
Last but not least, you can start using Elementor completely free of charge. While there is a professional version , as mentioned earlier in the article, the free version should work fine.
10. Pros and cons of using Elementor Page Builder
Just like any other, Elementor has its advantages and disadvantages. While the pros outweigh the cons, we’ve listed them here for you.
| Advantages of Elementor Page Builder | Disadvantages of Elementor Page Builder |
| Simple and intuitive interface | You need to upgrade to the Pro version to get support |
| Drag and drop the page builder | No lifetime pricing option |
| Easily customize pages for different devices (desktop, mobile, tablets) | Cases of slow page loading |
| Real-time live previews during editing | |
| More than 90 tools , more than 300 + templates , and many blocks to choose from | |
| Seamless integration with third-party tools | |
| Secure with regular updates | |
| Create custom themes, pop-ups and attractive animations | |
| Compatible with all themes | |
| Integrates well with WooCommerce | |
| The free version works great |
Final thoughts
Whew, we’ve covered a lot of information with this WordPress Elementor tutorial!
Regarding the basic ideas, I hope you can figure out why Elementor is a great page builder that takes a lot of guesswork out of web design. It strikes a perfect balance between ease of Use and deep functionality, making it one of the most accessible page builders available to WordPress.
Astra is incredibly lightweight, fast and flexible, and adds complementary features to Elementor so that you can create anything your brain dreams of!
Thanks for reading! We hope that this post has given you a great starting point for success with Elementor.