
The idea of Web site creation your own website may seem confusing in the begining .
You might even think that this task is impossible for anyone but a developer or someone with a background in web design.
Well, I have good news for you – there is a very easy-to-use program, and almost anyone can successfully create a unique and professional-looking website for their business, blog or portfolio. It’s called WordPress.
Here we present to you the second lesson of the series about Web site creation .
4. Choose your template
You can customize your WordPress site using many templates in WordPress, each of which has many layouts, formatting styles, colors, fonts and other visual options.
WordPress automatically applies a default template that looks fairly ordinary. You can keep it, but your website visitors may not be impressed by it. A custom WordPress template, whether paid or free, will make your website look attractive and professional to buyer Personals.
Similar to the wide range of hosting providers available, there are also hundreds of templates to choose from.
To help you, we have compiled a guide to one of our favorite templates and sorted them by purpose. Whether you are looking for a template that is versatile enough for multiple different business types, or a theme suitable for your e-commerce website, portfolio, blog, or business, there is a theme to suit your specific needs. On top of your theme, you can further customize your pages with a creation tool like Elementor .
To find a template that suits you best in WordPress.org , head to the admin control panel. Click appearance, then templates . You will be taken to another screen where you can browse the available themes or search for a specific template that you have in mind.
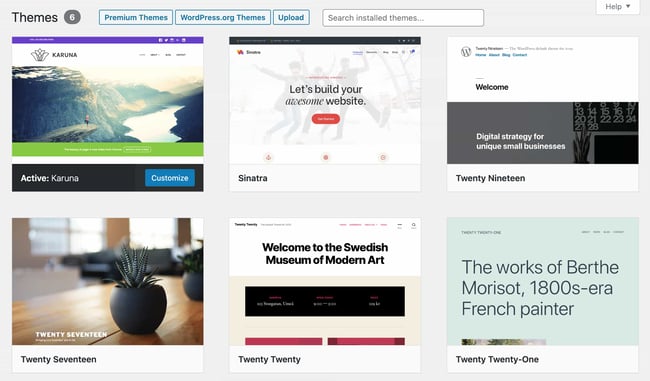
Once you’ve found the perfect theme, just install it to start customizing. Each theme has different steps that are required during the customization process, so be sure to follow them closely. If the theme has a website (often accessible through a WordPress template and template library), check the documentation as you work through the customization process.
5. Add posts and pages to your website
When you add content to your WordPress site, it is usually displayed in the form of posts and pages.
Posts (or “Dynamic Pages”) are commonly used for blogs and portfolios because they automatically place the latest website content on top of your featured content. The pages are static, which is why they attract business owners – the added content stays in the same place.
Posts and pages are the main types of posts in WordPress. In addition, there are other original post types, as well as custom post types . At the moment, we can only stick to pages and posts.
Start by deciding whether you want a post or a page to serve as the home page (or any page) of your website. To add a post to your website, go to the admin control panel, click posts and then add new .
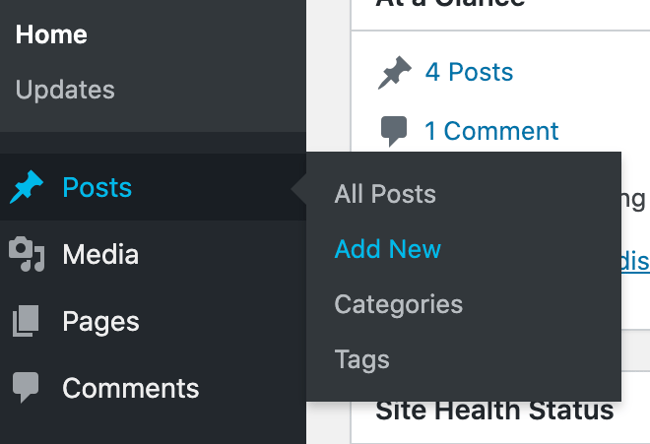
You can add a title to your post, Place photos, change the format, insert page elements via blocks and shortcodes . Click Save Draft to save your changes as a draft, or click “Publish” for the post to be published immediately.
Adding a page to your website is a similar process. In your administrator area, click pages, and then add new .
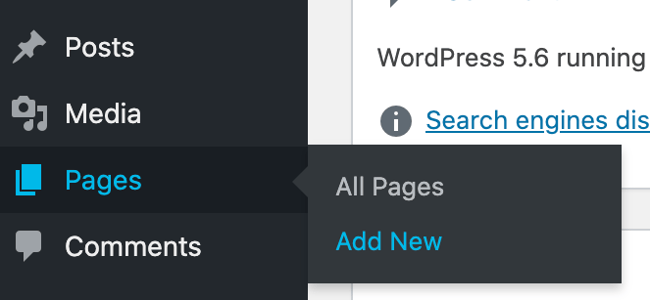
First, add a title to your page. After that, you can insert photos, embed videos and add content. Follow the same steps to create multiple pages for your website. When you’re done, click Save Draft or publish .
6. Customize your website
In addition to the theme you choose, there are a number of ways to further customize your website. Let’s review some options.
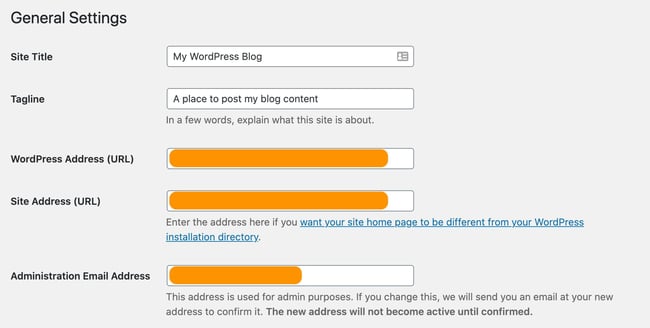
First, let’s customize the address of your site. From your admin control panel, select Settings> General . Here, add your website address and logo. You can also toggle other basic location information such as address, Email, time zone and more.
Next, let’s allocate your reading sections. Under Settings> reading, you can change your home page to a static page.

Next, let’s allocate your reading sections. Under Settings> reading, you can change your home page to a static page.

Keep this in mind if you are a business owner who prefers content to stay in one place on your website. Consider using a dynamic page if you are a blogger who prefers the latest content to appear at the top of your pages. This way, visitors can easily find your latest posts.
The navigation bar is also customizable. This allows visitors to easily find information on your website.
Add a navigation bar by going to the admin dashboard, clicking appearance and then menus .
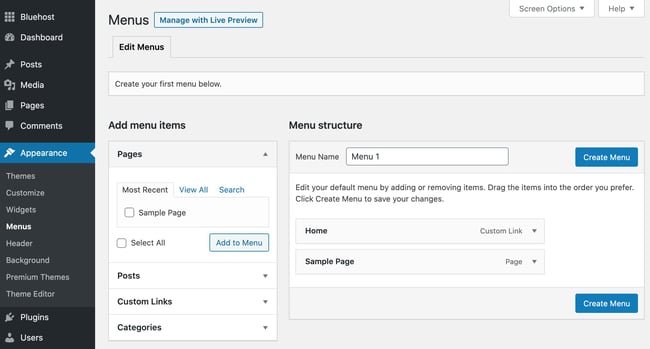
From here, you can select how you want your bar to look, how many pages you want to include, what you want to name these pages, and in what order you want to insert them.
Of course, this is just a small part of what you can do in the dashboard .
7. Install plugins
Plugins are pieces of software that add functionality to your WordPress site and enhance the user experience. With over 55,000 plugins available, there are options for most types of websites and users. Some of the most popular plugins available include :
- WordPress HubSpot plugin : you can easily add pop-ups, forms and live chat to your WordPress website. And as an added bonus, pair this add-on, or other additional CRM add-ons, with your HubSpot CRM.
- All in One SEO : a search engine optimization (SEO) plugin that companies use to improve their rankings and uncover new SEO growth opportunities.
- The Events Calendar : an easy events calendar that makes scheduling events from your location easy.
- Yoast SEO : the go-to Plugin to help you with on-page SEO. This app makes sure that you follow the best practices before posting your website online.
- TablePress : do you need a table on your site Look no further.
- The SEO Framework : another plugin that can help you master SEO on your site.
- Weglot : a translation plugin for translating WordPress and WooCommerce websites.
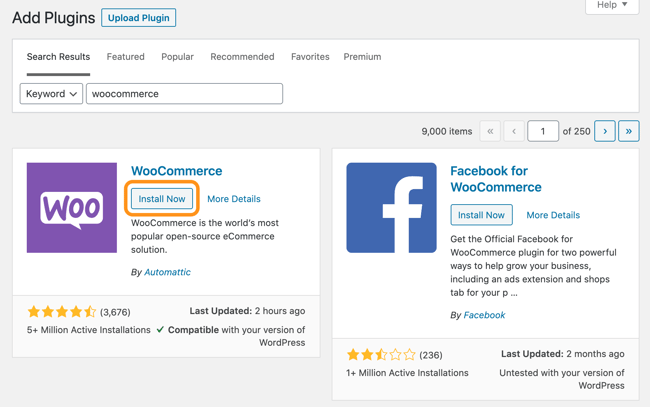
To start the installation, head to the accessories section of the administrator control panel. This shows you all the plugins that are currently installed on your site. Depending on your host, you may have several extensions already installed. Note that in order for the plugin to work, you must activate it after installation.

To add a new plugin , click Add New. Find the plugin you want, then click Install Now, wait a few seconds, and then click Activate .
8. Optimize your website to increase page speed.
If you want to make a Web site creation ,then you should focus because website performance is an important part of the user experience. If the page takes a long time to load, your visitors will quickly move to another site. You don’t want to frustrate visitors with slow speeds.
You can improve the performance of your website by enabling browser caching. Browser caching is the process of temporarily storing your website data on visitors ‘ browsers. In this way, your content does not have to be sent from the web server in order for it to appear in the browser, which increases the speed of the website.
To enable caching for your website, install and activate a caching extension by the process described above.
For example, WP Rocket is a caching plugin in WordPress that will make your site faster in a few clicks. Thanks to powerful options such as Remove Unused CSS and Delay JS Execution, you will save time and effort while improving Core Web Vitals scores, PageSpeed Insights score, and overall load time.
9. Get inspired by WordPress site examples
When you start customizing your website, you may feel overwhelmed by all the options you have. Instead of starting completely from scratch, it helps to get some inspiration from other typical WordPress sites. Here are some of our favorites :
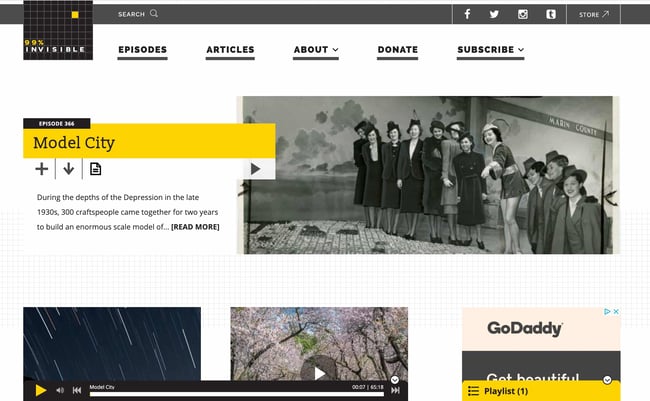
99% Invisible is a popular podcast focused on design and architecture. Their website is stylish, modern and provides easy navigation for visitors to quickly access each podcast episode.
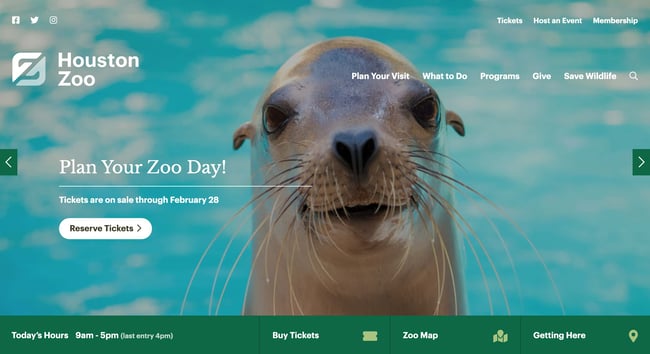
The Houston Zoo website displays its main attraction on the main page. The magnifying glass icon located in the top menu bar makes searching the site easy.
Awesome Motive, the creators of many WordPress projects, attracts their visitors with a simple and polished website. It features subtle animations to attract people’s attention.

In conclusion
We hope that the second lesson gave you an adequately information about Web site creation