

Do you want to allow users to register on your website?
Enabling user registration allows users to add posts, comments, or perform other actions on your website.
In this article, we will explain how to easily enable user registration on your website and how to manage your users.
Here is a list of topics we will cover in this article:
- Enabling user registration in WordPress.
- Adding login and registration links in WordPress.
- Adding the user profile snippet in WordPress.
- Creating custom login and registration pages using WPForms.
- Creating a custom login page using SeedProd.
- Managing users in WordPress.
Note: This guide focuses on adding users to your WordPress website with default user roles and capabilities. If you are looking to make money online by allowing users to pay for premium content and access your community, you should create a membership site in WordPress instead.
Enabling user registration in WordPress
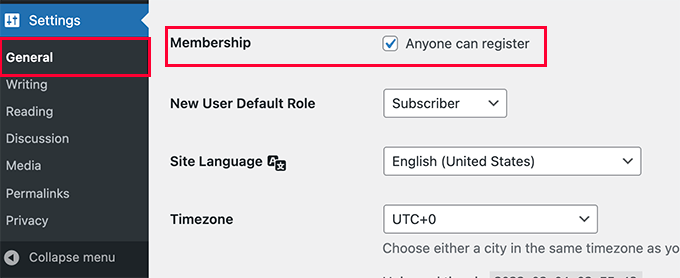
WordPress comes with a built-in user management function. It is disabled by default, but you can easily enable it. Simply go to Settings » General in your WordPress dashboard. Scroll down to the “Membership” section and check the option “Anyone can register.”
Therefore, you need to specify the default user role. This is the user role assigned to each new user who registers on your website. Each user role comes with its own permissions and capabilities. The default user role is typically set as “Subscriber,” but you can change it to any other available user role.
For example, if you want users to write articles on your website, you can change the default user role to “Contributor” or “Author.”
Important : Never use “Administrator” as the default user role for user registrations, or a new user might be able to take control of your website and lock you out. Don’t forget to click the “Save Changes” button to store your settings.
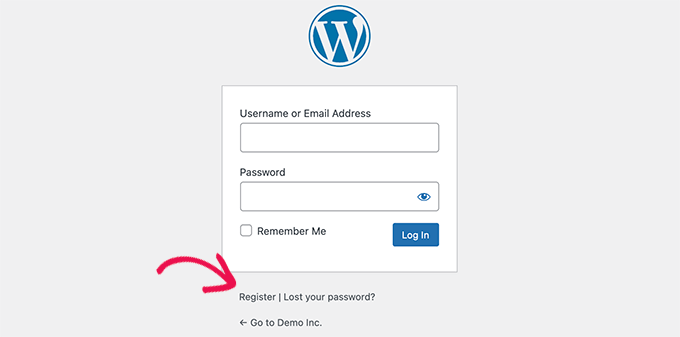
Now, your WordPress website is open for user registrations. Users can visit your login page and see an option to register as a new user.
Adding login and registration links in WordPress
After opening your website for user registration, you may want to let users know that they can register and login to their accounts. There are multiple ways to do this. You can simply add links in the sidebar of your login and registration page, or you can create custom login and registration pages for your website. We will show you 3 different methods, so you can choose the one that suits your needs.
Method 1: Adding the META Widget to the sidebar
The simplest way to add a login link is by adding a META widget to your sidebar. Simply go to Appearance » Widgets and add the “META” user interface element to your sidebar.

The meta widget includes links for registration, login/logout, RSS feed, comments feed, and WordPress.org website. This is how it appears on our website as an example :

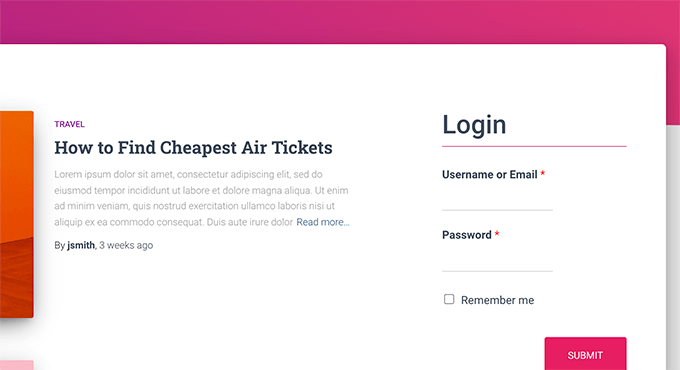
The second method: Creating Custom Login Pages using WPForms
The drawback of the first method is the lack of customization options for registration or login forms. You cannot add form fields or change the design of the forms, and they may not match your website’s design. By using custom login pages tailored to your needs, you can provide a much better user experience. Additionally, you can embed your forms on any page of your website and add form fields to collect any information you desire.
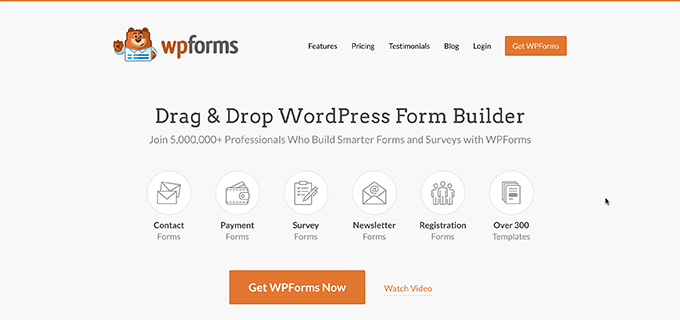
We will present different ways to create custom login pages for you. The easiest method is using the WPForms plugin.
Therefore, WPForms is the best WordPress form plugin in the market. It comes with a user registration add-on that allows you to easily add login and registration forms anywhere on your website.
After verification, you need to navigate to WPForms » Addons page.
On this page, scroll down to “User Registration addon” and click on the “Install Addon” button next to it.
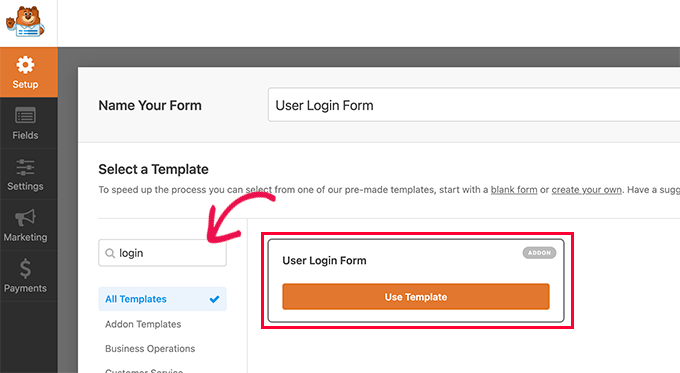
To create a custom login form, now that the custom user registration page is active, let’s add a custom login form to your website. To get started, visit WPForms » Add New. This will launch the WPForms form builder interface. You need to provide a name for your custom login form and then select “User Login Form” as the template.
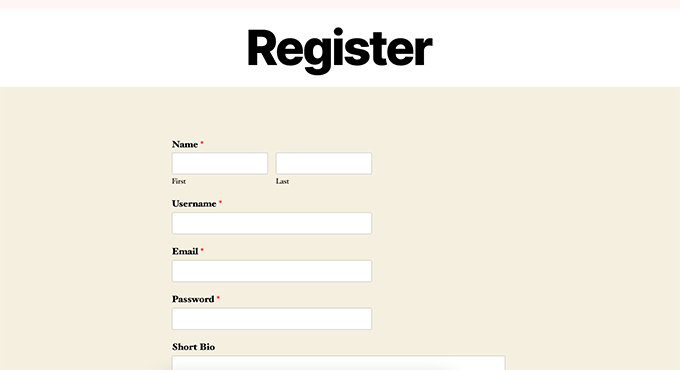
WPForms will now be created as a new login form, by default, it contains only the Username and Password fields.
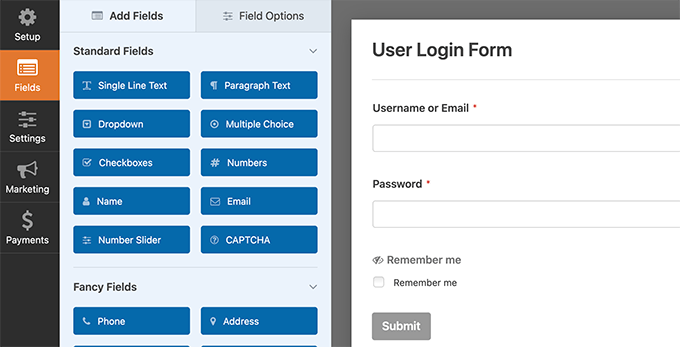
You can add additional fields to the form by adding them from the right panel. Then, after that, you need to click on the “Settings” tab and then click on the “Confirmation” tab. This is where you can specify what should happen after a successful login. You can display a message to the users, redirect them to the page they came from, or redirect them to any other page on your website.

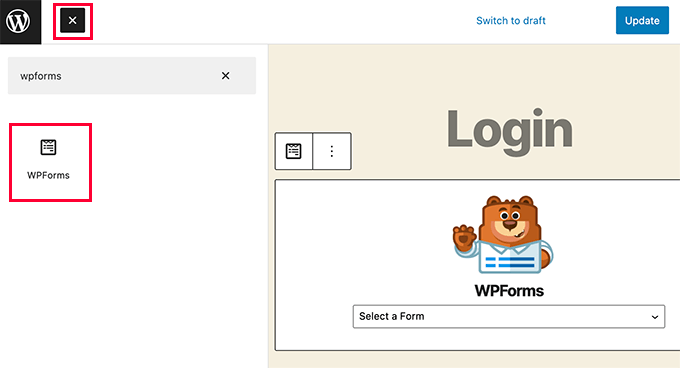
Click the “Save” button in the top right corner of the screen to save your form settings. You can now exit the form builder interface by clicking the “Close” button.
Your custom login form is ready to be added to your WordPress website. You can add the custom login form to a page by creating a new page and then adding the WPForms block to the content area.
You can also add the custom login form to the sidebar.
Simply go to Appearance » Widgets and add the WPForms block or the old widget to the sidebar.
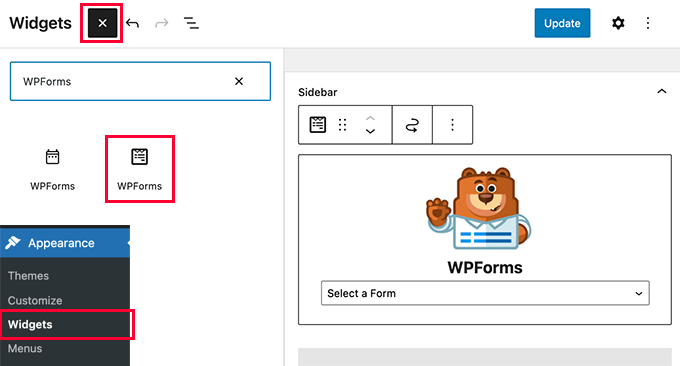
Select the newly created custom login form from the dropdown menu, then click the Update button to save the widget settings. You can now visit your website to see your custom login form in action.
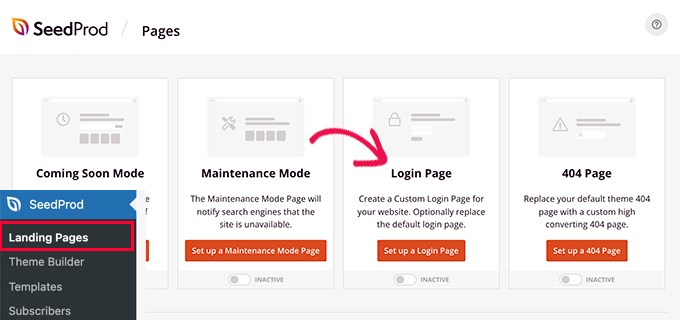
Method 3: Create a custom login page using SeedProd
Now if you are using WPForms alone to create a custom login page, your login page design will still be based on your WordPress theme.
What if I want to design a custom login page that looks more professional and elegant?
SeedProd allows you to easily create a beautiful custom login page for your site. Because it is the most powerful page builder plugin. You can use it to create any type of page without writing any code or learning any special design skills.
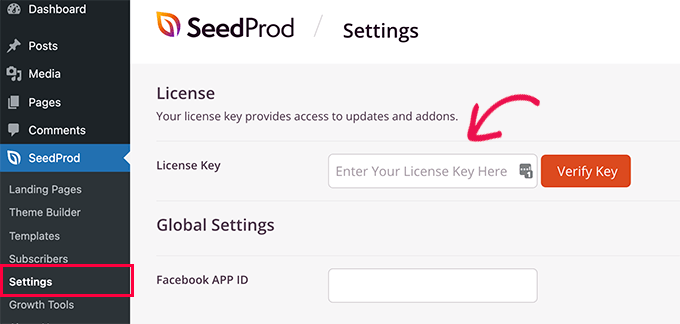
First, you need to install and activate the SeedProd plugin.
Upon activation, you will be asked to enter a license key and you can find this information under your account on the SeedProd website.
Next, you need to visit the SeedProd » Landing Pages page and click the Setup Login Page button.
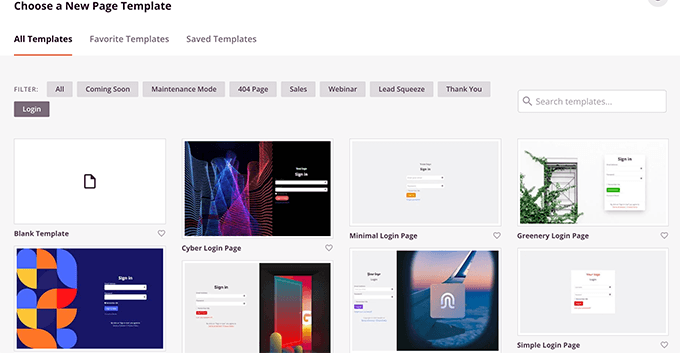
Next, you will be asked to choose a template for your login page. SeedProd comes with several professionally designed templates to choose from, or you can also start with a blank canvas.
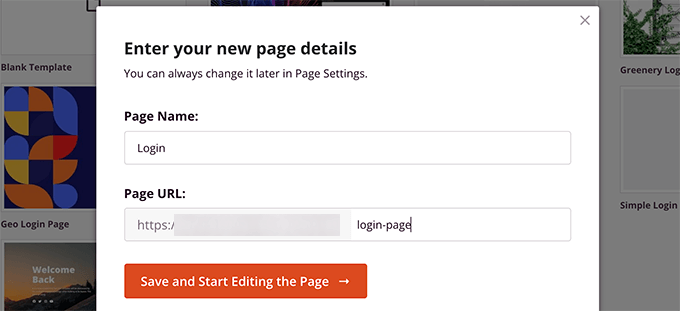
Next, you need to provide the name and URL of your custom login page.
Then click the Save and start editing button to continue.
This will launch the SeedProd page builder interface.
You can preview directly to your login page where you can point and click to edit any element.
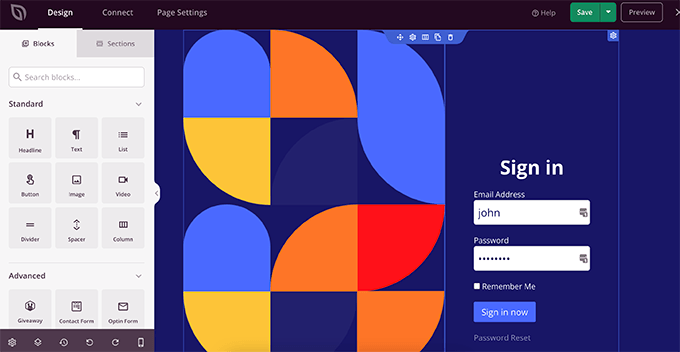
You can also add new blocks to your login page from the left column.
Once you are satisfied with the design, switch to the Page Settings tab.
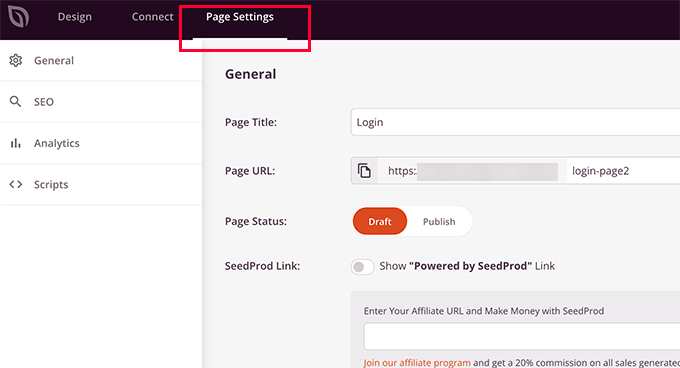
And here, you can redirect users from the default WordPress login page to your custom login page. You can also enable your custom login page in standalone mode, which disables loading any WordPress header and footer scripts.
Once you’re satisfied with the changes you’ve made, simply click the “Save” button and publish your custom login page.

You can now open a new browser tab in incognito mode and visit your login page to see it in action.

Manage users in WordPress :
- Click on “Users” in the WordPress admin dashboard. This will display a list of registered users.
- The list will include usernames, names, roles, and email addresses for each user. You can perform various actions on each user, such as editing their profile, changing their role, or deleting them.
- You can search for specific users using the search bar or filter users based on their roles using the dropdown menu.
- To add a new user, click on the “Add New” button. Fill in the required information, such as username, email address, password, and user role.
- You can also bulk select users and perform actions on multiple users simultaneously, such as deleting or changing their roles.
Remember to exercise caution when managing user accounts, especially when making changes to user roles or deleting user accounts, as it can impact their access and permissions on the website.

As a manager, you have the ability to delete any user at any time. You can also edit user profiles, change their roles, and modify their passwords.
This gives you complete control over what users can or cannot do on your website.